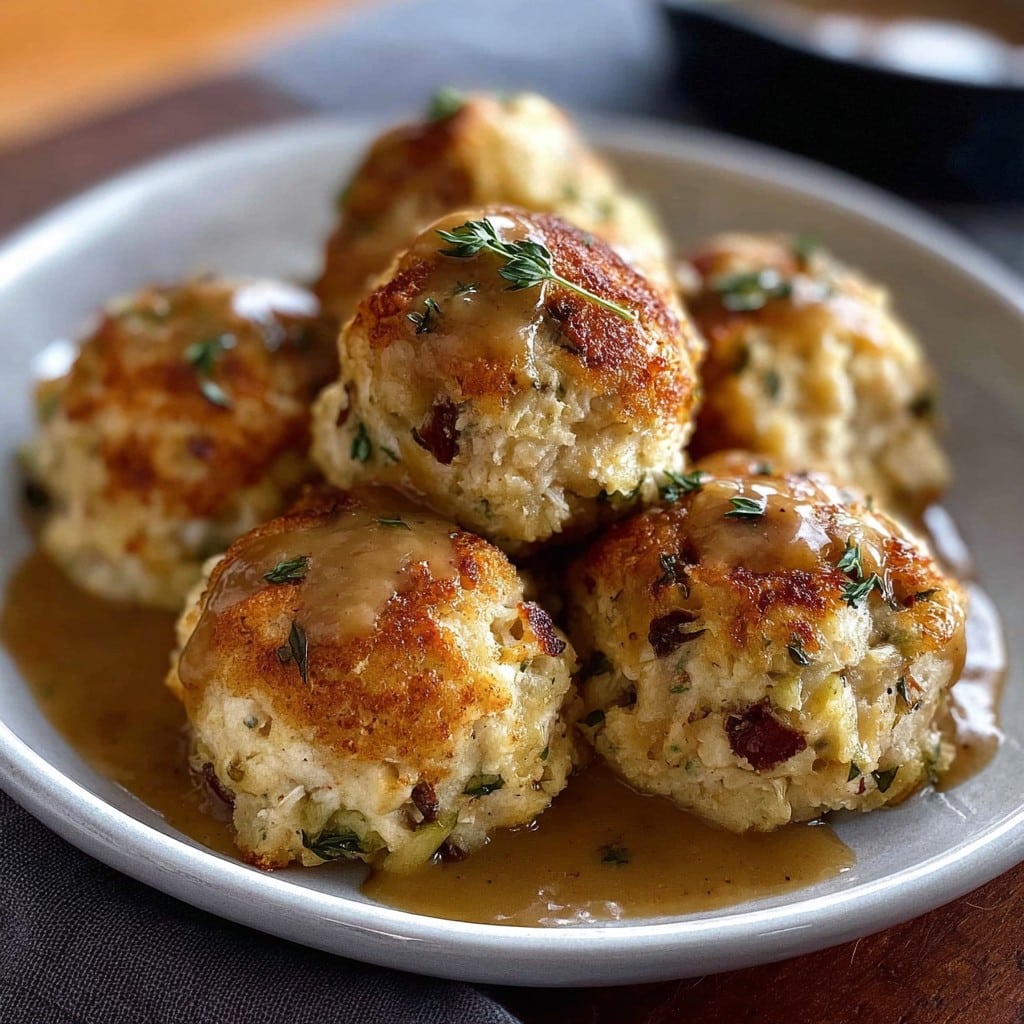
Turkey Stuffing Balls: The Only Recipe My Family Fights Over
Pulled Straight from My Family Table – Here’s My Turkey Stuffing Balls Story
Alright—you’re here for the Turkey stuffing Balls, and honestly? I get it. These things are ridiculous. I only started making them a few years ago, mostly to avoid the whole soggy stuffing drama inside the bird, and now I’d have a full-on mutiny if I left them out. The first time I made them? Burned two batches, my brother called them “craggy edible tennis balls,” and my kitchen was a disaster. But third time’s the charm (and hey, now they’re requested for Sunday dinners and random Wednesdays). Cook them once, and you’ll know what I mean.
Why You’ll Love This (Or At Least, Why I Do)
I make a double batch when the crew comes over, mostly because if I don’t, my sister will start hoarding hers on a separate plate. My family goes mad for these because they’re crispy all over (not just on top like the boring tray stuff). I’ve also made them with store-bought stuffing mix when I forgot to buy celery—nobody noticed, promise. And if you, like me, occasionally burn toast out of sheer distraction, the forgiving nature of these balls will win you over. If they split a bit—just call them “rustic.” Works every time!
What You’ll Need (But Don’t Stress If You Don’t Have Everything)
- About 4 cups stale bread, torn or cubed (White, wheat, or—guilty—leftover burger buns. My grandmother swore by Pepperidge Farm, but it’s all the same after a spin in the oven.)
- 2 tbsp butter (You can use olive oil in a pinch, but don’t tell my mom I said that.)
- 1 onion, diced medium-fine
- 2–3 celery stalks, chopped (No celery? Throw in some diced apple or mushrooms. Or just skip it, frankly.)
- 1/2 tsp dried sage (Fresh takes it up a notch, but never let a lack of sage stop a craving.)
- 1/2 tsp dried thyme
- 1 tsp salt, and a bit of black pepper
- 1 egg, beaten
- 1/2 to 3/4 cup chicken or turkey stock (I sometimes splash in a bit extra if the bread is bone-dry. Swanson’s is fine—or make one with leftover turkey bones like this if you’re feeling ambitious!)
- Optional extras: A handful of chopped parsley, bits of cooked sausage or bacon, or—don’t laugh—cranberries. Depends on the mood, really.
How I Actually Make Them (With Plenty of Wiggle Room)
- Bake your bread cubes at 170C (about 350F) for ten-ish minutes so they’re properly dry; or skip it if your bread’s already sad and stale. (Sometimes I shortcut and toast them in the frying pan!)
- Melt the butter in a big skillet, then toss in your onion and celery with a pinch of salt. Let them soften over medium heat—a good 5 minutes, maybe more if you like everything golden. I usually nibble a bit here, but honestly, some days I just rush this step and hope for the best.
- Tip everything into a big bowl (bigger than you think—this gets messy). Add bread, herbs, and pepper. Toss it around so the bread gets friendly with the butter and veggies.
- Crack in the beaten egg and pour half the stock. Now comes the fun, messy bit: squish and mix with your hands. Add stock slowly; you don’t want mush. The mixture should stick together if you squeeze it, but not drip. Don’t panic if you overdo it—just add a touch more bread.
- Scoop golf-ball sized portions, shaping gently. If they look weird or lumpy, that’s normal. Place them on a lined baking tray. (Honestly, I once used my hands because my scoop was dirty—it’s fine.)
- Pop into a 190C (375F) oven for about 25 minutes, or until crisp and lovely looking. Rotate the tray halfway through if your oven’s moody like mine.
A Few Notes I Had to Learn the Hard Way
- If you use hot stock, let it cool a bit before mixing or you’ll end up with scrambled eggy bits. Learned that the fun way.
- Really don’t over-soak the bread; it feels all wrong and you can’t go back. This is one where less is more.
- I’ve tried to “lighten” these with less butter. Didn’t scratch the itch, honestly.
Variations (The Good, The Bad, The Oddball)
- Made these once with cornbread instead of regular bread: not bad, bit crumbly (still tasty with gravy!)
- Halved the onion quantity for my brother; he didn’t notice. So apparently, that’s optional.
- Tried to make them gluten-free with chickpea flour bread: disaster—it fell apart. But if you have a solid GF loaf, go for it!
- Adding sausage or bacon? Winner, every time.
Equipment You Can Improvise
You need a sheet pan and a mixing bowl—nothing fancy. If you don’t have parchment paper, just grease the pan. No cookie scoop? Hands are perfect (and that’s what I do most days anyway, saves on washing up). I suppose a stand mixer could work, but…more trouble than it’s worth, if you ask me.
Storing Leftovers (But Honestly, What’s Left?)
Store in an airtight box in the fridge; they’re good for maybe 2 days, probably longer—but I wouldn’t know, since they’ve never survived longer than 24 hours here. They freeze well, but reheat in the oven for crispiness. Microwave if you must, but they go a bit sad and squishy.
What to Serve These With?
Oh, we pile them high next to roast turkey or chicken, with a haphazard ladle of proper gravy (here’s my all-time favorite recipe, no lie). Sometimes, my kids dip them in cranberry sauce, which seemed odd to me at first but now.. actually works. Might be my favorite way, though my other half insists they’re best all on their own at midnight, straight from the fridge. Choose your own adventure.
Things I Learned (Usually the Hard Way)
- Once tried to rush shaping the balls and, well, stuffing everywhere. If the mixture is too loose, just squeeze a bit more or add bread crumbs.
- Can’t stress this enough: Don’t skip the pre-baking if your bread is fresh. Otherwise, they go soggy in the middle—it’s like chewing a damp sock (not that I’ve done that).
- A nice, crispy outside comes from spacing them apart. Packed together? They steam, not roast. And isn’t the whole point the crunch?
Turkey Stuffing Balls FAQ (Because Folks Ask)
- Can you make these ahead? Oh, for sure. Shape and chill them on the tray (covered) up to a day ahead. Bake right before eating. They actually firm up nicely when chilled first.
- Can I freeze them? Yep—freeze on a tray till solid, then tip them into a bag. Bake straight from frozen, might need a couple extra minutes.
- Can I use gluten-free bread? I’ve tried (sorta worked). Use a sturdy kind that doesn’t crumble instantly, and maybe add a smidge more egg for binding. But, results might vary. Let me know if you crack the code!
- Why do my balls fall apart? Usually means too much liquid or not enough binder. Next time, squish a little more or pop in extra bread crumbs. Or, as my uncle does, call it “deconstructed.”
- Can I do this with leftover stuffing? Absolutely. Just add a touch of egg or broth if it’s a bit dry, form and bake as usual.
So there you go! If you give these a go, let me know how it turns out (or what tweaks you try—I’m always up for a good stuffing debate). And by the way, if you want to level up your poultry, Kenji’s roast turkey guide is hilariously thorough (and reminds me to stop forgetting to brine). Now, off to hide the last stuffing ball before someone else gets their paws on it.
Ingredients
- 1 lb ground turkey
- 2 cups seasoned stuffing mix
- 1/2 cup chicken broth
- 1/2 cup finely chopped celery
- 1/2 cup finely chopped onion
- 2 tablespoons melted butter
- 1 large egg
- 1 teaspoon dried sage
- 1 teaspoon dried parsley
- Salt and pepper to taste
Instructions
-
1Preheat oven to 375°F (190°C). Line a baking sheet with parchment paper.
-
2In a large bowl, combine ground turkey, stuffing mix, chopped celery, chopped onion, dried sage, dried parsley, salt, and pepper.
-
3In a small bowl, whisk together the chicken broth, melted butter, and egg. Pour mixture over turkey mixture and mix until well combined.
-
4Form the mixture into golf ball-sized balls and place them on the prepared baking sheet.
-
5Bake for 25 minutes, or until the stuffing balls are golden brown and cooked through. Serve warm.
Approximate Information for One Serving
Nutrition Disclaimers
Number of total servings shown is approximate. Actual number of servings will depend on your preferred portion sizes.
Nutritional values shown are general guidelines and reflect information for 1 serving using the ingredients listed, not including any optional ingredients. Actual macros may vary slightly depending on specific brands and types of ingredients used.
To determine the weight of one serving, prepare the recipe as instructed. Weigh the finished recipe, then divide the weight of the finished recipe (not including the weight of the container the food is in) by the desired number of servings. Result will be the weight of one serving.
Did you make this recipe?
Please consider Pinning it!!