Savory Protein Waffles: My Go-To Cozy Breakfast Recipe
Let Me Tell You About My Savory Protein Waffle Habit
I swear, every time I bust out the ol’ waffle maker for these savory protein waffles, the kitchen ends up smelling somewhere between a diner at brunch hour and my weird aunt’s cheese shop (long story, remind me to tell you about her obsession with goat cheese someday). Anyway, these waffles have become my hangover cure, post-gym refuel, and honestly, sometimes just dinner when I can’t be bothered. The first time I made ’em, I was trying to impress my neighbor by pretending I was that ‘healthy but still fun’ person. It mostly worked…aside from the time I completely forgot the baking powder and we ended up with protein pucks. Edible, but only just. But hey, live and learn, right?
Why I Keep Making These (Even When I Forget Stuff)
I usually whip up these protein waffles when I’m burned out on sweet breakfasts or just want something that sticks to the ribs. My family goes a little wild for them, mostly because they’re never exactly the same twice. (Apparently, I have a ‘creative’ streak in the kitchen, which is a nice way of saying I forget things or swap stuff last minute.) I make them with leftovers a lot, so it’s not always pretty—but they’re always hearty and, with enough cheese, everything tastes better. Oh, and bonus, if you’ve ever tried to sneak veggies into your kid’s breakfast…this is about as painless as it gets—if you don’t spill half the batter like I did last Tuesday.
Here’s What You’ll Need (Probably)
- 1 cup cottage cheese (I’ve also used ricotta when cottage cheese creeps me out, works fine!)
- 2 large eggs
- 1/3 cup milk (I use oat milk when I run out of regular, can’t really taste the diff)
- 1 cup oat flour, or just blitz up oats in your blender—my grandmother always insisted on Bob’s Red Mill, but honestly, store brand is AOK
- 1/2 cup unflavored whey protein powder (or plant-based protein, but watch the sweetness)
- 1/2 cup grated sharp cheddar (sometimes I swap for feta, but it’s saltier)
- 2 green onions, sliced (skip if you’re not an onion person)
- 1 tsp baking powder
- 1/2 tsp garlic powder (okay, I use more, but start with this if you’re shy)
- 1/4 tsp salt and a crack o’ pepper
- Optionals: a handful of spinach (fresh or thawed frozen, give it a squeeze though!), hot sauce, chopped cooked bacon, or herbs you forgot in the fridge
Let’s Get Making Savory Protein Waffles
- First, plug in your waffle maker. Trust me, I’ve forgotten before and ended up with cold, sad batter. Let it preheat while you mix stuff.
- Grab a big bowl and toss in the cottage cheese, eggs, and milk. Whisk it ’til it looks…questionable. (Don’t stress, it comes together in the end, promise.)
- Add in the oat flour (or ground oats if you went DIY), protein powder, baking powder, garlic powder, salt, and pepper. Stir until it looks thick and a little lumpy. At this point, I usually sneak a taste—mostly to check if I over-salted (again).
- Fold in the grated cheddar, onions, and whatever extra mix-ins you’ve got kicking around. The batter should be scoopable but not runny—sorta like a soft hummus. If it’s way too thick, a splash more milk never hurt anyone.
- Spoon a generous blob (about 1/3 cup-ish, I rarely measure) onto the greased waffle maker. Close the lid and let it do its thing for about 3-5 minutes. Don’t peek early! I always want to, but patience gives you that crispy edge. Waffles are done when they’re golden and you can smell the cheese toasting.
- Repeat with the rest. Stack, nibble, and—warning—sometimes the first one sticks, but after that, it’s usually smooth sailing.
Stuff I Wish I’d Known (Notes from My Failures)
- If you see smoke, it’s usually just the cheese on the side burning; don’t panic, but maybe ease up on filling next time.
- The texture is 10x better if you let the batter rest for a few mins—though honestly, I rarely do because I’m hungry.
- Sometimes, if I make these late at night, I think they taste better cold the next morning. Possibly just my imagination (or sleep deprivation?).
Things I’ve Tried (Some Good, Some…Not So Much)
- Roasted red peppers in the mix? A+ flavor but makes the batter a bit wetter, so maybe use less milk.
- Chopped cooked broccoli is oddly good. My partner disagrees, so…depends on your crowd.
- I once tried smoked salmon. Total miss for me, tasted like dirty socks—don’t say I didn’t warn ya.
Equipment I Use (And What If You Don’t Have It)
- Waffle maker — I have the one Serious Eats recommends, but I started with a £10 junk shop model and it did the job (mostly, unless I overloaded it).
- Big bowl, whisk, spatula — nothing fancy. Also, a fork for scraping out stuck-on bits when you overfill (inevitable for me).
- No waffle maker? Make them as pancakes on a griddle or nonstick pan—just call ‘em protein pancakes and get on with life.
How I (Try to) Store Leftovers
Okay, theoretically these keep in an airtight container in the fridge for about 3 days, but in my house, they disappear quick. If you do somehow have leftovers, they re-toast nicely in the toaster or oven, but microwaving makes them a bit floppy. (But sometimes I can’t be bothered, just me?)
How We Eat Them (Waffle Rituals at My Place)
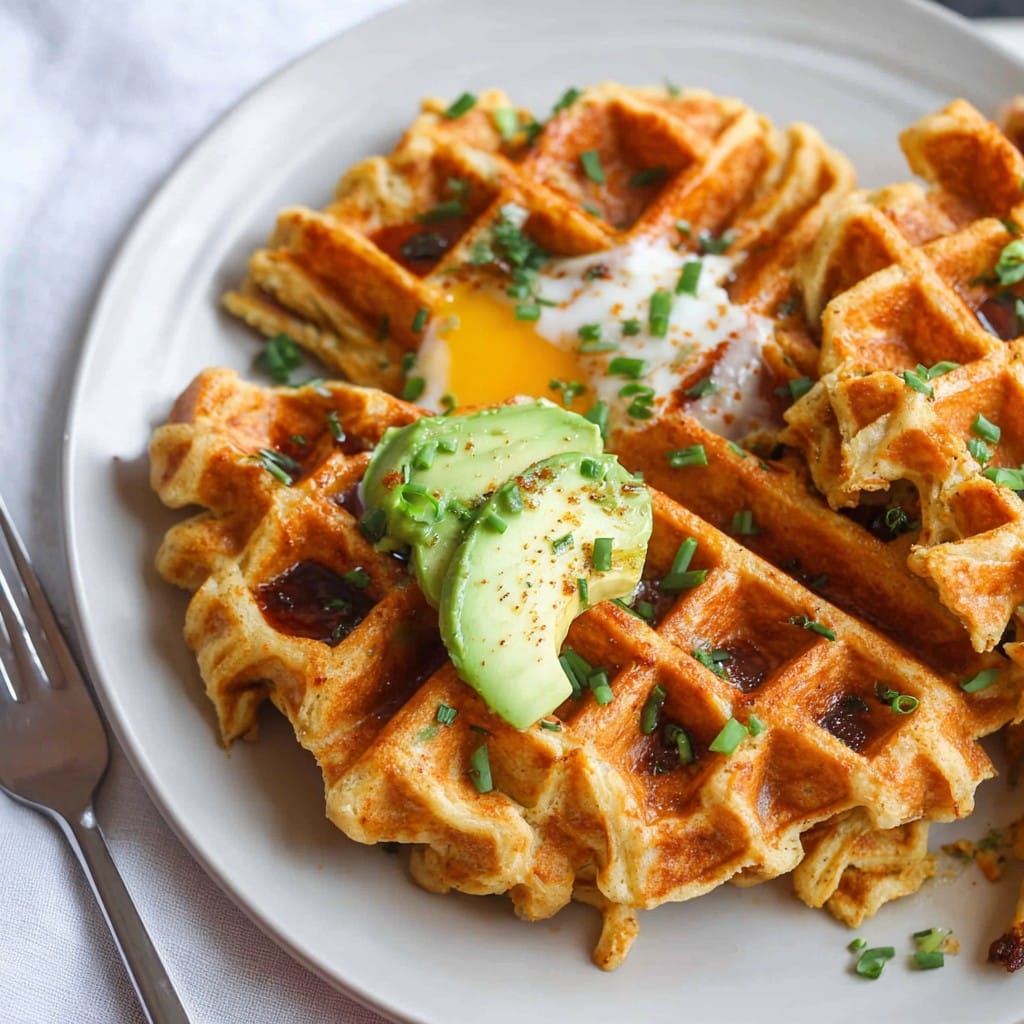
Weirdly, my family loves these with a fried egg on top, dash of Frank’s RedHot, and a bit of avocado (if it’s not rock hard—avocado roulette is real). I’ve also served them as a side instead of toast with soup. And on Sundays, my youngest asks for ketchup, which is…a choice.
Things I Wished I’d Done Differently (AKA: Pro Tips from My Mistakes)
- Once, I tried to speed up by cranking the heat. Don’t—it just burns the outside before it’s cooked through. I know, sounds obvious in hindsight.
- If you don’t oil the waffle grid enough, first one usually fuses on like cement. Now, I just go a little wild with nonstick spray and cross fingers.
- Adding too much milk makes floppy waffles. It’s tempting when the batter looks chunky, but less is more.
People Actually Ask Me Stuff (FAQs)
- Can I freeze these? Yeah, totally. Freeze in a single layer, then pop into a zip bag. Toast from frozen. I mean, don’t expect quite the same crispy texture, but it works for a busy morning.
- What can I sub for whey protein? I’d say any unflavored plant-based powder is fine, but watch out for sweeteners. Once, I used vanilla accidentally (don’t recommend unless you want weird dessert-vibes with garlic).
- Can you make batter ahead? I’ve done it overnight. It thickens up, so just give it a good stir and maybe loosen with a splash of milk.
- Why is my waffle sticking? Probably not enough oil, or you peeked too early (been there, don’t worry). Let it cook all the way and it should release easier.
- Protein waffles for meal prep? I think they’re great for that, but honestly I eat them all before Monday.
Phew, I got distracted thinking about that time I tried to make a sweet version and ended up with something way too salty (don’t try to adapt this recipe for dessert, trust me). Anyway, I hope you give these a go. Life’s too short for boring breakfasts—plus, who doesn’t need another excuse to have cheese before noon?
Ingredients
- 1 cup oat flour
- 1/2 cup unflavored protein powder
- 1 teaspoon baking powder
- 1/2 teaspoon salt
- 1/2 teaspoon garlic powder
- 2 large eggs
- 3/4 cup unsweetened almond milk
- 1/2 cup shredded cheddar cheese
- 1/4 cup chopped spinach
Instructions
-
1Preheat your waffle iron according to manufacturer instructions and lightly grease it.
-
2In a large bowl, whisk together oat flour, protein powder, baking powder, salt, and garlic powder.
-
3In another bowl, beat the eggs and mix in almond milk. Add the wet ingredients to the dry ingredients and stir until just combined.
-
4Fold in shredded cheddar cheese and chopped spinach.
-
5Pour an appropriate amount of batter into the hot waffle iron and cook for 3-5 minutes, or until golden and crisp.
-
6Serve waffles warm, optionally topped with fresh herbs or a dollop of Greek yogurt.
Approximate Information for One Serving
Nutrition Disclaimers
Number of total servings shown is approximate. Actual number of servings will depend on your preferred portion sizes.
Nutritional values shown are general guidelines and reflect information for 1 serving using the ingredients listed, not including any optional ingredients. Actual macros may vary slightly depending on specific brands and types of ingredients used.
To determine the weight of one serving, prepare the recipe as instructed. Weigh the finished recipe, then divide the weight of the finished recipe (not including the weight of the container the food is in) by the desired number of servings. Result will be the weight of one serving.
Did you make this recipe?
Please consider Pinning it!!