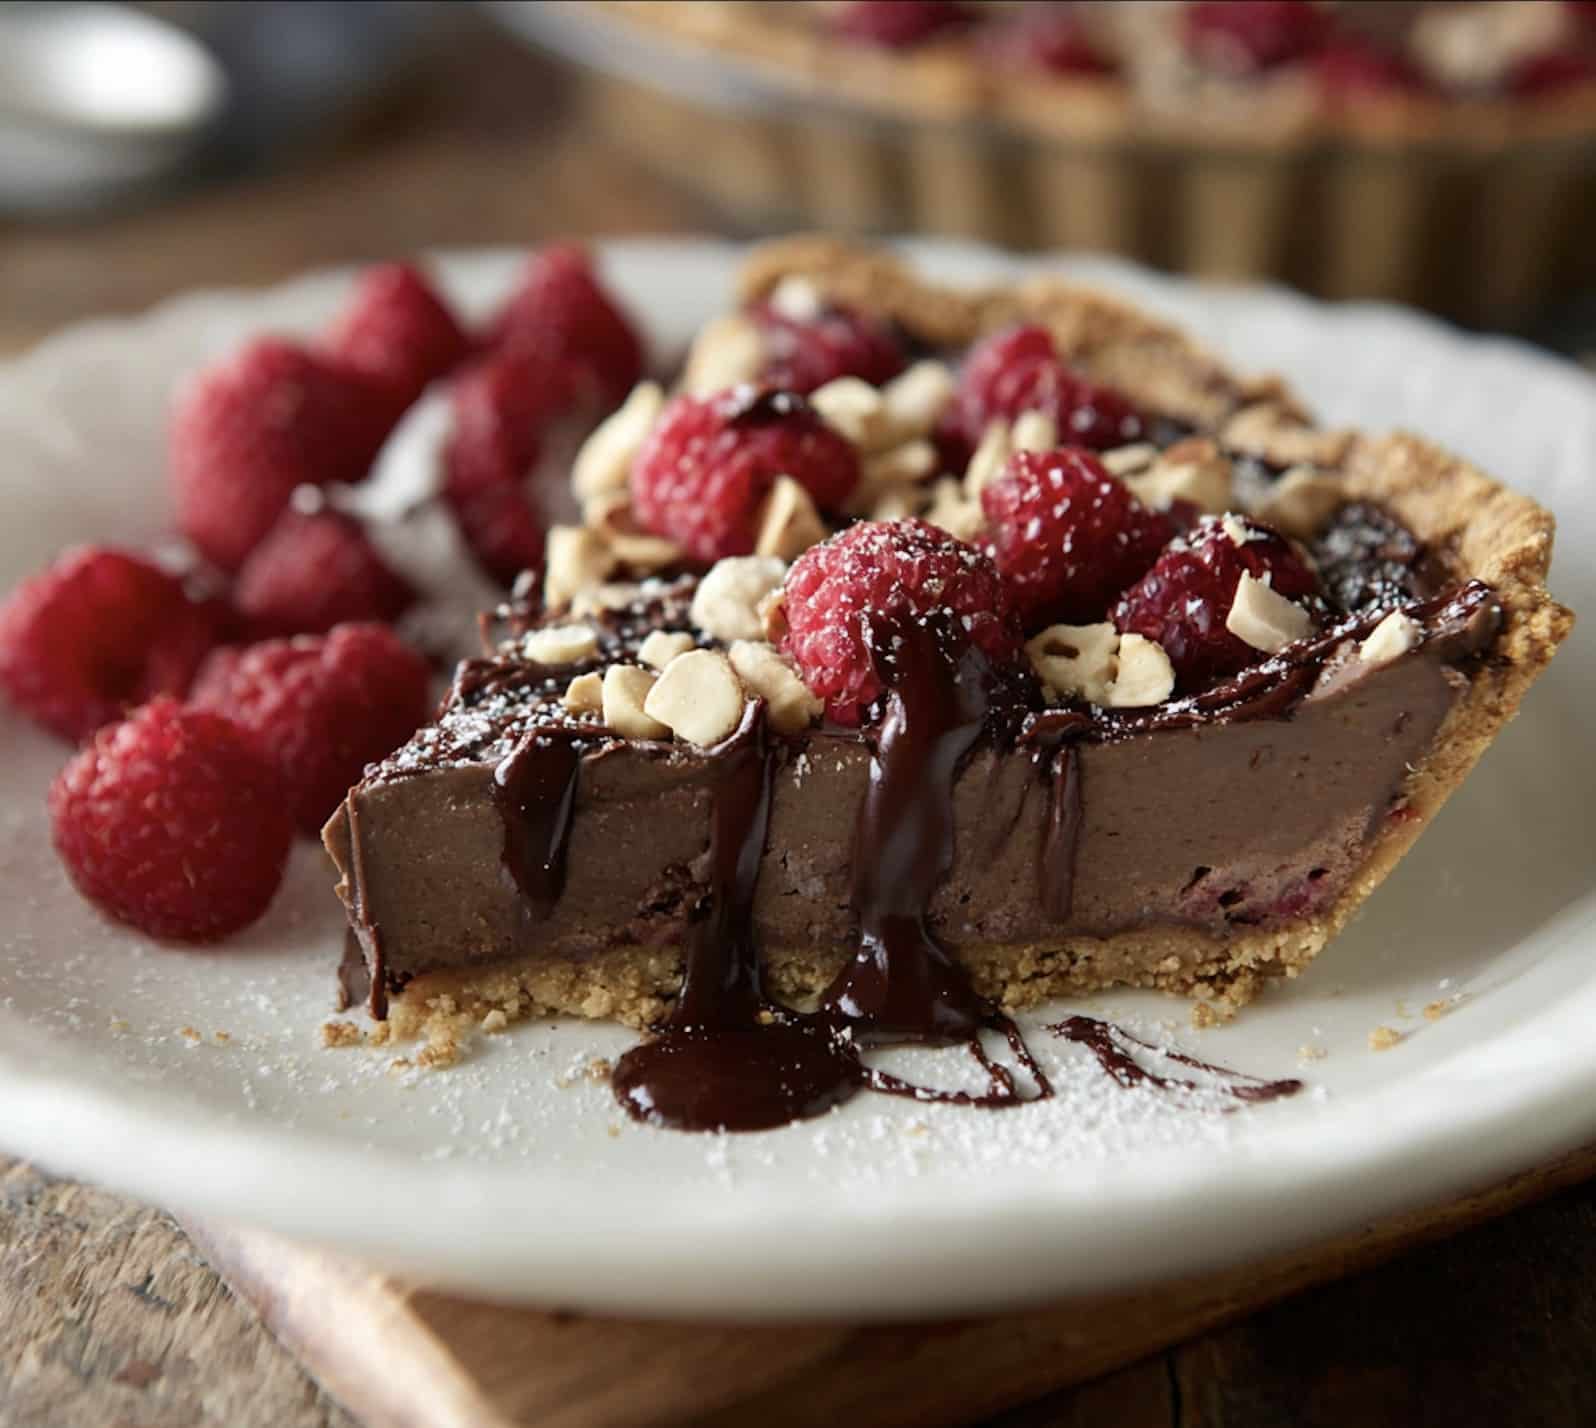
Raspberry Chocolate Hazelnut Pie Recipe: My Irresistible Go-To
Raspberry Chocolate Hazelnut Pie: The Pie That Vanished (Again)
Alright, so here’s the thing: raspberry chocolate hazelnut pie is basically the dessert my friends casually beg for whenever I offer to bring something sweet, and honestly, I get it. The first time I made this, my cousin and I nearly polished off a whole pie just “tasting” to make sure it was edible. Spoiler—she said she was just testing for raspberry bits, but honestly, she just loves chocolate (who doesn’t?!). If you’re new to pie baking, trust me, this one’s a crowd-pleaser even with my slightly wonky crust edges. Plus, who doesn’t love a fancy-sounding dessert that’s honestly very forgiving? And, not gonna lie, this pie has rescued more than one of my last-minute dinner invites.
Why You’ll Love This Pie (Seriously, It’s a Life Saver)
I make this whenever I want everyone at the table to be quiet for a full minute—not out of courtesy or manners, but because they’re all busy savoring their first bite. My family basically swoons over this because the combo of tart raspberries, rich chocolate, and nutty hazelnuts just hits that sweet/salty/creamy trifecta we all seem to crave. Sometimes I get a bit frazzled when I can’t find good fresh raspberries—frozen works, too (honestly, at this point I keep a bag tucked away just in case). If you’ve ever had a pie where the filling wants to ooze out everywhere—yeah, me too, until I prettied up the proportions over time. Now it’s more of a thick mousse-meets-ganache situation (in a good way!).
The Stuff You’ll Need (But I Totally Sub Things In)
- 1 store-bought pie crust (or make your own, but the ready ones from Aldi are just fine—don’t let anybody shame you, not everyone’s grandma had endless time!)
- 1 cup fresh raspberries (frozen totally okay, just thaw & blot them a tiny bit; sometimes I’ll use blackberries if that’s all I have)
- 3/4 cup semi-sweet chocolate chips (I tried dark chocolate chips once, and everyone said it tasted like fancy dessert, so there’s that)
- 3/4 cup toasted hazelnuts, roughly chopped (pecans are great if hazelnuts are MIA—yes, it’s happened)
- 1/2 cup heavy cream (half and half will do in a pinch, just don’t tell my aunt)
- 2 tbsp unsalted butter (honestly, I’ve forgotten it once, and it sort of worked, but don’t recommend)
- 1/3 cup granulated sugar
- 1 egg (for brushing the crust if you’re feeling fancy)
- 1 pinch salt (I realize “pinch” is relative, but go easy)
- Powdered sugar for dusting, if you want to be extra
What To Do: Directions, Sort Of As They Happened
- Preheat your oven to 375°F (190°C)—I always forget and then panic half-way, so do it first. Roll out the pie crust and plop it into a 9-inch pie dish. Patch up any cracks, nobody’s judging.
- Scatter your hazelnuts over the bottom. I usually sneak a few to munch—can’t help it. Then layer on the raspberries (don’t have to be too tidy, I promise).
- In a saucepan (or a microwave if you’re like me, running late), warm the cream and butter until just about to simmer. Pour over the chocolate chips in a bowl and let them melt. Wait a minute (stir a bit), then…once luscious, mix in the sugar and salt. This gooey wonder is the secret sauce.
- Pour the chocolate cream over everything in the crust. It may look like a complete mess, but don’t worry if there’s a raspberry poking through here and there—it all sorts itself out later.
- Brush the crust with that egg, if you like a golden finish. I usually forget; still tastes just as good.
- Bake for 35-40 minutes until the top gets kind of cracked and set. Don’t stress, the middle might jiggle a smidge, but that’s normal (it’ll firm as it cools).
- Cool at least an hour before eating. This bit is honestly torture, but important. Actually, I’ve tried to slice early—it gets messy, learns from my mistakes!
Notes From My Many, Many Attempts
- The pie likes to be cool before slicing. Warm pie is like dessert lava; it’s delicious, but not exactly photogenic. I usually tuck it in the fridge for quicker set.
- Once, I forgot to toast the hazelnuts, and it was…fine, just not as flavorful. Worth the 5 mins with a pan.
- If making ahead, the crust does get a bit softer overnight, but I think that’s part of its charm.
Variations I’ve Tried (And a Flop or Two)
- With Strawberries: Okay, kind of worked, but nowhere near as punchy as raspberries. The filling got a touch runny too. Blackberry is a lot closer in vibe.
- Coconut Crust: Used shortbread and a handful of shredded coconut—tasted amazing, but was a tad crumbly. Great for coconut fans, though. Apart form the mess.
- Dairy-Free: Used coconut cream instead of heavy cream. Actually, I find it works better if I chill the can overnight and use just the thick part. Slightly different taste, but not bad!
Equipment (But Honestly, Just Improvise)
You definitely should have a 9-inch pie dish, but I once made this in a deep tart pan and it was basically the same. If you don’t have a saucepan handy for the chocolate, the microwave works—I just zap in 15-second bursts, stirring between. And if you’re like me and don’t have a pastry brush, I literally just use my fingers for the egg wash. Works a treat!
Storage (If You’re So Lucky)
It’ll keep in the fridge for three days, covered, but honestly, in my household? It’s gone the same day. Maybe you’ll have better luck hiding it behind a big tub of lettuce! If you want crisp crust for leftovers, pop a slice in the toaster oven for a minute (not too long!).
How I Like To Serve It (And a Bit About Weird Family Habits)
I like a big wedge, room temp, with an even bigger dollop of whipped cream—sometimes with a smidge of Frangelico (okay, sometimes more than a smidge). My uncle insists on a scoop of vanilla ice cream, but that’s a battle for another day. Serve with good coffee, or if you’re feeling jazzed, make espresso at home. During winter, once or twice, we’ve even gone for hot chocolate with a slug of rum on the side (don’t ask; cold nights do strange things).
Some Honestly Learned Pro Tips
- Let the pie cool fully. I once tried rushing this and ended up with runny filling and sticky fingers—and a grumpy dog afterward who managed to nab a piece from the counter (true story).
- Even layer of nuts and fruit helps. If you pile them in one spot, you’ll get a weird, jammy lump. Not the end of the world, but not very elegant.
- You can shortcut with a ready-made chocolate ganache; I tried this once following King Arthur Baking’s recipe and it worked pretty darn well!
Questions Folks Have Actually Asked Me
- Can I use a graham cracker crust?
- Yeah, totally; it’s just a bit more crumbly, but still delicious. Actually, I think I like it better sometimes—it’s less formal. Just use a thick enough base so it doesn’t get soggy.
- Can I freeze this pie?
- Tried it once—it’s okay, but the berries get a tad mushy. I’d say fresh is best, or next-day at most. If you do freeze, wrap it tightly!
- Is it super sweet?
- Nope, it lands in that nice not-too-sweet, not-too-tart spot. But, if your sweet tooth is wild, sprinkle a tablespoon more sugar in the chocolate mix.
- What if I only have milk chocolate?
- Go for it! Pie’ll be sweeter and less intense. My niece is obsessed with this switch, so it gets the kids’ stamp of approval.
- Can I make gluten-free?
- Use a GF crust and you’re golden. I’ve used Bob’s Red Mill pie crust from their gluten-free recipe once, and it worked like a charm.
That’s pretty much it. If you try it, I genuinely hope you love it as much as we do—messy crust and all. And fair warning: you might want to set aside a slice for yourself before it “disappears.” (That’s not just me, right?)
Ingredients
- 1 1/2 cups chocolate wafer cookies, crushed
- 1/2 cup toasted hazelnuts, finely chopped
- 5 tablespoons unsalted butter, melted
- 1 1/4 cups semi-sweet chocolate chips
- 3/4 cup heavy cream
- 3/4 cup hazelnut spread (such as Nutella)
- 1 1/2 cups fresh raspberries
- 2 tablespoons raspberry jam
Instructions
-
1Preheat the oven to 350°F (175°C). In a bowl, combine crushed chocolate wafers, chopped hazelnuts, and melted butter. Mix well.
-
2Press the mixture evenly into the bottom and up the sides of a 9-inch pie pan to form a crust. Bake for 8 minutes, then let cool completely.
-
3Heat heavy cream in a saucepan until just simmering. Pour over chocolate chips in a bowl and let sit for 2 minutes. Stir until smooth, then mix in hazelnut spread.
-
4Spread the chocolate-hazelnut filling evenly into the cooled crust. Chill for at least 1 hour until set.
-
5Lightly warm raspberry jam and brush it over the set filling. Arrange fresh raspberries on top of the pie before serving.
Approximate Information for One Serving
Nutrition Disclaimers
Number of total servings shown is approximate. Actual number of servings will depend on your preferred portion sizes.
Nutritional values shown are general guidelines and reflect information for 1 serving using the ingredients listed, not including any optional ingredients. Actual macros may vary slightly depending on specific brands and types of ingredients used.
To determine the weight of one serving, prepare the recipe as instructed. Weigh the finished recipe, then divide the weight of the finished recipe (not including the weight of the container the food is in) by the desired number of servings. Result will be the weight of one serving.
Did you make this recipe?
Please consider Pinning it!!