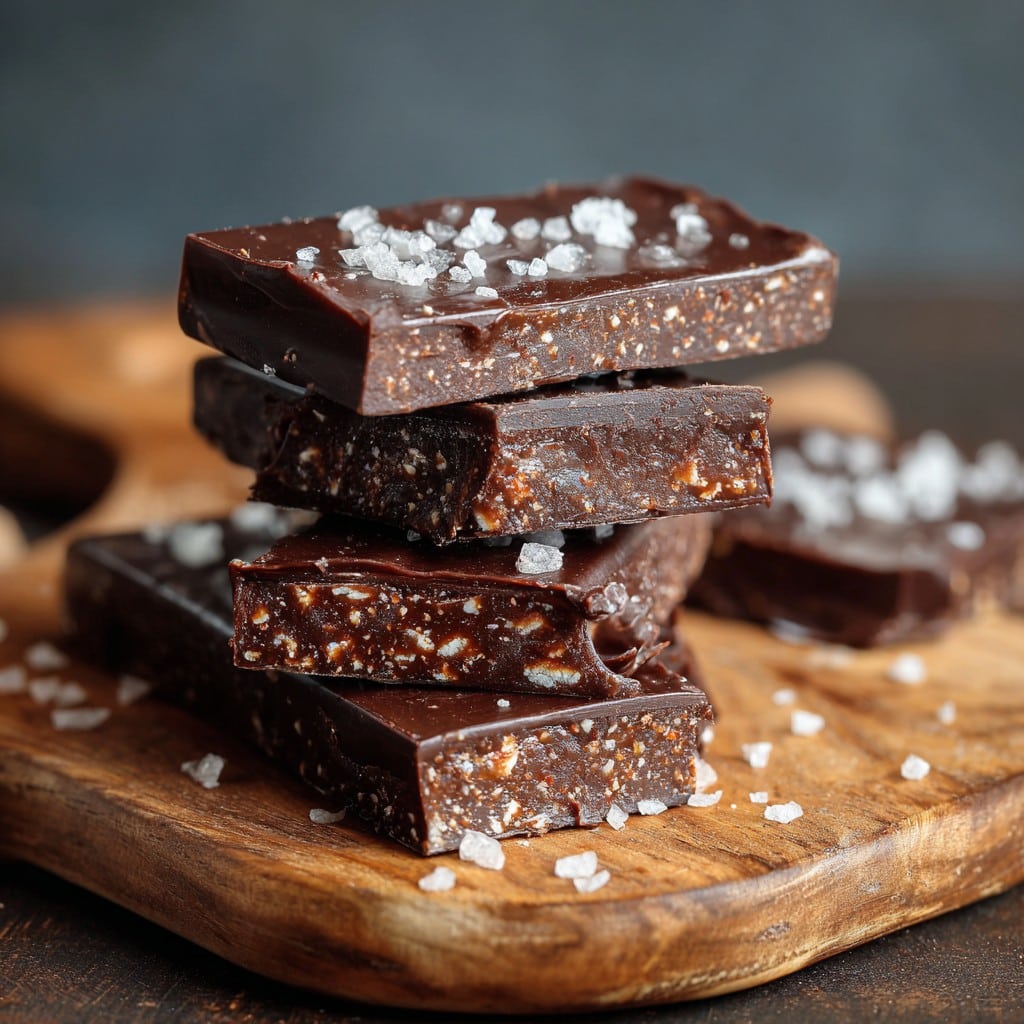
Protein Chocolate Bars Even Your Picky Brother Will Love
The Day I Saved My Mornings With Protein Chocolate Bars
Okay, confession: I used to grab way too many sad store-bought bars that tasted like a shoe mixed with dusty cocoa, just because I was late again. But last winter, after making a batch of these protein chocolate bars basically by accident—I’d run out of eggs for muffins and just threw whatever was in the pantry in a bowl—I realized, wow, these are so much better. My sister says they taste like a brownie that went to the gym. And funnily enough, my neighbor came over while I was dusted in cocoa (honestly, I looked unhinged) and ended up leaving with three bars in her coat pocket.
Why You’ll Love This (or at least forgive me for making you try it)
I whip these up whenever I know mornings are going to be bananas, or someone in the family is on a high-protein kick (lasts about a week, then back to toast). My youngest, who insists raisins are secretly insects, requests these because “they actually taste like chocolate”—her words, not mine. And if I’m craving a snack that feels like cheating but, you know—actually isn’t—this bar comes to the rescue. (Plus, I don’t have to hike to the store in the rain or pay seven quid for a crumbling slab. Been there.) Once, the batch was a little crumbly; I ate the pieces on yogurt. Happy accident, honestly!
Here’s What You’ll Need (Substitutions & All)
- 1 and 1/2 cups rolled oats (sometimes I use the quick ones, but steel-cut is a no-go for this, trust me)
- 3/4 cup chocolate protein powder (I’ve used vanilla in a pinch; also, my friend swears by this vegan blend)
- 1/2 cup almond butter (or peanut, or even tahini if you’re feeling fancy or out of nuts—makes it a bit earthier)
- 1/2 cup maple syrup (golden syrup works, but it’s sweeter—watch out if you hate sticky hands!)
- 1/3 cup unsweetened cocoa powder (I go with whatever’s at the back of the cupboard, honestly. Grandma always said never skimp on cocoa—but who listens?)
- Pinch of sea salt (forgot it once; didn’t ruin anything)
- 1 teaspoon vanilla extract (unless you, like me, regularly forget and it still comes out edible)
- 1/3 cup mini chocolate chips (optional, but… not really. You know what I mean?)
- A splosh of milk (whatever kind—regular, oat, whatever—you need, just enough to help things stick together)
How To Make Protein Chocolate Bars (Or Something Like Them)
- Grab a mixing bowl—a big one, unless you like washing up multiple bowls. Dump in the oats, protein powder, cocoa, and salt. I don’t bother sifting, but you can if you love extra work.
- Stir in almond butter, maple syrup, and vanilla. Honestly, this part’s easier if you microwave the nut butter for 15-20 seconds; that was a game-changer I learned after scraping half the almond butter off my wooden spoon.
- Mix! I use a spoon, though once I tried with my hands. Still scrubbing protein powder out form my cuticles. If it’s looking like dry pebbly gravel, start adding your milk—a tablespoon at a time is plenty. You’re aiming for something you can press together, not pour.
- Fold in your chocolate chips or chunks, or whatever small edible bits you feel like. Go wild, or not.
- Line a square dish (I use 8×8 because I’m old-school; any Tupperware with a flat base will do) with parchment. Scrape and smoosh with a spatula or very clean hands; press pretty firmly. This is when I always “test” a corner crumb. You know. For research.
- Pop it in the fridge for at least an hour, though honestly, thirty minutes works if you’re hungry and impatient (which, let’s face it, is most of us).
- Slice into bars—size is up to you. I sometimes make mini-bites for lunchboxes (and sneak a couple before anyone notices).
Lessons Learned (So You Don’t Have To)
- Once I used sunflower seed butter and it tasted… bizarre. Not bad, just odd. Maybe that’s your thing.
- Don’t try blending the oats; it turns to dust and you lose the nice bite.
- I always underestimate how sticky the mix gets—use parchment, or you’ll regret it at clean up time!
Experiments: What Worked, What Didn’t (Still Ate It Anyway)
I tossed in dried cranberries one time—honestly not bad. Chopped walnuts? Even better, if you don’t have nut allergies on deck. Tried espresso powder for a mocha vibe and… let’s just say it sounded more delicious in my head than in my mouth. We live and learn!
No Fancy Gear? No Problem
If you’ve got a decent bowl, a spatula (or a strong serving spoon, who cares), and a fridge, that’s basically all you need. I’ve squeezed this whole thing into a takeaway tupperware before when I couldn’t find my baking dish—worked fine. For mixing, even your hands work (use gloves if you have wild-colored nail polish, or you’ll be crusty for days).
How to Store These (Assuming You Don’t Eat Them All at Once)
Keep these in an airtight container in the fridge and they’ll stay nice for about a week. Though, honestly, they haven’t lasted longer than a day and a half here; I blame my husband’s snack thievery. You can freeze ‘em, but I find they get a bit crumbly.
How We Eat Them at My House
Most mornings, I’ll grab two with coffee (okay, sometimes three, don’t judge). My daughter likes hers chopped into her porridge, and on Sundays I’ve drizzled a bit of peanut butter and sea salt over the top for “brunch”.
Stuff I Wish I Knew Earlier (Learn from My Oddities)
- Take your time when mixing—being impatient seems to leave pockets of dry poweder. I did this once, ended up with one bar that was basically just, like, powder-wrapped cocoa chips. Meh.
- Don’t overcrowd your bars in too small a pan—the thicker they are, the harder to cut. Speaking of which, use a sharp knife (not a butter knife, no matter how optimistic you feel).
- Actually, I find these taste even better the next day, if you can wait. But that’s a big IF in my place.
Frequently Asked, Sometimes Amusing Questions
- Can you use whey protein? Or does it have to be vegan?
- Yep, both work. I’ve tried pea protein and it… let’s say you notice it a bit more. But it’s never inedible. Just don’t expect it to be exactly like bakery brownies. I’ve linked to one of my favourite brands here if you want to browse options.
- Serious business: Can I put these in lunchboxes?
- Definitely. Just wrap them in baking paper, or wax wraps if you’re fancy (I tried clingfilm, but it stuck more to my hands than the bar).
- What if I want it sweeter?
- Add more syrup/honey or—if you’re like my cousin—a drizzle of melted chocolate on top before chilling. Sky’s the limit, really.
- Got to be gluten free?
- Just check your oats and protein powder. I’m not a stickler, but my friend is coeliac and manages just fine with those tweaks.
- Can kids make these?
- Mine do (with supervision, obvs). The sticky hands decline is real, but it’s all in good fun!
Oh, while I’m here, if you want to make them even fancier, someone online suggested freeze-dried raspberries—haven’t tried that, but sounds posh.
Ingredients
- 1 1/2 cups rolled oats
- 1 cup chocolate protein powder
- 1/4 cup cocoa powder
- 1/2 cup almond butter
- 1/4 cup honey
- 1/4 cup unsweetened almond milk
- 1/2 cup dark chocolate chips
- 1/4 teaspoon sea salt
Instructions
-
1Line an 8×8 inch pan with parchment paper.
-
2In a large bowl, combine rolled oats, protein powder, cocoa powder, and sea salt.
-
3Add almond butter, honey, and almond milk to the dry ingredients. Mix until a thick dough forms.
-
4Fold in dark chocolate chips until evenly distributed.
-
5Press the mixture firmly into the prepared pan, smoothing the top.
-
6Refrigerate for at least 1 hour before slicing into bars. Store in an airtight container.
Approximate Information for One Serving
Nutrition Disclaimers
Number of total servings shown is approximate. Actual number of servings will depend on your preferred portion sizes.
Nutritional values shown are general guidelines and reflect information for 1 serving using the ingredients listed, not including any optional ingredients. Actual macros may vary slightly depending on specific brands and types of ingredients used.
To determine the weight of one serving, prepare the recipe as instructed. Weigh the finished recipe, then divide the weight of the finished recipe (not including the weight of the container the food is in) by the desired number of servings. Result will be the weight of one serving.
Did you make this recipe?
Please consider Pinning it!!