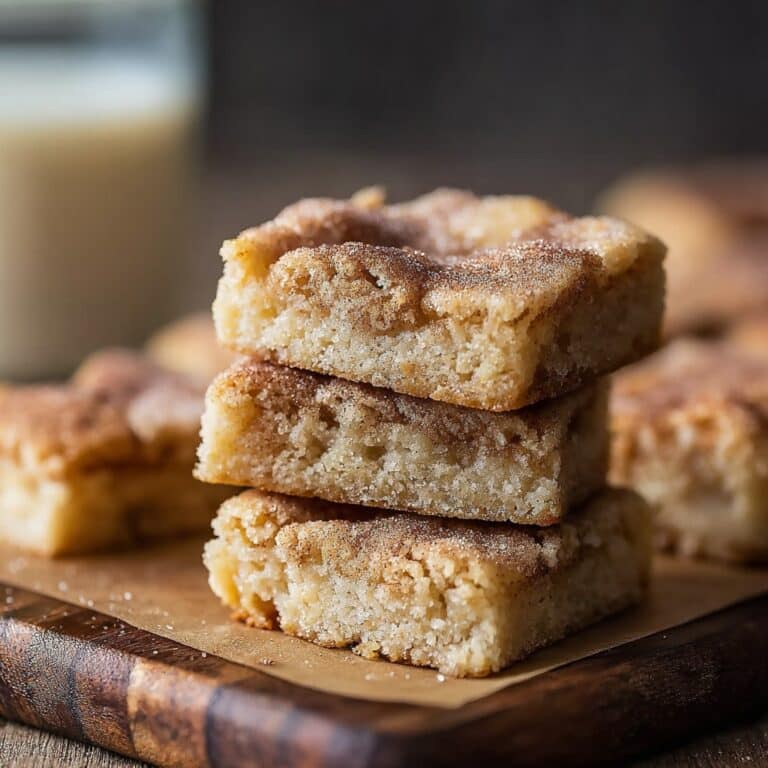
Peppermint Swirl Fudge
So, Let Me Tell You About Making Peppermint Swirl Fudge
You know how some recipes just smell like Christmas? Well, every time I make peppermint swirl fudge, my whole flat fills with this minty, sweet breeze that has my neighbor popping over “to borrow some sugar” (he never brings it back — hi, Tom). Anyway, I’m not saying this fudge can solve all your problems, but it has improved at least two family feuds in my kitchen. Oh, and my little cousin once tried to swirl the peppermint with a fork and made a hilarious mess. Seemed like abstract art; tasted fantastic. If you’re ever bored, honestly, let the kids do the swirling part.
Why I Keep Making This—And Why You Might, Too
I usually crack out this fudge when the weather’s getting grim, or when someone drops by unexpectedly. My family goes a bit wild for it — especially after dinner when everyone’s lurking around the kitchen, claiming they’re just “tidying up,” but really they’re just after another square. (Can’t blame them!) And if I feel too lazy to make anything complicated, this fudge steps in, no problem. Seriously, there’s no dreaded pastry anxiety here. Actually, the hardest part is waiting for it to set. I used to be convinced it was a winter-only thing, but last July my mate Lauren requested it for her birthday bash and — well, who am I to argue?
What You’ll Need (And What You Can Swap)
- 3 cups white chocolate chips (Honestly, supermarket own-brand is fine — my nan only ever got Ghirardelli but it’s not a dealbreaker)
- 1 can (14 oz) sweetened condensed milk (sometimes I use evaporated milk if I’m in a tight spot, but it’s not quite as creamy)
- 1 tsp peppermint extract (Careful! Too much and you’ll feel like you’re eating toothpaste. Ask me how I know…)
- 1/3 cup crushed peppermint candies or candy canes (My cousin once used spearmint, which was really weird, but not disastrous)
- Red food coloring (optional, but it’s not really a “swirl” without it – in my humble opinion)
- Pinch of salt (totally optional, but it kind of wakes up the flavor)
Let’s Make Some Fudge: My Not-So-Perfect Process
- Line your Pan – Grab an 8×8 inch tray (or whatever’s closest; I’ve used a roasting tin in a pinch). Line it with parchment paper. I usually let the paper hang over the sides so it’s easier to pull the fudge out later.
- Melt the Chocolate – Chuck the white chocolate chips and condensed milk in a medium saucepan. Low, gentle heat is best. Stir like you’re on auto-pilot until smooth. Don’t panic if it clumps a bit at first — it always looks lumpy before it starts to melt, then suddenly goes glossy and beautiful. This is where I usually sneak a tiny lick (be careful, it’s hot!)
- Stir in the Mint – Take the pan off the heat. Pour in your peppermint extract, then the salt if you’re using it. If you’re feeling brave, taste the mix (it’s the only way to find out if you’ve gone overboard with the peppermint, trust me).
- Pour and Swirl – Pour the mix into the pan. Now, dab little dots of red food coloring randomly across the surface. Use a toothpick, skewer, or (true story) the end of a plastic spoon to swirl it around. Go wild! But not too wild — if you swirl too much, you’ll end up with a pale pink fudge instead of a pretty swirl. Not that that’s bad. Some years, everyone thought it was intentional.
- Add the Crunch – Sprinkle your crushed peppermint candies over the top and press them down ever so slightly so they stick. (Or, use the flat of your hand if you’re a bit slapdash like me.)
- Let it Set – Into the fridge it goes. Give it at least two hours (I once tried to speed it up in the freezer, and all I got was fudge that snapped AND had ice crystals in it). Be patient! Once it’s proper firm, lift it form the pan using the parchment and slice into squares. I think it tastes better the next day, somehow.
A Few Extra Notes (Discovered the Hard Way)
- Don’t skip lining the pan, or you’ll spend forever wrestling fudge out with a knife. Not fun.
- Don’t microwave the chocolate unless you have to; if you do, stir every 20 seconds or it’ll seize up and you’ll have to start over. Ask me how I know…
- If your fudge is still sticky after two hours, just leave it a bit longer. Patience isn’t my strong suit either, but it works. Eventually.
Variations (& a “Whoops” Moment)
- Substitute dark or milk chocolate for the white – it’s less festive, but honestly just as tasty.
- Try orange extract for a chocolate orange vibe. Not traditional, but pretty fab (especially if you add a little orange zest).
- I tried making a ‘spicy’ version with chili flakes once – disaster. Would not recommend, unless you like fiery fudge; then again…
- My pal adds a layer of graham cracker crumbs on the bottom for a crunch. It’s extra work, but some people love it!
About That Equipment List
- Medium saucepan (Don’t have one? I’ve melted everything in a deep frying pan in an emergency. Worked alright. Maybe don’t share that bit at a dinner party though.)
- 8×8 inch (or roughly) baking tray
- Parchment paper – please, don’t skip this!
- Toothpick, skewer or an old butterknife for swirling paint-like patterns

How to Store (If There’s Any Left…)
Pop the squares in an airtight tin or Tupperware (assuming you haven’t inhaled the lot already). In the fridge, it’s good for up to a week. But honestly, in my house it never lasts more than a day! I once tried freezing a batch for ‘later’ — it was fine, but a bit crumbly afterward. Your call.
How I Like to Serve It (aka, How My Family Does)
I usually serve it in tiny squares, stacked on a cake stand for maximum snack-prestige. My brother eats it straight from the fridge, but Granny insists it’s better at room temp. (She also says a cup of tea is required. Can’t say I disagree.) Around Christmas, I tie up a few squares in cellophane with a ribbon for gifts — easy and cute. Oh, and my mate swears by dunking it in hot cocoa. Bit over the top, but not terrible.
Lessons I Learned the Not-So-Easy Way (Pro Tips)
- I once tried to rush the setting process by popping it in the freezer, thinking I was a genius. Nope — the texture was all weird and it tasted like the frozen back of my freezer smells. So yeah, just use the fridge and maybe clean out your freezer, too; it helps.
- Let the fudge come to room temperature before slicing, unless you want fudgy crumbs all over your counter.
- Taste the mixture before pouring into the pan! Once, I forgot and added way too much mint. It was like eating toothpaste, but colder.
FAQ – Real Questions I’ve Heard (and Answered… Eventually)
- Can I use real peppermint leaves instead of extract?
Hmm, short answer: not really. The flavor’s too subtle, and you’ll probably end up picking green bits out of your teeth. I mean, I guess you could infuse cream with mint leaves and get all technical about it, but store-bought extract is easy and consistent. - Is this fudge gluten-free?
As long as your peppermint candies are gluten-free (which most are), yes! Always double check the chocolate chips, though. More info over on Celiac.org if you want to get into the weeds on it. - Can I double the batch?
Oh, easily — just use a 9×13 inch tray and stir really well. The hardest part is not eating half of it before it sets. Don’t ask how I know. - How do I crush the candies without making a mess?
Wrap ‘em in a tea towel and bash with a rolling pin, or the bottom of a saucepan if you’re feeling feisty. Just watch out — tiny pieces go everywhere, and stepping on them is a special kind of pain. (I once used a food processor, but ended up with peppermint dust.) - Where did you get your red food coloring?
Honestly, anywhere! But I like the Wilton gel colors because they don’t water down the mix. A friend swears by the ones from Lakeland, too.
Anyway, I’ve rambled enough (I hope your fudge turns out marvelously swirly and not toothpastey). If you’ve got any rogue ideas for variations, I’d love to hear them — or, you know, test them for, um, science. Cheers!
Ingredients
- 3 cups white chocolate chips
- 1 can (14 oz) sweetened condensed milk
- 1/4 cup unsalted butter
- 1 teaspoon vanilla extract
- 1 teaspoon peppermint extract
- 3-4 drops red food coloring
- 1/2 cup crushed peppermint candies
- Pinch of salt
Instructions
-
1Line an 8×8-inch baking pan with parchment paper, leaving an overhang for lifting. Lightly grease the parchment.
-
2In a medium saucepan over low heat, combine white chocolate chips, sweetened condensed milk, and butter. Stir constantly until melted and smooth.
-
3Remove the saucepan from heat. Stir in vanilla extract, peppermint extract, and a pinch of salt.
-
4Transfer 1/3 cup of the fudge mixture to a small bowl. Add red food coloring to this bowl and mix until evenly tinted.
-
5Pour the plain fudge mixture into the prepared pan and spread evenly. Dollop the red-tinted fudge over the top, then use a knife or skewer to gently swirl for a marbled effect.
-
6Sprinkle crushed peppermint candies over the top. Refrigerate for at least 2 hours or until set. Cut into pieces and serve.
Approximate Information for One Serving
Nutrition Disclaimers
Number of total servings shown is approximate. Actual number of servings will depend on your preferred portion sizes.
Nutritional values shown are general guidelines and reflect information for 1 serving using the ingredients listed, not including any optional ingredients. Actual macros may vary slightly depending on specific brands and types of ingredients used.
To determine the weight of one serving, prepare the recipe as instructed. Weigh the finished recipe, then divide the weight of the finished recipe (not including the weight of the container the food is in) by the desired number of servings. Result will be the weight of one serving.
Did you make this recipe?
Please consider Pinning it!!