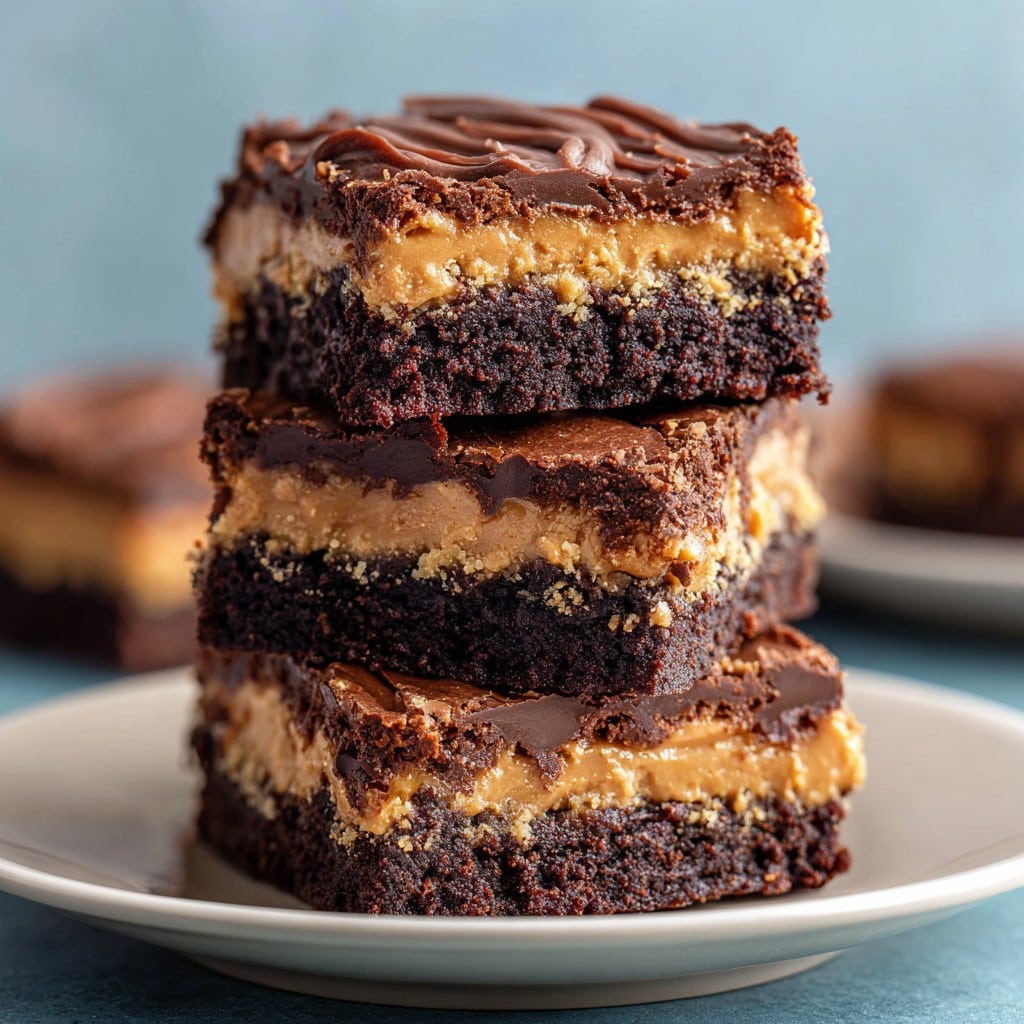
Peanut Butter Stuffed Brownies: The Comfort Treat I Crave
Okay, Let’s Talk Peanut Butter Stuffed Brownies
I don’t know about you, but sometimes (okay, frequently) I get those days where nothing but a gooey, over-the-top chocolate treat will do. Enter these peanut butter stuffed brownies. They’re legendary in my little family, partly because I can never seem to cut them straight and mostly just because everyone wants the center piece. The first time I baked these was after a bit of a rough day at work. One thing led to another, peanut butter ended up between two layers of thick brownie mix, and, well, my kitchen’s never really recovered. The smell alone—seriously, you could charge admission.
Why You’ll Love This (At Least, My Crowd Does)
I whip up this recipe whenever it feels like we *need* a pick-me-up, or some cozy, movie-night energy. My husband will straight-up guard the pan if there’s even a whiff that we might have guests over. The peanut butter tames the sweetness just enough so it’s not too much even after two (or four) pieces. And honestly? I have tried those boxed mixes in a rush; they’re fine, but this is the stuff you brag about. (Big shoutout to my sister, who once tried to microwave the whole thing to ‘save time’—the edges were charcoal. Don’t do that. Please.)
The Stuff You’ll Need
- 200g good dark chocolate (70% is my sweet spot—sometimes I just use up the odds and ends lurking in my cupboard, though)
- 110g unsalted butter (honestly, salted works too, in a pinch; I’ve used both and haven’t been struck down yet)
- 2/3 cup smooth peanut butter (crunchy is cool, but a bit messier layering)
- 1 cup white sugar (I’ve swapped in half brown when I’m feeling extra)
- 2 large eggs
- 1 tsp vanilla (or just “a splash” if you measure like my gran did)
- 2/3 cup all-purpose flour
- 1/4 tsp salt (skip if your peanut butter is the salty sort)
Optional things: a handful of chocolate chips on top for drama, or if you want to get wild, a swirl of raspberry jam. Just saying.
Kind of Step-by-Step Directions (With Occasional Chaos)
- Line a square baking tin (8×8 is my go-to) with parchment. Or if you, like me once or twice, forgot to buy some, just butter the heck out of the pan; you’ll survive.
- Melt the butter and chocolate together in a saucepan over low heat, stirring so it doesn’t go granular. I used to try this in the microwave and it worked, except for the occasional chocolate explosion—don’t get distracted by your phone like I do!
- Let it cool for a couple mins—if you’re impatient and add the rest while it’s hot, you’ll scramble the eggs. Ask me how I know…
- Whisk in the sugar, then the eggs (one at a time, if you remember), then vanilla. It’s fine if it’s not perfectly smooth; brownies are forgiving, more or less.
- Stir in flour and salt until just combined, like, don’t go mad. This is usually where I sneak a spoonful to check for… scientific purposes.
- Pour half the batter in the tin. Spread the peanut butter over the top—it helps if you zap it in the microwave for 15 seconds first so it’s easier to squidge around. Make a bit of a mess, life’s too short.
- Top with the rest of the brownie batter (I dollop it on in blobs and gently spread with a spoon). If you want to be truly extra, drop a few chocolate chips on top or maybe a pinch of flaky salt.
- Bake at 350°F (180°C) for about 25 to 30 minutes. The middle should just wobble a bit, but the sides will pull away from the tin (and your kitchen will smell like an absolute dream).
- Let them cool as long as you can stand it. Or at least enough so you don’t scorch your mouth (been there, oops).
Random Notes I Wish I’d Known Before
- If you use natural peanut butter, sometimes the layers get swirly and not as neat; still tastes boss though.
- Actually, I find they taste better the next day—if you can hide them from your lot.
- Don’t panic if the top cracks a bit as it cools. You’re not on Bake Off.
How I’ve Messed With This Recipe (So You Don’t Have To)
- Once I tried adding chopped up pretzels in the filling—salty and good, but got kinda soggy overnight.
- Halving the sugar does make them less fudgy, but also less like dessert, if you ask me.
- I tried swirling in Nutella instead of peanut butter. Delicious, but not peanut buttery, obviously.
Gear You (Sort of) Need
- 8×8 inch baking tin (if you only have a round one, go for it, just cut odd pieces—nobody will complain)
- Saucepan & wooden spoon (or, if all else fails, a microwave and a fork)
- Parchment paper (but butter and a bit of hope works in a pinch)
Honestly, most kitchen stuff can be subbed if you’re winging it, which is how I’ve gotten through plenty of lockdown bakes. If your oven runs hot, keep an eagle eye out at the end.
Keeping and Storing ‘Em (If You Can Actually Get That Far)
Officially, you can keep these in an airtight container for about three days at room temp or up to a week in the fridge (probably longer, but mine have never stuck around long enough for actual science). They freeze pretty well, too—just don’t ask me how to wait for them to thaw completely before eating.
How I Like to Serve These (Totally Optional)
We do these up proper with a scoop of vanilla ice cream and a drizzle of—well, whatever syrupy thing is lurking in the fridge. My eldest even likes them breakfast-style (I know, not recommended but…life isn’t perfect) with a strong cup of coffee for dunking. For some reason, brownies always taste best at midnight while watching reruns.
Things I’ve Learned (Usually the Hard Way)
- Letting the brownie cool fully makes for way neater slices, but I still usually cave halfway through and end up with a gooey mess.
- Don’t skip on properly lining your pan unless you fancy chiseling stuck brownie bits for the ages.
- I once tried baking these at a lower temp to see if they’d be even gooier—end result, half-raw in the middle. Stick with 350°F if you aren’t a gambling person.
FAQ: Honest Answers to Real Brownie Drama
- Can I double this and use a bigger pan?
- Sure, but watch your baking time. There was one party where I tripled the batch and somehow the center took forever to set. Maybe just make two pans?
- Can I leave out the peanut butter?
- You do you! Straight chocolate brownies will still work. Or try almond butter or even cookie butter if you’re feeling fancy.
- Are these super sweet?
- They’re sweet, but the peanut butter keeps ‘em from being too much. If you prefer, pull back the sugar a tablespoon or two. Not sure why I didn’t do this sooner, actually.
- How do I know when they’re done?
- The edges will look dry and the top just set. If a toothpick comes out with gooey crumbs (not liquid batter), you’re golden. And if they’re a bit underdone, all the better, in my opinion.
- Do you have a video of this?
- Well, not yet, but I recommend Tasty’s brownie tips—they saved me from some rookie mistakes. Or for pb filling ideas, Sally’s Baking Addiction is solid gold.
Side note: I really meant to mention earlier—I think brownies are a rare kind of social glue. Like, you bring a plate of these to your mate’s place and suddenly you’re everyone’s favorite, even if you can’t remember whose mug is whose. Anyway, that’s more of a life hack than a recipe tip, but there you go.
Ingredients
- 1 cup unsalted butter, melted
- 2 cups granulated sugar
- 1 cup all-purpose flour
- 1 cup unsweetened cocoa powder
- 4 large eggs
- 1/2 teaspoon salt
- 1 teaspoon vanilla extract
- 3/4 cup creamy peanut butter
- 1/2 cup powdered sugar
Instructions
-
1Preheat your oven to 350°F (175°C). Line a 9×13-inch baking pan with parchment paper and lightly grease.
-
2In a large bowl, whisk together melted butter and sugar until well combined. Add eggs one at a time, mixing well after each addition. Stir in vanilla extract.
-
3Sift in flour, cocoa powder, and salt. Fold the dry ingredients into the wet mixture until just combined. Do not overmix.
-
4In a medium bowl, mix together peanut butter and powdered sugar until smooth.
-
5Spread half of the brownie batter into the prepared pan. Drop spoonfuls of the peanut butter mixture over the batter and smooth into an even layer. Cover with remaining brownie batter and gently spread to cover.
-
6Bake for 32-35 minutes, or until a toothpick inserted near the edge comes out mostly clean. Allow to cool completely before slicing.
Approximate Information for One Serving
Nutrition Disclaimers
Number of total servings shown is approximate. Actual number of servings will depend on your preferred portion sizes.
Nutritional values shown are general guidelines and reflect information for 1 serving using the ingredients listed, not including any optional ingredients. Actual macros may vary slightly depending on specific brands and types of ingredients used.
To determine the weight of one serving, prepare the recipe as instructed. Weigh the finished recipe, then divide the weight of the finished recipe (not including the weight of the container the food is in) by the desired number of servings. Result will be the weight of one serving.
Did you make this recipe?
Please consider Pinning it!!