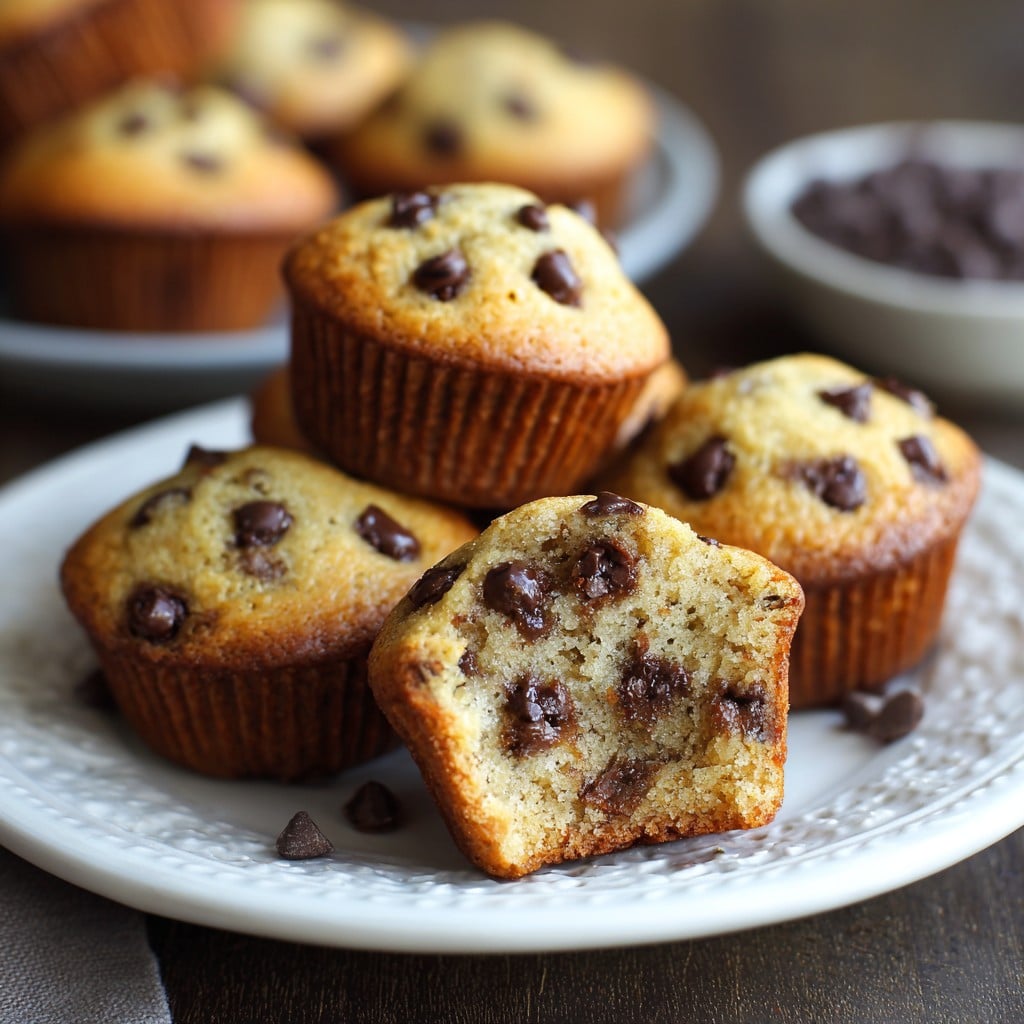
Mini Chocolate Chip Muffins: Easy Recipe and Real-Life Tips
Let Me Tell You Why These Little Muffins Are a Staple
Alright, if I’m honest, the first time I made mini chocolate chip muffins, it was because I’d completely forgotten about the bake sale at school. (Classic, right?) Anyway, I threw together whatever was lurking in the pantry, and—no joke—they were gone in 5 minutes flat. My husband still says the memory of me frantically scooping batter into teeny muffin cups at 1 a.m. was a turning point in our marriage. Sometimes, I think these muffins have more fans in my house than I do.
Anyway, enough about my semi-chaotic baking life. Let’s get baking, shall we?
Honestly, Why Even Make These?
- I pop these in the oven when I want “something sweet, but not like, cake sweet” (if that makes sense?)
- My family loses the plot when the house smells like warm chocolate chips—especially if it’s raining outside. Cozy vibes.
- They’re the ultimate after-school (or after-work, let’s be real) snack that won’t have you washing fifty dishes after.
- If you’ve ever had that kitchen disaster where muffins stuck to the pan, don’t even worry—I’ll tell you how to avoid it, because I’ve done it, and yes I still ate them crumbly!
So Here’s What You’ll Need
- 1 ¾ cups all-purpose flour (though sometimes, I’ll use half whole wheat—if I’m feeling virtuous)
- ½ tsp baking soda (my gran swore by baking powder, but I like this combo better—most days)
- ½ tsp baking powder
- ¼ tsp salt (Kosher salt, if you have it; table salt works in a pinch… see what I did there?)
- ⅓ cup unsalted butter, melted (I’ve honestly just used margarine when I ran out, didn’t ruin my day)
- ½ cup granulated sugar (you can swap in light brown sugar for deeper flavor, and I sometimes do, but it’s your call)
- 1 large egg, room temperature-ish (I once forgot to take it out—ran it under warm tap for 2 mins, all good)
- ¾ cup milk (any will do—almond, oat, the fancy stuff or regular ol’ cow)
- 1 ¼ tsp vanilla extract (real vanilla is great! But I buy the big bottle from Costco which… probably isn’t)
- ¾ cup mini chocolate chips (sometimes I toss a handful in, sometimes I measure, it’s never the wrong amount here)
Let’s Actually Make Them
- Preheat the oven to 350°F (about 175°C)—do it first, trust me, or you’ll forget. Get your mini muffin pan ready (I’ve greased with butter, oil, even nonstick spray. Sometimes I use paper liners if I find them in the drawer).
- In a medium bowl, whisk the flour, baking soda, baking powder, and salt. Dry stuff together—you know the drill.
- In another bowl (or just a big jug, honestly), whisk the melted butter and sugar until it looks kinda glossy. Toss the egg in and beat it a bit, then add the milk and vanilla. The mixture isn’t going to look super smooth at this point… don’t worry!
- Pour the wet ingredients into the dry ones. Gently fold until there are only a few streaks of flour left—this is where I usually sneak a taste because raw batter is half the point, right? (Do as you will, egg warning and all!)
- Fold in those mini chocolate chips. Try not to overmix. Lumps are fine, really.
- Spoon batter into your pan, filling just about to the top. Sometimes I make a mess and they’re not even, but that’s half the charm.
- Bake for 10–13 minutes. Mine usually take 12. A toothpick should come out with moist crumbs—not totally clean—or honestly just poke with a knife if you’re living wild like me.
- Let them cool for a few minutes (if you can stand it—my son starts stealing them while they’re piping hot so who am I to argue?)
Notes Only a Slightly Distracted Home Baker Would Notice
- If you overbake them, they’ll turn into chocolate chip rocks. Not great. But if that happens, microwave with a damp paper towel for 10 seconds—who knew?
- I once used self-raising flour and forgot the baking powder/soda. Strangely, it worked out fine. So I guess baking science is… flexible?
- You really don’t need to sift the flour—unless you want an upper arm workout.
Variations I’ve Liked (And One I’ll Never Try Again)
- Lemon zest mixed in. Suprisingly good! Especially with a tablespoon of poppy seeds.
- Chopped nuts worked, but only if you’re into that sort of thing. My daughter picked every last one out.
- Peanut butter chips: Win. Butterscotch: Different crowd favorite.
- I tried swirling in raspberry jam once; it looked gorgeous but kind of made the muffins too gooey. Next time, maybe swirl less.
What If I Don’t Have All the Gear?
I use a proper mini muffin pan when I want to be fancy but, confession, I’ve definitely just dolloped batter onto a regular baking sheet and made “freeform” muffin blobs. (Don’t call the muffin police.) If you don’t have a whisk, use a fork; it won’t end the world.
How Do I Store These (Not That You’ll Need To)
Technically, you can keep them in an airtight container for 2–3 days. But honestly, if they last 24 hours, I haven’t met your family. They also freeze pretty well, but pop them in the microwave for 10 seconds so they don’t taste weirdly icy.
How I Like to Serve Mini Chocolate Chip Muffins
Hot tip—set out a bowl of fresh berries (or just whatever’s laying around) with muffins for breakfast. Or do what we do: serve alongside strong coffee, dunk at will. Some folks do ice cream sandwiches with these but that’s maybe too wild for a Tuesday, y’know?
Lessons Learned—AKA My “Pro” Muffin Tidbits
- I once tried to pour all the wet ingredients super fast (because, impatient). Guess what? Lumpy, not fluffy. Gently is actually better here.
- If your oven runs hot (mine does, thanks to being older than me), check after 10 minutes. Dry muffins are sad muffins.
- Letting the muffins sit in the pan more than 5 mins? They turn chewy on the edges, so I always tip them out pronto now.
Real Q&A—Bake Sale Edition
Q: Can you use regular chocolate chips if you don’t have minis?
Totally. They sink a bit more but nobody has ever turned their nose up at more chocolate. Chop them a bit if you want, or don’t. It works out.
Q: Why do my muffins stick to the pan?
Ooof, been there! Either it wasn’t greased enough, or you left the muffins in the pan too long after baking; I find they pop right out when you do it quickly. Some folks swear by parchment liners (like Sally’s Baking Addiction recommends), but I’m lazy and don’t always bother.
Q: Can I make these ahead for parties?
Yes—freeze them, then warm up right before serving. Actually, I think these taste better the next day, though my kids disagree.
Q: Dairy-free options?
For sure! Use plant milk and vegan butter, works a treat. I grabbed some ideas here at Minimalist Baker once when I ran out of regular milk, and no one noticed the difference.
Wait, Did You Say Freeform Muffins?
Yep, I did. Once made these on a camping trip on the fire—no pan, just a cast iron skillet and crossed fingers. Some might call it accidental innovation; I call it not lugging more stuff outdoors.
So, there you go: muffin magic with real-life bumps. Bake, share, and don’t worry about a crumb here or there. Sometimes, a little kitchen imperfection is exactly what makes these Mini Chocolate Chip Muffins yours.
Ingredients
- 1 and 1/2 cups all-purpose flour
- 1/2 cup granulated sugar
- 1/4 cup light brown sugar, packed
- 1/2 teaspoon baking soda
- 1 teaspoon baking powder
- 1/4 teaspoon salt
- 1/2 cup unsalted butter, melted and cooled
- 1/2 cup milk
- 1 large egg
- 1 teaspoon vanilla extract
- 3/4 cup mini chocolate chips
Instructions
-
1Preheat your oven to 350°F (175°C). Grease a 24-cup mini muffin pan or line with paper liners.
-
2In a large bowl, whisk together the flour, granulated sugar, brown sugar, baking powder, baking soda, and salt.
-
3In another bowl, whisk together the melted butter, milk, egg, and vanilla extract until well combined.
-
4Pour the wet ingredients into the dry ingredients and gently mix until just combined. Do not overmix. Fold in the mini chocolate chips.
-
5Divide the batter evenly among the prepared mini muffin cups, filling each about 3/4 full.
-
6Bake for 10-12 minutes, or until a toothpick inserted into the center comes out clean. Let cool in the pan for a few minutes before transferring to a wire rack.
Approximate Information for One Serving
Nutrition Disclaimers
Number of total servings shown is approximate. Actual number of servings will depend on your preferred portion sizes.
Nutritional values shown are general guidelines and reflect information for 1 serving using the ingredients listed, not including any optional ingredients. Actual macros may vary slightly depending on specific brands and types of ingredients used.
To determine the weight of one serving, prepare the recipe as instructed. Weigh the finished recipe, then divide the weight of the finished recipe (not including the weight of the container the food is in) by the desired number of servings. Result will be the weight of one serving.
Did you make this recipe?
Please consider Pinning it!!