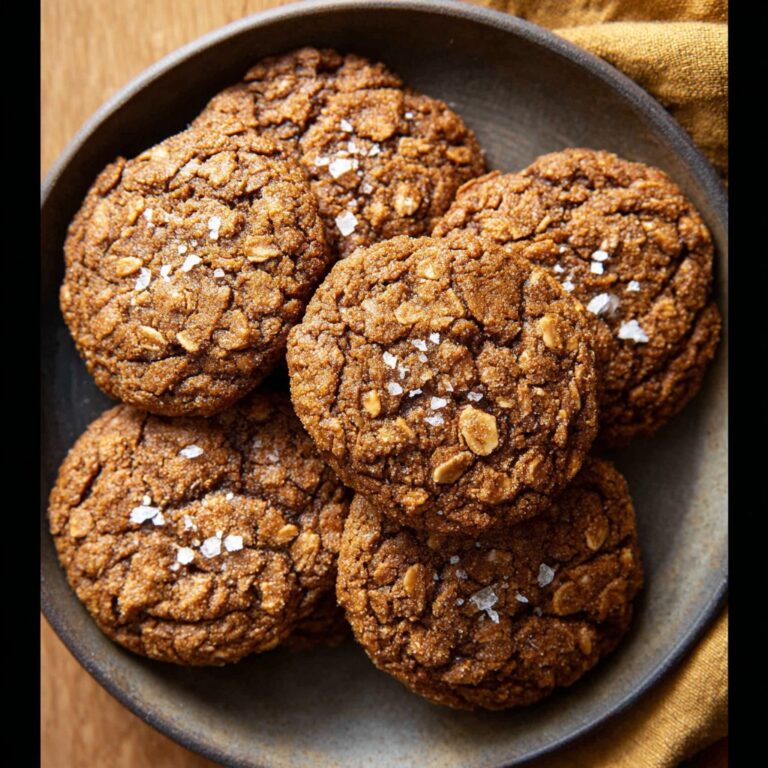
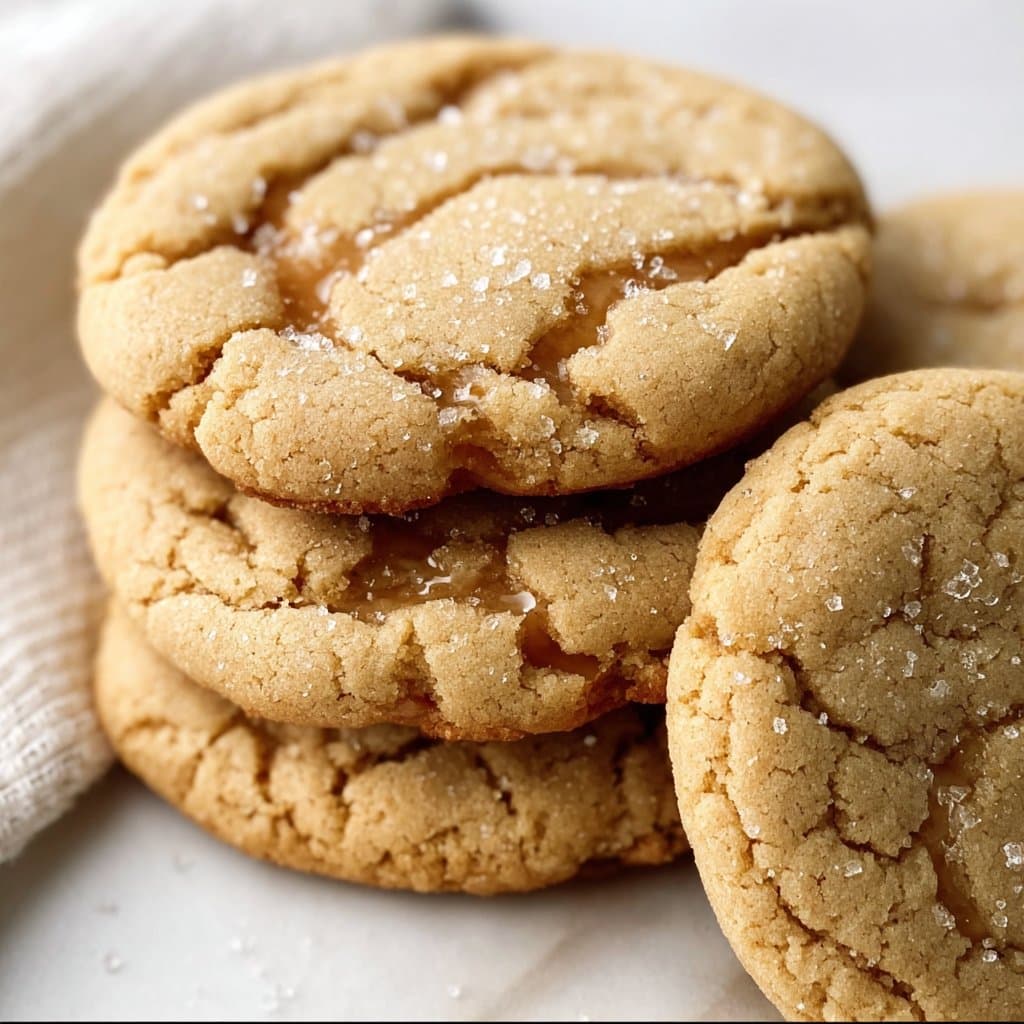
Maple Brown Sugar Cookies Recipe — Sweet, Cozy & Easy Treat
Let’s Chat About Maple Brown Sugar Cookies (And My Slight Oops)
If you’ve ever baked just to make the whole house feel cozy, well, you’re in good company. Maple brown sugar cookies? Absolute autumn magic — though honestly I make them in July too; seasons are a suggestion. The first time I made these, I nearly forgot the eggs because I was talking to my neighbor about her cat’s “impressive tail” (her words, not mine), and somehow the cookies still turned out fantastic. Or maybe I just wanted dessert so badly that I didn’t care — debatable. Either way, if you don’t mind a little sticky, sweet chaos and want your kitchen to smell like a pancake breakfast gone rogue, keep reading.
Why I Keep Making These — Even When I Shouldn’t
I make these cookies whenever my kids start that “we’re so hungry we might faint” drama at 9 p.m. (frankly, I suspect it’s a ruse for snacks). My family goes nuts for these — literally the jar gets raided before they’re properly cool! Sometimes I try to hide a few for myself, but that’s a losing game. If you love soft, chewy cookies with a maple kick and a whisper of caramel flavor from the brown sugar, you’ll love these. And I’m telling you, even my brother-in-law who’s suspicious of anything not chocolatey asks for the recipe. One warning: I’ve overbaked these a couple of times — they get crunchy at the edges, good for tea-dunking, not so great for my chewy-cookie-loving heart.
What’s Going in the Bowl? Ingredients (Substitute Roulette)
- 1 cup unsalted butter, softened (I have used salted in a pinch, but cut back any added salt)
- 1 1/4 cups packed dark brown sugar (though my grandma swore by Muscovado, regular brown sugar is just fine)
- 1/4 cup pure maple syrup (the real stuff if you can swing it, but pancake syrup in an emergency isn’t the end of the world — I promise)
- 2 large eggs (or 3 small, if that’s all you’ve got)
- 2 1/2 cups all-purpose flour
- 1/2 teaspoon baking soda
- 1/2 teaspoon salt (skip it if using salted butter)
- 1 teaspoon vanilla extract (maple extract does work here too, if you’re in a very maple mood)
How I Actually Make Them — Directions with Detours
- Cream together the butter and brown sugar till fluffy. I just use a wooden spoon if my stand mixer bowl is dirty — takes a bit longer, but arm workout justified.
- Now pour in the maple syrup and vanilla; beat that in until it looks kind of like caramel. Don’t sweat it if it looks split, everything comes together when you add flour.
- Add eggs one at a time. This is where I usually sneak a taste, though raw cookie dough blah-blah warnings apply.
- In another bowl, loosely mix the flour, baking soda, and salt. I sometimes skip this separate bowl business and just sprinkle them straight in — less washing up, but not strictly textbook.
- Combine your dry and wet stuff gently; stop when you see the last streak of flour. If you beat these to oblivion, the cookies go tough city (been there, regretted that).
- Chill the dough for at least 30 minutes, or until you get distracted by an episode of Bake Off. Actually, I find that overnight in the fridge makes the flavors pop, but half an hour works in real life.
- Preheat oven to 350°F (175°C). Drop balls of dough (about a ping pong ball, technically 2 tablespoons) onto a lined baking sheet. I occasionally roll mine in a bit of sugar for sparkle but that’s a whim thing.
- Bake 10 to 12 minutes. Edges should look set but centers a tad soft. Take them out, trust me. They’ll firm up while cooling.
- Cool on the tray — or do what my dad does, which is eat them straight off the pan with a spatula (don’t burn your tongue though; voice of experience).
Notes (AKA Oops, Learned That the Hard Way)
- If you use cheap syrup, cookies taste sweeter but not as mapley — not bad, just different. Actually, sometimes I like that for variety.
- Too much flour makes them dry quick — keep a light hand.
- I once used a hand mixer at high speed and the dough went everywhere. Lesson: low and slow works better here.
Variations (Some Good, One Not So Genius)
- Add chopped pecans or walnuts for crunch — my aunt swears by it. I usually forget.
- White chocolate chips actually work surprisingly well (who knew?).
- Tried adding raisins once. Don’t. They get weirdly chewy — live and learn.
Equipment You (Sorta) Need
- Stand mixer or trusty wooden spoon (if your arms are feeling peppy).
- Baking sheets lined with parchment (or just butter ’em if you’re out. Wax paper melts, don’t use that — ask me how I know).
- Mixing bowls. Size doesn’t really matter; just not too tiny or you’ll be wearing flour for days.
- If you don’t have a cookie scoop, two spoons work fine — or hands, it’s dough, not rocket science.
Stashing Your Cookies (If Any Make It That Far)
Keep them in an airtight container at room temp. They’re softest the first day, get a chewier middle by day two; honestly, in my house these barely last 24 hours, so storage is more theoretical than practical. Oh — they freeze well too, for up to 2 months, but label them or you’ll forget what the mystery lump is. Source? Me, last month.
Want to Show Them Off? Serving Ideas from My Table
I love them with hot coffee, right out of the oven, but the official family tradition is making ice cream sandwiches from two cookies and a scoop of vanilla. Slightly melty, absolute joy. Once, we crumbled them on pancakes, too — decadence.
Real-World Lessons (Because Perfection Is Boring)
- Chill the dough, even if you’re impatient. I rushed it once and they spread like pancakes — not the vibe.
- Don’t overmix the flour in. Dense cookies are a letdown, take my word for it.
- Don’t bake two trays at once unless you’re rotating halfway, unless you enjoy lopsided cookies with crispy bottoms.
FAQ-ish: People Actually Ask Me…
- Can I use light brown sugar?
- Yeah, definitely! They’re a bit less caramel-y, but still tasty. Sometimes I even do a mix of both if I’m running low.
- Do I have to chill the dough?
- No one will find you if you skip it, but the cookies will be a bit thinner and crispier — so if you like that, go ahead!
- Is maple extract necessary?
- Nah. But if you love things punchy, chuck in half a teaspoon. Just don’t use too much or it gets weird and fake-tasting, in my opinion.
- What if I don’t have parchment paper?
- Just grease the tray generously. Or, if you have one, a silicone baking mat is a lifesaver (I found a good review on Sally’s Baking Addiction for pan options that helped me pick mine).
- Are these super sweet?
- Pretty sweet, but not toothache-level. If you want them less sugary, cut the brown sugar by 1/4 cup, but don’t blame me if they don’t spread as much!
- Need more cookie recipes?
- I get lots of inspiration from King Arthur Baking — great resource!
Small side note — I once tried to pop a couple of these in my bag for a hike and, let’s just say, crumbly pockets make terrible trail snacks. Next time, I’m bringing granola bars and saving the cookies for tea break.
Ingredients
- 2 1/4 cups all-purpose flour
- 3/4 cup unsalted butter, softened
- 1 cup brown sugar, packed
- 1/4 cup pure maple syrup
- 1 large egg
- 1 teaspoon vanilla extract
- 1/2 teaspoon baking soda
- 1/4 teaspoon salt
Instructions
-
1Preheat oven to 350°F (175°C) and line a baking sheet with parchment paper.
-
2In a large bowl, cream together the softened butter and brown sugar until light and fluffy.
-
3Beat in the egg, maple syrup, and vanilla extract until well combined.
-
4In a separate bowl, whisk together the flour, baking soda, and salt. Gradually add to the wet ingredients and mix until just combined.
-
5Scoop dough by tablespoons onto the prepared baking sheet, spacing cookies about 2 inches apart.
-
6Bake for 9-11 minutes, or until edges are lightly golden. Allow to cool on the baking sheet for 3 minutes before transferring to a wire rack to cool completely.
Approximate Information for One Serving
Nutrition Disclaimers
Number of total servings shown is approximate. Actual number of servings will depend on your preferred portion sizes.
Nutritional values shown are general guidelines and reflect information for 1 serving using the ingredients listed, not including any optional ingredients. Actual macros may vary slightly depending on specific brands and types of ingredients used.
To determine the weight of one serving, prepare the recipe as instructed. Weigh the finished recipe, then divide the weight of the finished recipe (not including the weight of the container the food is in) by the desired number of servings. Result will be the weight of one serving.
Did you make this recipe?
Please consider Pinning it!!