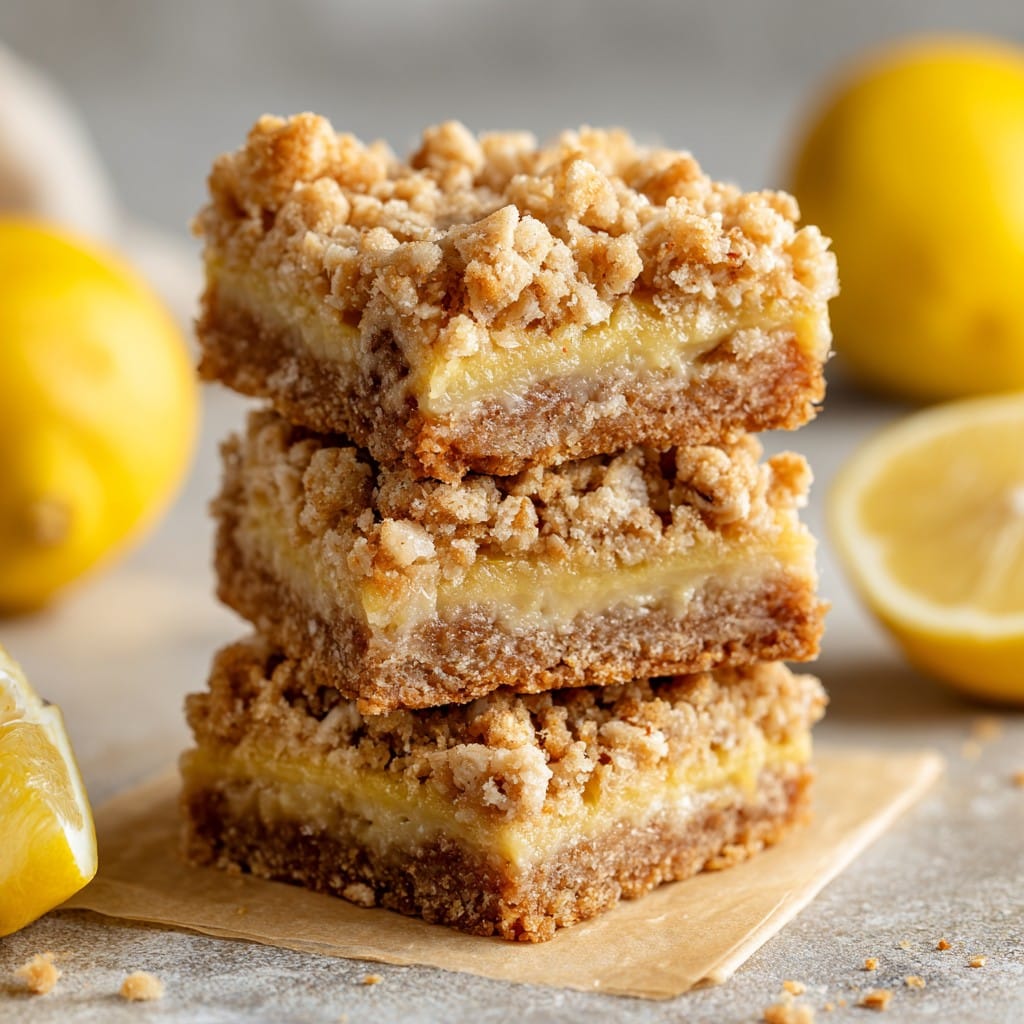
Lemon Oatmeal Crumble Bars: My Homey, Tangy Bake Story
Let’s Be Real: Why I Bake These Bars Again (…and Again)
Alright friend, so imagine this: it’s one of those grey, drizzly Tuesdays, the kind where the cat just sits in the window judging you and you could really use a slice of something cheerful. That’s when I drag out the rolled oats and lemons for these Lemon Oatmeal Crumble Bars. The first time I made them, I legit thought I’d ruined the whole batch because I measured out the lemon juice absentmindedly—twice, actually. Turns out, the extra zing made them perfect (not that I’d admit my mistake to my mum, who’s the queen of precise baking). But honestly, these bars are the cure for any gloom, kitchen mishap or otherwise.
Funny little story—last Christmas, my nephew swiped half the corner piece when my back was turned and then tried to blame the dog. I can’t really blame him. Even cold, these things go faster than hotcakes (is that still a thing people say?).
Why You’ll Really Love These Bars (Am I Bias? Probably.)
I make this when a full blown tart or cheesecake is just not going to happen—who has that kind of resolve at 8pm? My family goes absolutely nuts for the crumbly top and the tangy lemon layer—my mum even puts them on the “hide-from-dad” shelf. Sometimes I make them when I’ve got lemons to use up and, ok, when I need want something nostalgic. One thing though: getting the oatmeal to be crispy without being dry took me ages (if you’re fighting that beast, don’t give up—the secret’s in the butter, I promise). And also, the cleanup isn’t too bad. At least not compared to that one time I made sticky toffee pudding and basically cemented my pan shut for three days. But I digress!
What You’ll Need (or What I Grab When I’m in a Rush)
- 1 cup (250g) unsalted butter, melted (I use salted if that’s all I have. It honestly works; just hold back on extra salt.)
- 1 and 1/2 cups old-fashioned oats (Quick oats sort of work too, but texture is a bit different. My gran swore by Quaker, but any brand honestly.)
- 1 and 1/4 cups all-purpose flour (Whole wheat adds a nice nutty thing, so swap in half if you want to feel virtuous.)
- 3/4 cup brown sugar, packed (I use light, but dark is actually lovely if you like that caramelly hit.)
- 1/2 teaspoon baking soda
- 1/4 teaspoon salt (unless you’re using salted butter—then just a little pinch.)
- 1 cup lemon curd (store-bought or homemade; I usually use this easy lemon curd recipe because it’s not fussy)
- Zest of 1 big lemon (or 2 smaller ones—sometimes I just eyeball it if I’m tired. More zest = more punch.)
- 1 tablespoon fresh lemon juice (I have used bottled when I’m desperate, and nobody noticed. Maybe don’t tell my husband…)
- Optional: handful of chopped nuts (pecans or almonds), or a pinch of cinnamon (for a different vibe)
How To Throw It All Together
- Preheat your oven to 350°F/180°C. Line an 8×8-inch (20x20cm) baking pan with parchment. I leave overhang to help yank the bars out later, but if you skip this and everything sticks, don’t blame me. Just kidding—but seriously, parchment saves lives (or at least, desserts).
- Mix melted butter, oats, flour, brown sugar, baking soda, and salt in a big bowl. Use a fork or your hands—I usually start with a spoon, then go in with hands because it’s more fun (and works better, actually).
- Take out about a cup of this oat mixture and set it aside for the crumble topping. Don’t be precious about the measurement—close enough is good enough.
- Press the rest firmly into your pan. You want a solid base, but not packed so tight it turns to concrete. Somewhere in between. Smooth it out. This is where I usually sneak a crumb. For science.
- In a small bowl, mix lemon curd with zest and lemon juice. Give it a good stir. (Taste it! Too tart? Add a tiny bit of powdered sugar; not that you ever asked for my opinion.)
- Spread this lemony goodness over your oat base evenly. Don’t stress if it’s a bit runny—mine always is, and it turns out fine.
- Crumble your reserved oat mixture all over the top. I like to add some big clumps for texture. If you’re using nuts or cinnamon, this is their moment.
- Bake on the middle rack about 30–35 minutes. When the top looks golden (not blond, not burnt—sort of sun-kissed) and your kitchen smells like a lemon-scented candle factory, you’re done.
- Let cool for a good hour—if you can wait. Warm bars are squishy and messy but, honestly, still delicious. For cleaner slices, refrigerate them after cooling. Or don’t, if you like living dangerously.
Notes: Little Lessons (From Mild Heartbreak and Small Victories)
- Don’t panic if your base seems sandy before baking—it firms up. I once thought I’d ruined it, but nope.
- If your lemon curd is very wobbly, pop it in the fridge for ten before spreading. Actually helps.
- The bars do taste even better on the second day (when they survive that long, which is rare in my world).
How I’ve Tweaked This (and What I’d Probably Avoid Next Time)
- Swapped in homemade raspberry jam in place of lemon curd once—actually, it was terrific. Blackberry, though? Meh, bit too sweet for me.
- Halved the butter once—don’t do that. Turned out dusty. Live and learn!
- Used gluten-free flour mix; it worked, a bit softer but still tasty (helpful if you’re baking for friends with coeliac).
Gear You (Sorta) Need – Or Improvise Like I Do
- A square baking pan—metal or glass, doesn’t matter. I once used a round cake tin and just called them wedges instead of bars.
- Mixing bowls, at least one big.
- A zester or microplane is handy, but I’ve used the fine side of a box grater in a pinch. The results are, let’s say, rustic.
- Parchment paper makes life easier, but wax paper will do if you’re careful (don’t bake it too hot though).
How To Store Them (If You Actually Have Leftovers)
Pop them in an airtight tin at room temp for up to two days, or in the fridge for five. But honestly, in my house, there’s never anything left by morning—if I blink, they’re gone. You can freeze them, but thawing makes the crumble a bit softer. Still tastes decent straight from the freezer if you’re desperate at midnight, not that I’m admitting to anything.
How I Like To Serve ‘Em
Just with tea, honestly, or sometimes a scoop of vanilla ice cream if I’m feeling fancy (or, you know, showing off for mates). My niece prefers them as breakfast with yoghurt—she claims it counts as health food that way. We don’t argue.
Pro Tips (A.K.A. What I Messed Up So You Don’t Have To)
- Don’t rush the cooling. I once sliced too soon and it was a lemon-crumb avalanche.
- Actually, let the oats and butter mix sit a couple minutes before pressing in the pan—it seems to hold together better, I swear by it now.
- Taste your lemon curd before using! I got a super sour one once and, wow, that woke everybody up fast.
Real Questions I Get (And My Sometimes-Honest Answers)
- Can I use lime instead of lemon?
- Oh, sure thing! It’s a bit more tropical, but actually it’s pretty good (I tried it when I ran out of lemons; no regrets).
- What’s the best lemon curd to buy?
- Honestly, I love Bonne Maman’s but go with what’s on sale. I’ve never met a lemon curd that totally ruined the bars.
- My bars are crumbly. What’s up with that?
- Might be too little butter or not enough press-down. Or you cut them too soon (been there). Still edible, though!
- Are these super sweet?
- I’d say the balance is more tart-sweet, but it does depend on your lemon curd. If you like things less sweet, maybe use a touch less.
- Can I make them vegan?
- Yep—swap in plant-based butter and find a vegan lemon curd (or make your own, I use this Simple Veganista recipe). Works surprisingly well!
Oh, before I forget—does anyone else hum the Great British Bake Off theme while they wait for things to cool? No? Just me? Right, well, good luck with your Lemon Oatmeal Crumble Bars. If you make a mess, blame it on the recipe (just kidding!).
Ingredients
- 1 cup all-purpose flour
- 1 cup old-fashioned rolled oats
- 3/4 cup brown sugar, packed
- 1/2 teaspoon baking powder
- 1/4 teaspoon salt
- 1/2 cup unsalted butter, melted
- 1 large egg
- 3/4 cup lemon juice (freshly squeezed)
- 2 teaspoons lemon zest
- 1 14-oz can sweetened condensed milk
Instructions
-
1Preheat oven to 350°F (175°C). Grease and line an 8×8-inch baking pan with parchment paper.
-
2In a large bowl, mix together flour, oats, brown sugar, baking powder, and salt until combined.
-
3Stir in melted butter and egg to form a crumbly mixture. Press about two-thirds of the crumble mixture into the prepared pan to form the base.
-
4In a separate bowl, whisk together lemon juice, lemon zest, and sweetened condensed milk until smooth. Pour lemon filling over the base.
-
5Sprinkle the remaining crumble mixture evenly over the lemon filling.
-
6Bake for 30 minutes or until the top is golden brown. Let cool completely before cutting into bars.
Approximate Information for One Serving
Nutrition Disclaimers
Number of total servings shown is approximate. Actual number of servings will depend on your preferred portion sizes.
Nutritional values shown are general guidelines and reflect information for 1 serving using the ingredients listed, not including any optional ingredients. Actual macros may vary slightly depending on specific brands and types of ingredients used.
To determine the weight of one serving, prepare the recipe as instructed. Weigh the finished recipe, then divide the weight of the finished recipe (not including the weight of the container the food is in) by the desired number of servings. Result will be the weight of one serving.
Did you make this recipe?
Please consider Pinning it!!