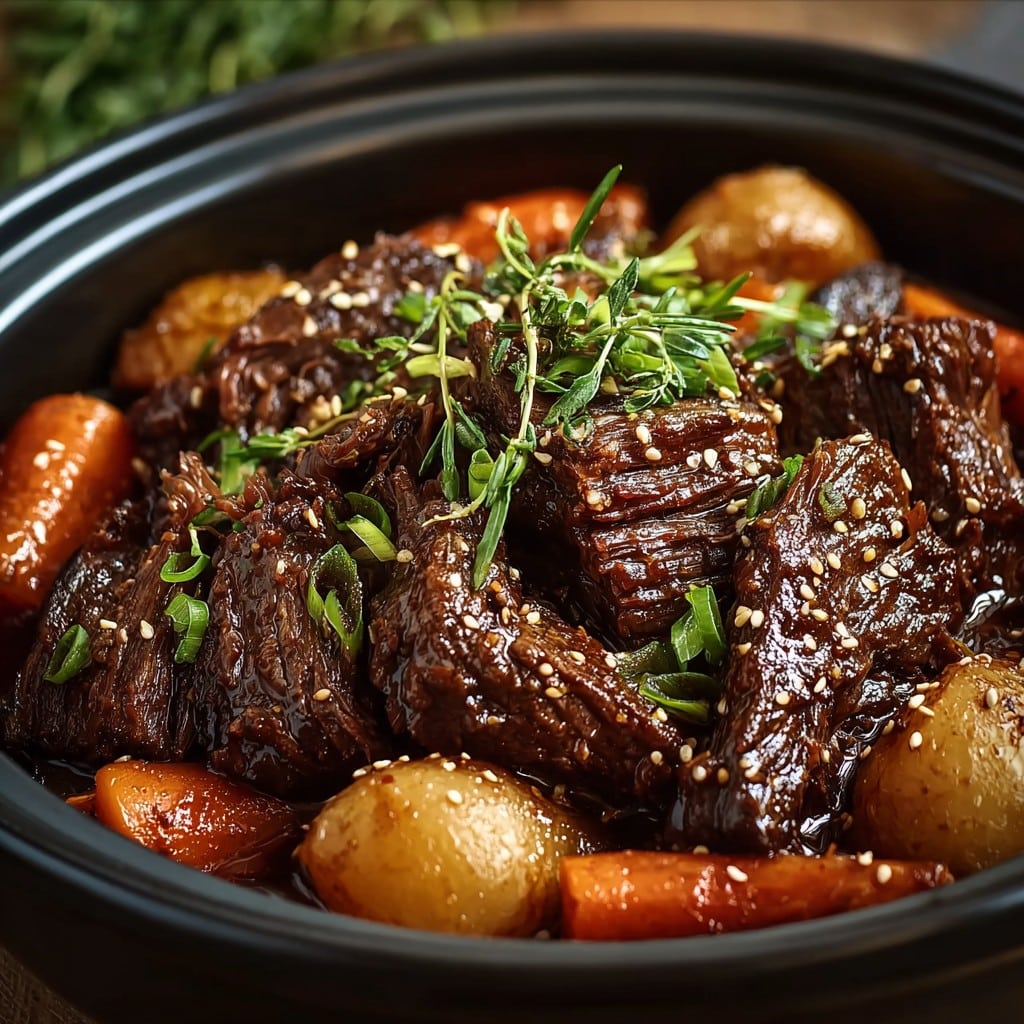
Korean Style Pot Roast: A Cozy, Flavorful Twist for Dinner
So, Korean Style Pot Roast — Here’s What Happens at My Place
I remember the first time I tackled this Korean Style Pot Roast, I hadn’t even heard of gochujang (the red stuff that stains your shirt, you know?), and I think my mom half-expected the kitchen ceiling to cave in. Spoiler: It didn’t, unless you count the smoke alarms. There’s a particular winter Sunday that stands out: me, the tiniest (and, let’s be honest, slightly impatient) assistant chef, my brother poking his nose in every few minutes, and a house that slowly started smelling like absolute heaven. You know, the kind of smell that worms its way into your sweater. Anyway, by the time we sat down and tucked in, it’d been a whole day of waiting, but — man — did it taste like a bear hug. If you ever need a meal to impress or just want lefties for a week, this is the one. Just be prepared for someone to sneak a bite before dinner actually starts. Not naming names (me).
Why You’ll Love This (Assuming You Have Time!)
I make this when I want something that tastes like it took forever, but actually most of that time, I’m just peeking in the oven with a mug of tea. My family? Well, they practically hover when this is cooking — except for that one time I tried using too much ginger (ginger-savvy folks, go easy!). I’ve even made this for friends who usually stick their noses up at “fusion stuff,” and they always go for seconds. (And occasionally thirds; hey, no judgment here.) And on those rushed days, I love that I can just toss some of the ingredients in without really measuring — it’s forgiving like that. Oh, and if you ever feel like beef is a bit much, I’ve swapped in pork before — it’s surprisingly good, but beef still wins in my book.
Here’s What You’ll Need (But Don’t Quote Me on the Brands)
- About 3-4 lbs (1.5 kg) beef chuck roast (Chuck is ideal, but brisket or even pork shoulder works if it’s what you’ve got; my cousin swears by brisket, though, to me it’s just too pricy sometimes)
- 1 large onion, sliced thick (or two smaller ones if that’s what rolls out of your veg drawer)
- 5 cloves garlic, smashed (can’t go wrong with extra, right?)
- Thumb-sized piece of ginger, peeled and sliced (but honestly, I’ve used a big ol’ spoon of minced from a jar when I’m feeling lazy)
- 2-3 carrots, cut chunky (sometimes I just use baby carrots and call it a day)
- 2 potatoes, peeled and cut into halves (or quartered; I’ve also used sweet potato which is real nice)
- 1/4 cup soy sauce (Kikkoman if you have it, but I’ve used store-brand stuff just fine)
- 1/4 cup gochujang (that magical Korean chili paste — if you seriously can’t find any, a bit of miso plus chili paste isn’t bad)
- 2 tbsp brown sugar (I’ve done maple syrup in a pinch, but it makes things more runny)
- 2 tbsp rice vinegar (or apple cider vinegar — no one’s policing you)
- 1-2 tbsp toasted sesame oil (I tend to go heavy, but that’s just me)
- 2 cups beef broth (or chicken; I’ve very occasionally used one of those Better Than Bouillon things and hot water — works fine)
- 1 tsp black pepper
- Optional: 1/2 tsp crushed red pepper for a little fire (or leave it out if kids are eating, honestly it’s plenty with just gochujang)
- Handful of scallions, sliced (for serving, but if you forget, nobody will report you!)
- Toasted sesame seeds, for garnish (again, optional — I’ve skipped without any family mutiny)
Here’s How I Usually Pull It Off
- Brown the Beef: Start by heating a splash of any oil you’ve got in a heavy pot or Dutch oven. Sear the roast on all sides. Don’t be shy — this is where the flavor starts. And yes, your house will smell amazing; potential upside, neighbors might show up “just dropping by.”
- Vegetables Go In: Toss in the onions, carrots, and potatoes right on top. Some people do onions first, I just dump ’em all in here. Don’t stress about perfect slicing — they’ll break down anyway.
- The Sauce (Mix It Like You Mean It): In a bowl or big measuring jug, whisk together soy sauce, gochujang, ginger, garlic, brown sugar, vinegar, sesame oil, black pepper, and beef broth. Pour this over the beef and veggies. Take a second to treasure the color here — it’s pretty wild, but don’t worry if it looks too red; that all tones down as it cooks.
- Bring to Simmer: Let the whole thing bubble away on the stove for ten or twenty minutes. This is the moment I usually try sneaking a carrot piece to “check if it’s soft” (it’s not). Patience is a virtue (I’m still working on that bit).
- Oven Time: Lid on, then into the oven it goes at about 325°F (160°C) for 3 to 3.5 hours. I used to peek every 30 minutes, but honestly? Just ignore it. You can check after two hours and give things a turn, but it’s pretty low-stress. If it looks a bit dry, splash in a touch more broth or even just water.
- Shred (or Slice) and Rest: When the beef falls apart easily with a fork, pull it out and let it sit for ten minutes (you don’t have to, but it’s juicier if you do). Spoon off a little fat if you want, but I actually like to leave some for extra flavor. Shred with two forks right in the pot, or slice if you like neat pieces — up to you.
- Finish and Serve: Taste things now. Maybe it needs a bit more salt, or another splash of vinegar? Go with your gut. Toss scallions and sesame seeds on top, or just serve family-style and let everyone dig in. (This is also the point where I burn my mouth every single time. Sigh.)
Some Notes (Aka Oops, Lessons Learned)
- Once, I used regular chili paste instead of gochujang. It…was not the same. Still edible, but felt like it was missing its pants.
- If you want a thinner sauce, you can just leave the lid off for the last 30 minutes and let it cook down. Alternatively, do nothing; the sauce is forgiving.
- On second thought, skip extra ginger unless you really love it. It gets punchy fast.
- I find leftovers (if you get any!) taste better the next day, but the potatoes get a tad mushy. I don’t mind, but some people are picky.
What If You Want to Mix It Up?
- I once made this exact recipe with pork shoulder — actually pretty killer, just fattier. Chicken thighs weren’t as exciting; a bit boring, if you ask me.
- Try tossing in some daikon or napa cabbage last hour — changes things, but in a good way.
- In a real pinch, you could try even using a slow cooker; just do the browning up front. But, the oven method is my go-to.
- Once I tried subbing honey for the sugar. Strange aftertaste — not my best idea.
So, What Gear Do You Need?
- Heavy Dutch oven or big oven-safe pot (but if you only have a deep roasting pan or slow cooker, you can MacGyver it — cover tightly with foil if there’s no lid)
- Tongs or a pair of forks for shredding
- Sharp knife for hacking at veggies (I mean prepping… but you know what I mean)
- Cutting board, preferably not the warped one lurking at the back of your cupboard (but who am I to judge?)

How to Store This (If There’s Any Left)
Leftovers go in a sealed container in the fridge — keeps up to 4 days, though, honestly, in my house it never lasts more than a day! If you’re a planner, freezing works too (minus the potatoes, which get all weird in the freezer; so maybe pick them out first). I’ve reheated it in a pan or even the microwave, and either way, it kind of tastes deeper the next day.
How Do I Serve This? (Because Everyone Asks)
We always pile it up over jasmine rice — but sticky rice would rule, too. My uncle likes to tuck the leftovers into crusty rolls for a ‘fake banh mi’ sort of thing. You can spoon it over mashed potatoes, noodles, or even throw in sautéed greens (I did kale once, wasn’t bad at all). For some reason, my partner insists on extra gochujang at the table, which I think is overkill, but you do you.
Pro Tips — Stuff I Learned the Hard Way
- I once tried rushing the searing step and yeah, regretted it — the crust matters!
- Don’t skip the resting before shredding if you can help it. Meat gets juicier. (I used to skip it; now, I don’t.)
- Sometimes, I get too enthusiastic with the carrots and the stew looks like an orange mess. Hold back a little — balance is key.
Got Questions? Fire Away!
- Is this super spicy?
Not really — gochujang is more savory and a bit sweet. Want less heat? Use less or drop the chili flakes. - Can I do this in a slow cooker?
Yep! Brown everything first, then toss it in for 8 hours on low. (I almost always forget to start early enough though — plan ahead if you can) - What if I can’t find gochujang?
Honestly, try a mix of miso, a pinch of brown sugar, and chili paste — not quite the same, but way better than nothing! Here’s the one I usually use: Maangchi’s gochujang guide. - What’s the best cut of meat?
Chuck roast is my favorite, but really — brisket and pork shoulder both work fine. Brisket gets a bit firmer. - Anything I should not do?
Don’t skip the searing (it’s worth the mess). And don’t go wild with extra soy sauce — it gets salty fast. - Where do you get your Korean pantry stuff?
I usually hit up my local Asian market, but H Mart ships nationwide — super handy for stuff like gochujang. - How do I double this for a crowd?
Just scale everything up. Use a huge pan or split into two; don’t crowd the meat, or it’ll steam, not brown. Learned that the hard way!
If you’ve never tried this, I say give it a go. If it goes sideways, well, at least your kitchen will smell amazing and you’ll probably have some fun along the way — plus, you can always snag a backup pizza; no shame in that (I have, more than once). If you want more Korean comfort food rabbit holes, check out Korean Bapsang’s slow cooker version — she’s got great photos, too.
Ingredients
- 3 lbs beef chuck roast
- 1/2 cup soy sauce
- 1/4 cup brown sugar
- 1/4 cup rice vinegar
- 3 cloves garlic, minced
- 2 tbsp fresh ginger, grated
- 1 tbsp sesame oil
- 1 cup beef broth
- 2 large carrots, cut into chunks
- 1 large onion, sliced
- 2 green onions, sliced (for garnish)
- 1 tbsp toasted sesame seeds (for garnish)
Instructions
-
1Preheat the oven to 325°F (163°C). In a large Dutch oven or oven-safe pot, heat sesame oil over medium-high heat. Sear the beef chuck roast on all sides until browned, about 6 minutes.
-
2In a bowl, whisk together soy sauce, brown sugar, rice vinegar, garlic, ginger, and beef broth until combined.
-
3Add the sliced onions and carrots around the seared beef in the pot. Pour the prepared sauce over the beef and vegetables.
-
4Cover the pot with a lid and transfer to the preheated oven. Cook for about 3 hours, or until the beef is fork-tender.
-
5Remove from oven and let rest for 10 minutes. Slice or shred the beef. Garnish with green onions and toasted sesame seeds before serving.
Approximate Information for One Serving
Nutrition Disclaimers
Number of total servings shown is approximate. Actual number of servings will depend on your preferred portion sizes.
Nutritional values shown are general guidelines and reflect information for 1 serving using the ingredients listed, not including any optional ingredients. Actual macros may vary slightly depending on specific brands and types of ingredients used.
To determine the weight of one serving, prepare the recipe as instructed. Weigh the finished recipe, then divide the weight of the finished recipe (not including the weight of the container the food is in) by the desired number of servings. Result will be the weight of one serving.
Did you make this recipe?
Please consider Pinning it!!


