Homemade Cheesy Garlic Breadsticks: A Loved Family Snack
Let Me Tell You, These Cheesy Garlic Breadsticks Are Trouble (The Good Kind)
Alright, so you know that moment when you’re really craving something carb-y, cheesy, and maybe just a little bit over-the-top? That’s when I whip up my homemade cheesy garlic breadsticks. Honestly, I started making these back in my uni days; they were cheap, ridiculously easy, and—frankly—I needed something to keep me from ordering actual pizza every night. Plus, there’s a certain magic to the smell of garlic bread in the oven that seems to bring everyone out of their rooms (including the cat, who definitely shouldn’t be eating cheese but likes to test her luck regardless).
I remember once, I tried to make these when my oven timer was busted so I just guessed and, wow, let’s just say the bottom wasn’t exactly golden brown. Lesson learned: setting a phone timer is your friend. Anyway, if you’re after a buttery, garlicky snack that practically screams comfort food, pull up a chair. And if you end up eating half the tray before anyone else gets a look in—well, you wouldn’t be the first.
Why You’ll Love This Recipe (At Least, I Do!)
I make this recipe when it’s movie night or when I’ve got friends dropping by (which, okay, is a fancy way of saying I usually just make them when I need a quick pick-me-up). My family goes a bit bonkers for these—especially when I add a bit of extra garlic (because, honestly, there’s no such thing as too much). My brother actually tried to eat the leftovers cold and, well, he regretted that—let’s just say the microwave exists for a reason.
And there was that one time I burned the first batch because I got side-tracked looking at Smitten Kitchen’s tips for roasting garlic (dangerous rabbit hole, be warned). But when you get it right—fluffy middle, crispy edges, gooey cheese—perfection. I sometimes sneak a stick while they’re too hot and just blow on it until it won’t destroy my mouth. You know what I mean, right?
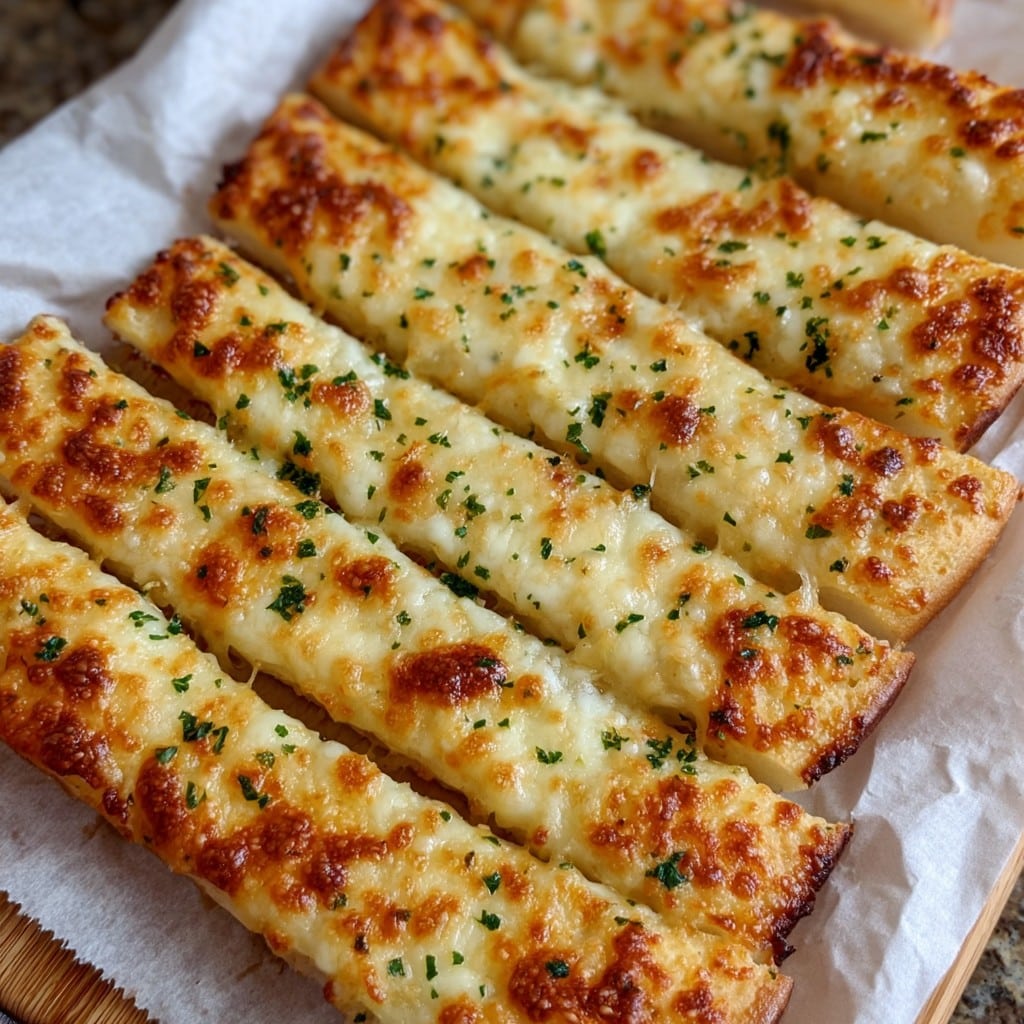
Gather Your Ingredients (Nothing Too Fancy)
- 1 ball of pizza dough (around 400g, shop-bought is 100% fine—my grandma called it cheating but honestly, she’d use it in a pinch)
- 2 cups shredded mozzarella cheese (I have swapped in cheddar or, uh, whatever is lurking in the fridge. Go wild)
- 2–3 cloves garlic, minced (Or a fat tablespoon of garlic paste if you’re lazy—as I definitely am on Wednesdays)
- 3 tablespoons unsalted butter (sometimes I melt it with a splash of olive oil if I’m feeling ‘fancy’)
- 1/2 teaspoon dried oregano (or Italian seasoning blend—who’s judging?)
- 1/4 teaspoon salt (I eyeball it, honestly)
- 1 tablespoon chopped fresh parsley—totally optional, I forget it half the time
- Grated parmesan for sprinkling (my cousin swears by the stuff in the green can, but it all melts down nicely)
How to Make Them (Just Go With the Flow)
- Preheat the oven to 220°C / 425°F. Line a baking tray with parchment paper. No parchment? Just oil up the tray; it’s not a dealbreaker.
- Roll out your dough on a floured surface—about the size of a baking sheet. If it’s trying to spring back, let it rest a minute (sometimes I mutter at it, not sure it helps).
- Transfer the dough to your tray. If it looks a bit wobbly, that’s fine. I just pat it out until it’s vaguely rectangular.
- Melt the butter in a small pan and stir in your garlic. If you’re not a fan of raw garlic, gently cook it for a minute until fragrant. Pour (or brush) this all over the dough. This is where I usually take a big whiff because, yum.
- Scatter the mozzarella over everything. If you love cheese as much as we do, throw on an extra handful. Sprinkle with salt, oregano, and parmesan.
- Bake for 12–15 minutes, or until the cheese is golden and bubbling around the edges. Don’t freak if the cheese slides off the sides a bit (happens to me every time, it’s all part of the rustic charm).
- Let it cool for about 3–5 mins, then slice into sticks with a pizza cutter. Or a big knife—I have used both depending on what’s clean.
- Top with parsley if you want (but, no pressure).
Honestly Useful Notes
- If you keep your dough a bit thicker, you’ll get fluffier breadsticks. That said, pizza-thin is also good—just different.
- Tried garlic powder instead of fresh once—eh, it’s ok in a pinch but doesn’t hit the same.
- Pre-grated mozzarella melts fine, but has a bit less stretch. I only grate fresh if I’m feeling virtuous, which isn’t often.
- Lining the tray means less washing up, which is honestly a significant perk.
Variations I’ve Tried (Some Winners, Some Not-So-Much)
- Tossed on thinly sliced jalapeños once. Spicy, but in a good way.
- Did a “breakfast” version with crumbled bacon. Pretty epic but, wow, rich.
- Swapped in vegan cheese for a friend—worked fine, just keep an eye on melting (some vegan cheeses get odd texture-wise).
- Tried adding sun-dried tomatoes: honestly, a bit too chewy. Maybe I did it wrong?
Do You Actually Need Special Equipment?
A rolling pin is nice, but I’ve legit used a wine bottle before. Parchment paper is handy but, as I said, oil works. Pizza cutter? If you don’t have one, a sharp knife does the job—just maybe don’t cut up the tray itself (done that, regretted it).
How to Store (In Theory…)
Officially, you can wrap leftovers in foil and keep them in the fridge for up to two days. Realistically, mine never see sunrise. If you do manage to have some left, reheat them in a toaster oven or hot oven for best texture. Microwave makes them chewy, but still wicked tasty.
How I Love to Serve These
We sometimes dunk these in marinara sauce, but my secret favorite is alongside a bowl of soup—tomato, especially. Also good with, like, everything. Oh, and my cousin likes to eat them cold for breakfast; controversial, I know.
What I Wish I’d Known Earlier (Aka Pro Tips)
- I once tried to skip the resting-the-dough step and it fought back—don’t rush that part unless you like bouncy dough in your face.
- Let the breadsticks cool a few minutes before slicing. I always try to rush this bit and things get messy (but, also, deliciously melty).
- A gentle hand with the garlic is wise if you’re serving this to, like, coworkers. Just saying.
Your Questions, (Mostly) Answered
- Can I freeze these breadsticks?
I’ve honestly never had leftovers to try, but one friend said she wraps them tight and they freeze fine. Just reheat in the oven—no guarantees it’ll be as good as fresh, though. - Gluten-free dough?
Sure, if you can get your hands on it! Actually, I think the cheese and garlic cover up any weirdness from most gluten-free doughs, so knock yourself out. - What if I don’t eat cheese?
Oof, tricky. Maybe try a dairy-free cheese or go ultra garlicky and skip the cheese altogether, which is—wait, who am I kidding, it’s called cheesy breadsticks for a reason. But hey, you do you! - How do I double this recipe?
Just double all the amounts and use two trays. Or make it in a bigger sheet pan. Be prepared for slightly longer bake time (keep an eye on the cheese—brown is great, black is… not so much). - What’s a good dipping sauce?
Marinara’s classic, ranch is a guilty pleasure, and occasionally I use sriracha mixed with mayo for a real kick. Try a few and see what you like best (warning: addictive!).
Anyway, if you make these Homemade Cheesy Garlic Breadsticks, I hope they go down as quickly at your place as they do at mine. And hey, if yours come out a bit rustic, that just means they’re homemade—honestly, that’s half the charm.
Ingredients
- 1 cup warm water
- 1 tablespoon granulated sugar
- 2 1/4 teaspoons active dry yeast
- 2 1/2 cups all-purpose flour
- 1 teaspoon salt
- 2 tablespoons olive oil
- 3 tablespoons unsalted butter, melted
- 3 cloves garlic, minced
- 1 1/2 cups shredded mozzarella cheese
- 2 tablespoons grated Parmesan cheese
- 1 tablespoon chopped fresh parsley (optional, for garnish)
Instructions
-
1In a large bowl, combine warm water, sugar, and yeast. Let it sit for 5 minutes until it becomes foamy.
-
2Add flour, salt, and olive oil to the yeast mixture. Mix until a dough forms, then knead for 5-7 minutes until smooth. Cover and let rise for 15 minutes.
-
3Preheat oven to 400°F (200°C). Roll out the dough on a floured surface into a rectangle, about 9×13 inches. Transfer to a parchment-lined baking sheet.
-
4Mix melted butter and minced garlic together. Brush the dough with the garlic butter, reserving a little for after baking.
-
5Sprinkle mozzarella and Parmesan cheese evenly over the dough. Bake for 15-18 minutes, or until golden and the cheese is bubbly.
-
6Brush with reserved garlic butter, slice into sticks, and sprinkle with fresh parsley if desired. Serve warm.
Approximate Information for One Serving
Nutrition Disclaimers
Number of total servings shown is approximate. Actual number of servings will depend on your preferred portion sizes.
Nutritional values shown are general guidelines and reflect information for 1 serving using the ingredients listed, not including any optional ingredients. Actual macros may vary slightly depending on specific brands and types of ingredients used.
To determine the weight of one serving, prepare the recipe as instructed. Weigh the finished recipe, then divide the weight of the finished recipe (not including the weight of the container the food is in) by the desired number of servings. Result will be the weight of one serving.
Did you make this recipe?
Please consider Pinning it!!