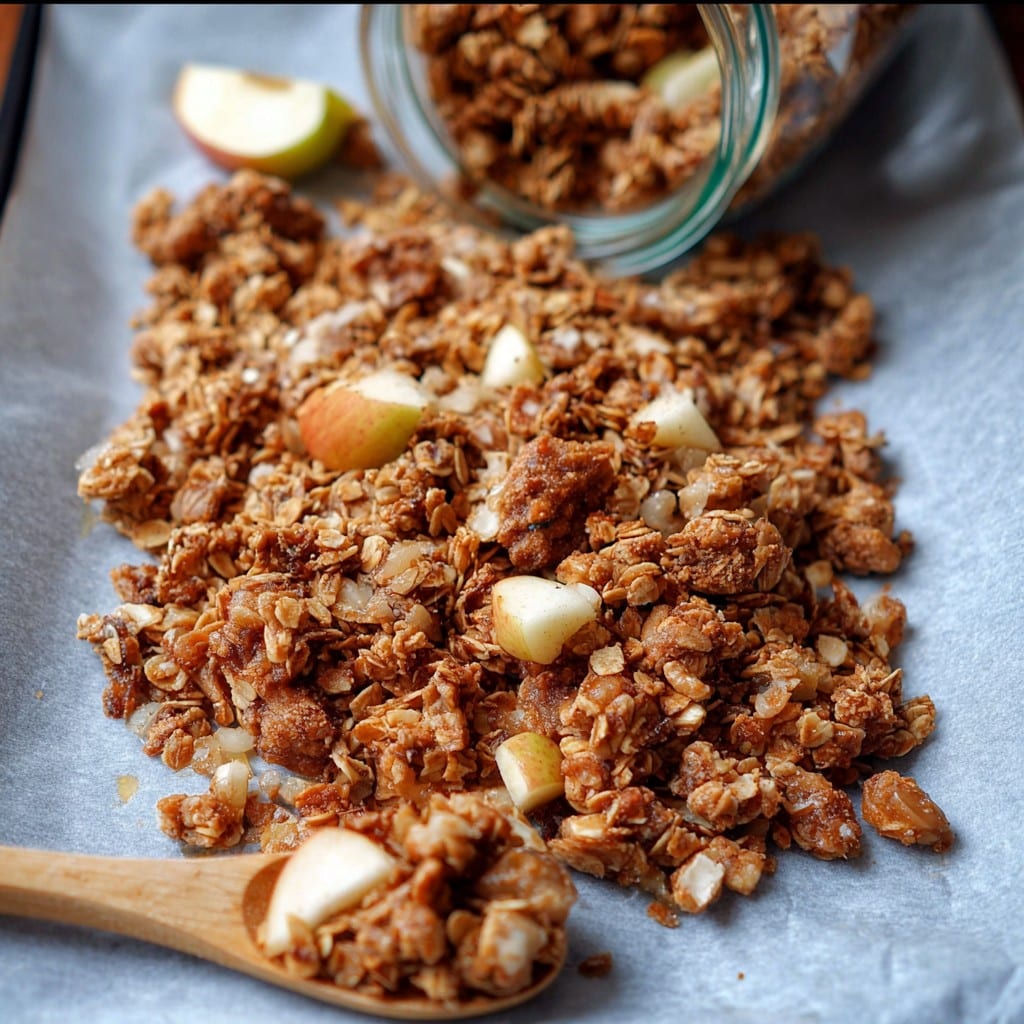
Healthy Apple Pie Granola: My Go-To Cozy Breakfast Recipe
The Story Behind This Granola (Or How I Stopped Buying Store-Bought Cereal)
I started making healthy apple pie granola one cold, sort-of-miserable November morning when my youngest declared, with full dramatic flair, that “cereal is so boring, Mum!”. It struck a nerve. I mean, I love a bowl of trusty old flakes, but honestly, who can blame her? So, inspired by some leftover apples and an, um… questionably sticky bag of oats lurking in the pantry, I whipped something up. The house ended up smelling like a Grandma’s kitchen (which is never a bad thing in my book) and now, whenever the cereal boredom strikes, this granola is what saves my bacon. Figuratively, I mean, I wouldn’t serve this with bacon.
Also—slight digression, but isn’t there something magical about the smell of baked apples and cinnamon? It makes even a drizzly Monday feel like it might turn out all right. Anyway. On to the nitty gritty.
Why I Keep Coming Back to This Recipe
I make this whenever I’m craving something comforting but don’t want to feel like I need a nap right after breakfast. The whole family goes bananas for it (um, apples, I mean!), probably because it tastes like fresh-out-the-oven apple pie meets crunchy granola. Also, I used to think granola was time-consuming, but—well, unless I get distracted scrolling for granola inspiration on Cookie + Kate (which totally happens)—it’s really not. The first time I tried it, I overbaked the batch and it was basically apple-scented gravel. Live and learn, as Gran says.
Oh, and the main reason? I know exactly what’s in it. No mystery bits. No suspicions. Just the stuff I can pronounce (most days anyway).
Here’s What You’ll Need (And a Few Substitutes I Swear By)
- 2 medium apples, grated (I like Honeycrisp or Granny Smith, but you do you. And, in a pinch, I’ve used pears. Worked fine.)
- 3 cups rolled oats (the old-fashioned kind. My grandmother always swore by Quaker, but the store brand does the job.)
- 1 cup nuts (walnuts or pecans; I’ve used almonds when that’s all I had)
- 1/2 cup unsweetened applesauce (if I’m out, sometimes I mash an extra apple with a fork—rustic but good)
- 1/3 cup maple syrup or honey (I use whichever’s on hand. Supposedly maple is healthier, but I can’t always taste the diff!)
- 1/4 cup coconut oil (melted; butter has happened once or twice—decent result, just a little more decadent)
- 2 tsp cinnamon
- 1/4 tsp nutmeg (the pre-ground stuff from the back of the cupboard works as well as fresh, in my humble opinion)
- 1/4 tsp salt
- 1/2 cup raisins or dried cranberries (optional. My husband pretends to hate raisins, so sometimes I just leave them out.)
How I Actually Throw This Together (Without Losing My Mind)
- Preheat your oven to 325°F (160°C). Line a big tray with baking paper—or if you’re out, just rub a touch of coconut oil on it. No shame.
- Mix the oats, your chosen nuts, spices, and salt in a large bowl. This is where I usually stop and inhale because the cinnamon smell is already worth it.
- In another bowl (or, let’s be honest, a measuring jug because it’s easier), whisk together the applesauce, maple syrup, coconut oil, and grated apples. Don’t worry if it looks a bit suspiciously chunky—once baked, it’s magic.
- Pour the wet into the dry and stir, stir, stir until every oat is a little glossy (or as close as you can get without breaking an arm).
- Spread it out on the lined tray in a layer about as thick as your thumb. Pop it in the oven for about 35 minutes (give or take—check at 30!), stirring once halfway. And please, don’t wander off to water the plants or you’ll get late-stage charred edges. Not that I’m admitting anything.
- After baking, let it completely cool on the tray. This is crucial for crunch; once I got greedy and scooped it off early and, well, sogginess happened.
- Add the raisins or cranberries at the end and give it all a good mix.
Things I’ve Learned (Sometimes The Hard Way)
- If you use quick oats instead of rolled, the texture is, hm, let’s say “different.” Kinda mushy—but still edible. Not my first pick.
- Don’t skip letting it cool fully—in fact, on second thought, let it cool even longer than you think, especially if you like big crunchy clusters.
- Be careful with the honey; once I got a little too generous and ended up with sticky, chewy clumps. Fun for pulling out fillings, less fun for actual breakfast.
Experiments, Substitutions, and a Failure or Two
- I once swapped in pumpkin puree for the apple sauce—eh, it worked, but felt more like autumn in a bowl. Not bad, just… different?
- I tried using chia seeds for crunch. Honestly, just got stuck in my teeth. Wouldn’t do that again!
- Swapping out half the oats for puffed rice makes it lighter but a touch less satisfying, in my (decidedly breakfast-obsessed) opinion.
What You Need (And What I Grab When I Can’t Find Stuff)
- Big mixing bowl (if yours is in the dishwasher, use a soup pot. Nobody will know.)
- Baking tray (cookie sheet, roasting tin—whatever fits your oven. I once used two loaf pans when I couldn’t find my tray. It worked, sort of.)
- Grater for the apples (or just chop them tiny. I used a knife once when I was feeling fancy. Not the same, but still worked.)
- Wooden spoon or spatula
Storing This Granola—If You Even Get the Chance
Keep it in an airtight jar (which sounds very pro, but I use a washed-out pasta sauce tub half the time). It stays fresh and crunchy for about a week, though honestly, in my house, it never lasts more than a day and a half. If it does get soft, a quick pop back in the oven (say, 5 minutes at 300°F) perks it right up. Learned this trick from Downshiftology’s granola tip.
How I Serve It (Spoiler: With Everything)
I love this best tumbled over thick Greek yogurt with a handful of fresh berries—sometimes a sneaky drizzle of almond butter if I’m feeling flash. My kids like it plain as a snack, or even sprinkled over vanilla ice cream for a sneaky dessert. And, odd as it sounds, I once tried it with a scoop of cottage cheese. Surprisingly not terrible!
My Hard-Earned (and Occasionally Regrettable) Pro Tips
- Rushing the stirring bit in the oven? Not worth it, mates—once I skipped halfway stirring and ended up with raw sections. So unless you want “half-baked surprise” in your bowl, just give it a quick toss.
- Check your oven temp. Mine runs hot on the right side, so I spin my tray around midway. Otherwise, you’ll get one side that’s tan and the other that’s sort of ghostly pale. Not ideal.
- Actually, I find it works better if I slightly underbake and let it finish crisping while cooling. It firms up a good bit off the heat.
Common Questions I Get (And My Real Answers)
- Can I use steel-cut oats? I’d say nah, not for this. Steel-cut oats are too toothy and never really soften up the way you want. Stick with rolled unless you like jaw workouts.
- Is it freezer-friendly? Yep! Just make sure it’s in a sealed bag or box. That said, mine has never lasted long enough to freeze, so take that with a pinch of salt.
- Is this recipe gluten-free? If you use gluten-free oats, totally. Otherwise, you know, the usual store oats might be a problem if you’re super sensitive.
- How do I make it chunkier? Smoosh it down on the tray and don’t stir much during baking. I only learned this after years of tiny crumbly bits. Oops.
- Can I add protein powder? I’ve tried it—once. Tasted a bit chalky, but maybe I used the wrong kind!
Anyway, here’s the thing: even if you mess it up a little (and we all do now and then), this healthy apple pie granola is about as forgiving as recipes get. Give it a whirl when you fancy something wholesome and homey—and let me know if you find a weirdly brilliant combo I should try next!
Ingredients
- 3 cups old-fashioned rolled oats
- 1 cup dried apples, chopped
- 1/2 cup raw pecans, chopped
- 1/2 cup unsweetened applesauce
- 1/4 cup pure maple syrup
- 2 tablespoons coconut oil, melted
- 1 1/2 teaspoons ground cinnamon
- 1/4 teaspoon ground nutmeg
- 1/4 teaspoon sea salt
Instructions
-
1Preheat the oven to 325°F (163°C) and line a baking sheet with parchment paper.
-
2In a large bowl, combine oats, pecans, cinnamon, nutmeg, and sea salt.
-
3In a separate bowl, whisk together applesauce, maple syrup, and melted coconut oil. Pour over the dry ingredients and mix well.
-
4Spread the mixture evenly on the prepared baking sheet. Bake for 25 minutes, stirring halfway through.
-
5Remove from the oven, add chopped dried apples, and gently toss. Bake for an additional 5 minutes, then let cool completely before storing.
Approximate Information for One Serving
Nutrition Disclaimers
Number of total servings shown is approximate. Actual number of servings will depend on your preferred portion sizes.
Nutritional values shown are general guidelines and reflect information for 1 serving using the ingredients listed, not including any optional ingredients. Actual macros may vary slightly depending on specific brands and types of ingredients used.
To determine the weight of one serving, prepare the recipe as instructed. Weigh the finished recipe, then divide the weight of the finished recipe (not including the weight of the container the food is in) by the desired number of servings. Result will be the weight of one serving.
Did you make this recipe?
Please consider Pinning it!!