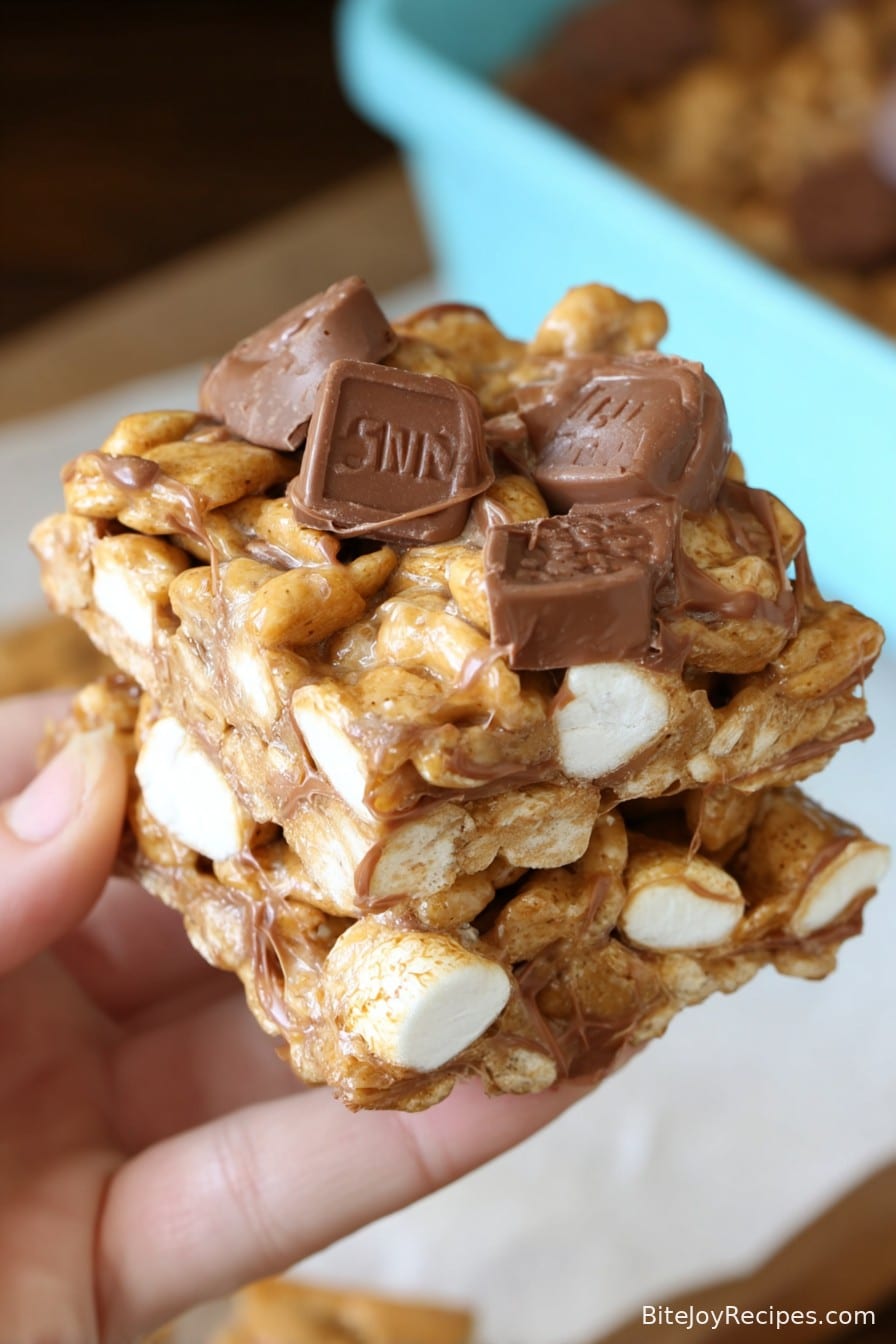
Golden Graham Bars
Okay, gather round, friends—you’re in for a treat. Golden Graham Bars are basically my kitchen’s answer to those times when dessert needs to happen fast, and preferably before the kids realize there’s cereal in the house. First time I whipped these up was for a game night (which is code for ‘just another excuse to snack’) and, not to brag, but they barely lasted an hour. Plus, there’s something just hilariously satisfying about pretending this counts as ‘using up pantry staples’ when what you’re really doing is making breakfast cereal into candy. If you ever needed an excuse to eat Golden Grahams at 9 PM—this is it.
Why I Think You’ll Love These (Or At Least Not Hate Them)
I make Golden Graham Bars when the snack cupboard is looking sad, but I want to seem like I put in more effort than just opening a bag of chips (hashtag mom life). My family goes bonkers for these, partly because there’s chocolate, and let’s be honest—mostly because half the time I forget to cut perfect squares and they get to ‘sample’ the edges. Also, if you kinda hate cleaning sticky pots (raises hand), these only use one.
Stuff You’ll Need (Don’t Sweat It If You Sub Here and There)
- 5 cups Golden Grahams cereal (I mean, any knock-off brand totally works. My gran swore by the real deal, but, meh.)
- 1 1/2 cups mini marshmallows + a big handful for fun
- 1 cup semi-sweet chocolate chips (sometimes I use milk chocolate, or even chopped up Halloween leftovers… it all melts!)
- 1/3 cup light corn syrup (in a pinch, honey works, though it’s a bit stickier—it has its own charm!)
- 1/4 cup unsalted butter (the salted kind works, too; just skip adding extra salt unless you’re feeling wild)
- 1 teaspoon vanilla extract (I eyeball this, who measures?)
- A pinch of salt (totally optional, but I think it brightens the flavors up)
Here’s How I Throw It Together
- Prep your pan: Grab an 8×8 or 9×9 baking dish and line it with parchment. If you don’t have parchment, I’ve used foil or even just buttered the dish so nothing sticks like glue later.
- Melt the gooey stuff: In a big pot, melt the butter over medium-low. Add corn syrup and 1 cup of the chocolate chips, stirring so it doesn’t scorch. I usually sneak a taste here—quality control, right?
- Toss in marshmallows: Add the 1 and 1/2 cups marshmallows. Keep stirring until everything’s smooth (if it gets lumpy, it’s okay. Smooth(ish) is fine—perfection is overrated.)
- Time for cereal: Remove pot from heat. Dump in the Golden Grahams and a pinch of salt, then stir to coat. Now, and this is crucial, toss in your extra handful of marshmallows and vanilla, stirring just until they’re sorta melty but still have a little shape.
- Layer and chill: Scrape the whole sticky mess into your prepped pan. Pat it down with the back of a greased spoon (or honestly, just your hands—it’s messy, but fun). Sprinkle the rest of the chocolate chips on top—they go all melty and delicious.
- Set and slice: Let it sit for at least 30 minutes to firm up. Longer if you can stand waiting, which, honestly, we never do. Cut into wonky squares and try not to eat four before dinner.
Pitfalls and Little Discoveries
So, I’ve learned the hard way: if you overheat the marshmallow mixture, it becomes this weird, chewy brick situation. Not great. Also, don’t try mixing the cereal in a tiny bowl. I did that once—in a fit of not wanting to wash my big pot—but ended up with cereal on the floor and a grumpy cat.
Wild (and Not-So-Wild) Variations I’ve Tried
- Peanut butter chips instead of chocolate chips—my kids loved it, but my husband claimed it was ‘a bit much.’ (He’s probably right for once.)
- Thrown in some chopped pecans. Tasty, but most of them fell out when slicing, so… meh.
- Used cocoa puffs instead of Golden Grahams. Weirdly, this one didn’t set right. Would not repeat, but I ate them anyway. Waste not, want not, eh?
- Sometimes, I sprinkle sea salt on top. Makes me feel fancy.

If You Don’t Have Every Gadget…
Honestly, you just need a big pot and a basic pan. That’s it. I’ve managed before with a cake tin when the baking dish was missing, and once used a wine bottle to press the bars flat (don’t tell my mother in law).
Keeping ‘Em Fresh (Not That They Last)
Store these cut bars in an airtight tub at room temp. Maybe they last four days? Hard to say, since in my house they’re lucky to see daylight the next morning. If it’s hot, they get a bit melty. Tuck some parchment between layers if you’re being proper.
How We Serve ‘Em (Traditions and Otherwise)
Here’s how we roll: dump them in a bowl, or pile them on a plate with a mug of hot chocolate. If you’re feeling grownup-y, cut tiny squares for tea. Or, be like my son and ask for one with a scoop of vanilla ice cream (I mean, why not?). Special occasions? I once put a candle in one instead of cake. Worked a treat.
Stuff I Wish I’d Known (You Can Learn From My Goofs)
- Don’t rush the melting, otherwise it’s weirdly grainy. Patience, grasshopper.
- Let them cool before slicing (I know, I know—I fail at this every time. Sticky knife central.)
- If it gets too hard, a microwave nudge (10 seconds) softens things up. Don’t overdo it, unless you enjoy lava-level snacks.
Your Questions Answered (Or at Least Addressed… Sort Of)
Q: Can I freeze Golden Graham Bars? Sure can—the texture’s a little different (gets a bit chewy), but it’ll do in a pinch. Wrap ‘em up good!
Q: Could I use big marshmallows? Oh, definitely. Just chop ‘em up—or not. They melt, eventually. Save the mini ones for stirring in at the end if you want melty bits in each bite.
Q: What if I’m short on cereal? I sometimes add a scoop of oats or even cornflakes. Once, I used stale animal crackers. It was… different. In a good-bad way.
Q: They’re so sticky!? Yeah, they are. That’s kind of the point, but if you oil your hands or the spoon, it’s easier. Or just embrace it and get messy.
Oh—random thought, but does anyone else always seem to have three open boxes of cereal in the cupboard, each with just enough left to be not quite enough? No? Just me? Anyway. Happy bar-making!
Ingredients
- 6 cups Golden Grahams cereal
- 1 (10 oz) bag mini marshmallows
- 1/4 cup unsalted butter
- 1 cup milk chocolate chips
- 1/2 cup semi-sweet chocolate chips
- 1/2 teaspoon vanilla extract
- 1/4 teaspoon salt
- Cooking spray, for pan
Instructions
-
1Grease a 9×13-inch baking pan with cooking spray and set aside.
-
2In a large pot over medium heat, melt the butter. Add the mini marshmallows and stir until completely melted and smooth.
-
3Remove the pot from heat and stir in the vanilla extract and salt.
-
4Add Golden Grahams cereal and gently stir with a spatula until all pieces are coated with the marshmallow mixture.
-
5Fold in the milk chocolate chips and half of the semi-sweet chocolate chips, being careful not to overmix so they don’t melt entirely.
-
6Press the mixture evenly into the prepared pan. Sprinkle remaining semi-sweet chocolate chips on top. Let cool completely, then cut into bars and serve.
Approximate Information for One Serving
Nutrition Disclaimers
Number of total servings shown is approximate. Actual number of servings will depend on your preferred portion sizes.
Nutritional values shown are general guidelines and reflect information for 1 serving using the ingredients listed, not including any optional ingredients. Actual macros may vary slightly depending on specific brands and types of ingredients used.
To determine the weight of one serving, prepare the recipe as instructed. Weigh the finished recipe, then divide the weight of the finished recipe (not including the weight of the container the food is in) by the desired number of servings. Result will be the weight of one serving.
Did you make this recipe?
Please consider Pinning it!!