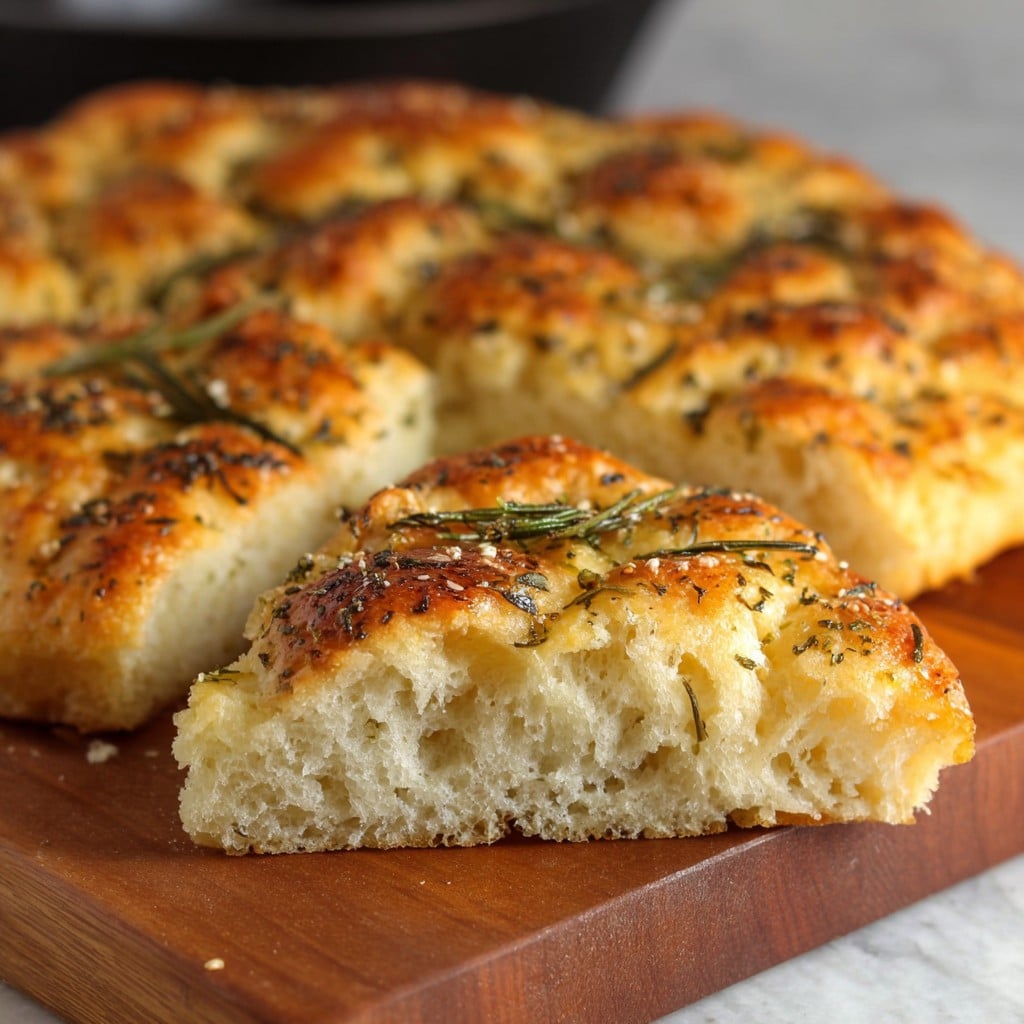
Gluten Free Focaccia Bread: My Down-to-Earth Home Baker’s Guide
So, Gluten Free Focaccia… Why’s It on My Table?
Alright, so here’s the deal. I started making gluten free focaccia bread when my cousin decided wheat was the culinary equivalent of a troublemaker at a polite dinner party. (It wasn’t exactly voluntary on her part.) Now, I’m usually not one to turn down a good crusty loaf, but it turns out that focaccia doesn’t need gluten to make your kitchen smell like an Italian bakery. Actually, there’s something deeply satisfying about watching a bunch of gluten free flours—stuff that could double as pillow stuffing, honestly—come together into the kind of chewy, olive oil–drenched flatbread that leaves everyone pretending they know what the word “crumb” actually means.
And if you’re the sort who talks to your food while it rises…well, you’re definitely among friends here.
Why I Keep Making This (Even When Life Gets Busy)
I make this gluten free focaccia when, frankly, I want to look like I’ve put in more effort than I have. My family demolishes it whenever it hits the table (the kids once asked if I could “please just serve this as dinner,” which… I mean, maybe someday). It’s my secret weapon when someone drops by unexpectedly, because who doesn’t love fresh bread with a bit of olive oil and sea salt? (I’d be lying if I said I don’t sometimes keep a batch on standby in the freezer—just in case I need an edible hug.)
Truthfully, the first few times were a bit chaotic: I either overbaked it or under-oiled the pan. But you figure things out after a few mildly tragic—but still very edible—loaves. Plus, no one in my house seems to mind the odd crispy edge or, erm, rustic look.
What You’ll Need (Substitutes and Family Drama Included)
- 2 cups gluten free all-purpose flour (I switch between Bob’s Red Mill and King Arthur but honestly, whatever’s easier to find, go for it)
- 1 tablespoon sugar (sometimes I use honey if I’m feeling fancy, just whisk it in with the wet stuff)
- 1 packet (or 2¼ tsp) instant yeast (my grandma had a thing for Fleischmann’s; I’ve used store brand, works fine)
- 1 teaspoon sea salt (table salt will do in a pinch)
- 1¼ cups warm water (not scald your finger hot, just comfortably warm)
- ⅓ cup olive oil (plus extra for drizzling – sometimes I cheat and use avocado oil if I’m out)
- 2 teaspoons dried rosemary (totally optional, but I do love that woodsy aroma)
- Course salt for topping
- Optional: a handful of cherry tomatoes, sliced olives, or caramelized onions for topping (I’ll toss on whatever’s threatening to turn in my veggie drawer)
Let’s Make It! (Don’t Sweat the Small Stuff)
- In a biggish bowl, whisk together your flour, yeast, sugar, and salt. (Don’t panic if there’s a tiny flour cloud—just means you’re really baking now.)
- Pour in the warm water and olive oil. Stir with a wooden spoon or spatula until you’ve got a thick, shaggy dough. It’ll be stickier than regular bread dough. That’s normal, don’t add extra flour. Actually, I once did and it got a wee bit brick-like.
- Line a 9×13 inch pan with baking parchment and drizzle on a big glug of oil (don’t be stingy here). Scoop the dough in and use your hands—damp works best—or a spatula to nudge it towards the corners. Don’t fret if it resists. It’ll relax after a bit.
- Here’s where I usually get distracted and forget to preheat the oven (400°F or about 200°C, in case you want to be precise). Cover the dough loosely with plastic wrap or a damp tea towel. Let it rise somewhere warm for 40-50 minutes. If it doesn’t double, that’s ok—it’ll puff up in the oven.
- Now, drizzle more olive oil over the top, get in there with your fingertips, and dimple the dough like you’re giving it a little massage. Sprinkle rosemary, coarse salt, and toss on whatever toppings you fancy. Sneak a taste of the oily finger if you want. You’re the chef.
- Bake for 25-30 minutes until golden around the edges. Sometimes mine’s ready in 24, sometimes 31—I just tap the top for that slightly hollow sound. And don’t worry if it looks odd. Focaccia is a rebel—it never turns out the exact same way twice.
- Cool for a few (good luck waiting), then slice and serve warm, or at least mostly not burning hot.
Some Notes (Aka, My Learning Curve)
- More oil = crispier crust. Sometimes it almost fries. I honestly love the extra crunch.
- This dough feels stickier than regular focaccia—resist the urge to keep flouring it to death.
- If your kitchen’s Arctic in the winter, stick the dough in the (turned-off!) oven with the light on. Works a treat.
- Fresh rosemary is gorgeous, but dried is usually what I actually have around. No shame.
How I’ve Tweaked It (And When It Backfired)
- I tossed in black olives and lemon zest—nice surprise tang. Sun-dried tomatoes sunk a bit, but tasted good anyway!
- Once I swapped all olive oil for coconut oil (don’t ask why, just a brainfart)—and regretted it. Too sweet, not savory enough. Lesson learned.
- Chopped fresh cherry tomatoes look pretty, but if you add too many, it gets soggy (voice of experience speaking here).
If You Don’t Have All the Fancy Gear?
Look, proper focaccia pans are nice. But last week I used a pie dish and it worked fine—just check a little earlier because the edges cook quicker. Don’t have parchment? Generously oil your dish, and say a little prayer when un-molding. I’ve totally used reusable silicone sheets, like this silicone baking mat from KitchenAid, and it worked a treat.
Storing It (Not That There’ll Be Leftovers…)
This honestly never lasts more than a day at my place—sometimes I find a single wedge left on the counter and it’s magically vanished by dinnertime. If you do end up with leftovers (miracles happen), wrap it in foil or pop it in an airtight container. Probably best within 2 days. You can freeze it too, but I think it gets a bit chewier when thawed, so maybe re-warm in the oven if you go that route.
How Do I Serve This? Glad You Asked…
We do it with olive oil and balsamic for dunking (or just straight-up butter if I’m feeling old-school). It’s great for mopping up soup—I made this gorgeous minestrone last week, and focaccia was the star side.) Sometimes I split it for sandwiches—makes a killer base for chicken salad or, if we’re being honest, a cheeky fried egg sando.
Stuff I Learned the Hard Way (So You Don’t Have To)
- Don’t rush the rise. Crumb gets goopy (I once tried, it wasn’t pretty and tasted a bit raw in the center).
- Don’t skimp on the oil or your crust will be sad—and that’s just no fun.
- (Optional, but fun) If you want an herby crust, add chopped rosemary or thyme after baking, too. The flavor is fresher.
Honestly, Ask Me Anything!
- Can I use an egg replacer or make it vegan?
- Good news: This recipe is already egg-free; I sometimes use agave instead of honey for a full vegan loaf. Works fine!
- My dough looks like pancake batter. What did I do wrong?
- Probably just a bit too much water (every flour blend acts differently). Stir in a tiny bit more flour, but honestly, focaccia dough’s supposed to be gloopy. Promise.
- Do I have to use instant yeast?
- I’ve used active dry in a pinch. Proof it first in the warm water with sugar and let it sit till it gets foamy—then carry on!
- Can I double this for a crowd?
- Absolutely; just use a big sheet pan and maybe an extra drizzle of courage. Watch the bake time and tell me how it goes.
- Where can I find good gluten free flours?
- I often grab mine form King Arthur Baking or even my local supermarket. No need to overthink this part.
Oh, and before I forget: the focaccia makes a surprisingly good breakfast with a little ricotta and tomato. Just saying. Hope you’ll enjoy baking as much as I (usually) do—mishaps, distractions, flour on the cat, and all!
Ingredients
- 2 cups gluten-free all-purpose flour blend
- 1 cup warm water (about 110°F)
- 2 tablespoons olive oil, plus more for drizzling
- 1 tablespoon honey
- 1 packet (2 1/4 tsp) active dry yeast
- 1 teaspoon salt
- 1/2 teaspoon dried rosemary
- Sea salt flakes, for topping
Instructions
-
1In a small bowl, mix warm water with honey and sprinkle yeast over top. Let sit for 5 minutes until frothy.
-
2In a large bowl, whisk together the gluten-free flour blend and salt. Pour in the yeast mixture and 2 tablespoons olive oil; stir until a thick batter forms.
-
3Spread the dough into a greased 9×13 inch baking pan. Use oiled fingers to dimple the surface all over.
-
4Drizzle the top with extra olive oil, sprinkle with dried rosemary and sea salt flakes.
-
5Cover loosely with a clean towel and let rise in a warm place for 20 minutes.
-
6Bake in a preheated oven at 400°F (200°C) for 25-30 minutes, or until golden brown. Let cool slightly before slicing and serving.
Approximate Information for One Serving
Nutrition Disclaimers
Number of total servings shown is approximate. Actual number of servings will depend on your preferred portion sizes.
Nutritional values shown are general guidelines and reflect information for 1 serving using the ingredients listed, not including any optional ingredients. Actual macros may vary slightly depending on specific brands and types of ingredients used.
To determine the weight of one serving, prepare the recipe as instructed. Weigh the finished recipe, then divide the weight of the finished recipe (not including the weight of the container the food is in) by the desired number of servings. Result will be the weight of one serving.
Did you make this recipe?
Please consider Pinning it!!