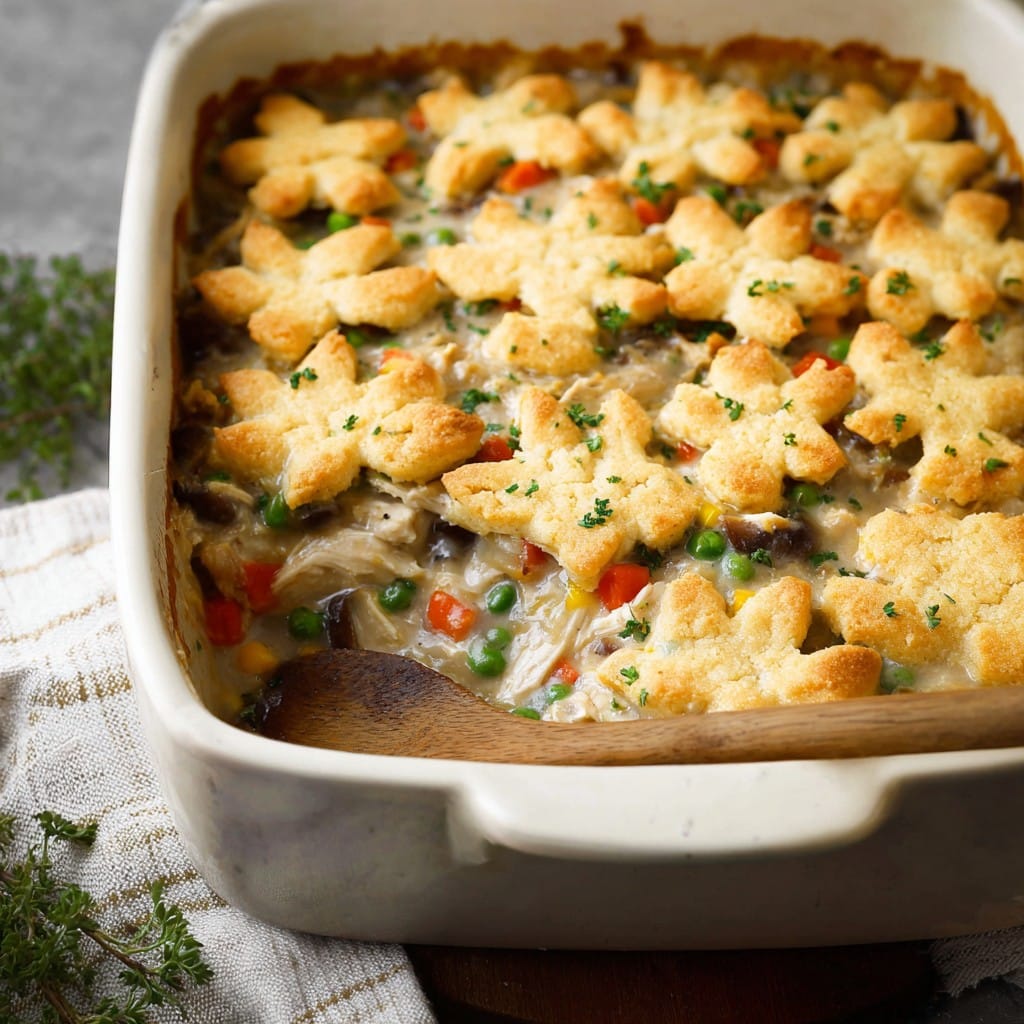
Gluten-Free Chicken Pot Pie Casserole for Busy Weeknights
So, This Gluten-Free Chicken Pot Pie Casserole…
Look, I’ll tell you straight, I stumbled onto this recipe on a rainy Tuesday after my daughter came home miffed that she couldn’t eat the pot pie in the cafeteria. The classic stuff is off-limits, but honestly, I’d been craving all that creamy, cozy goodness too—so, win-win? Actually, there’s a story—years ago, my cousin mistook cornstarch for icing sugar in her gluten-free crust, but that’s a tale for another time. Anyway, this casserole got popular real fast with my crew, probably helped by—well, a rather reckless hand with the peas. No shame! Just real talk: this is less about perfect lattice crusts, and more about keeping everyone happy (and maybe getting some leftovers for lunch…).
Why I Make This (More Often Than I’ll Admit)
I make this when I want dinner sorted without juggling four pans (or when it’s been one of those Mondays, you know the ones). My family basically inhales it every time, and even my neighbor, who claims she can always taste the gluten-free swaps, comes back for seconds. Oh, and on busy weeks, I’ll use rotisserie chicken—seriously makes life so much easier. Plus, the comfort factor is through the roof—even if I do wind up with peas under the fridge (again).
Here’s What You’ll Need (and My Swaps)
- 2-3 cups cooked chicken (shredded rotisserie chicken is my go-to, but leftover turkey’s fair game—done it more than once after Thanksgiving)
- 1 cup frozen peas and carrots (or fresh if you’ve got them, but—or a bag of that mixed veggie blend if I’m feeling wild)
- 1 small onion, diced (I sometimes skip this if onions aren’t popular that day—no judgment)
- 2 garlic cloves, minced (jarred is fine—nobody’s peeking in your kitchen)
- 2 cups chicken stock (I like Better than Bouillon, but if you only have cubes, use those; it still works)
- 1 cup milk or non-dairy alt (almond’s good, but oat milk’s creamier)
- 1/3 cup gluten-free all-purpose flour (Bob’s Red Mill is what I keep on hand, but Cup4Cup is decent too—my old roommate swore by Krusteaz so whatever fits your shelf)
- 3 tbsp butter or dairy-free spread
- 1 tsp dried thyme (or go on, use Italian seasoning; no culinary police here)
- Salt and pepper—just measure with your heart really
- For the topping: 1.5 cups gluten-free baking mix (like Bisquick GF), 1 egg, 1/2 cup milk/non-dairy, a drizzle of oil or a knob of butter
How I Make It (With a Bit of Improvising)
- Give Yourself Time. Preheat the oven to about 400F (or 200C if you do Celsius—shoutout UK friends!).
- Start the Sauce. In a med saucepan, melt the butter over a not-too-high heat, then toss in your diced onion. Let it sweat for 3-4 minutes (it’ll look a bit sad and translucent—not exactly photogenic, but smells great). Add your garlic, cook another 30 sec. This is where I usually sneak a taste—don’t do it with raw flour though. Yuck.
- Thicken It Up. Sprinkle in the gluten-free flour, and stir, let it get pasty and a little golden—don’t worry, this part always seems messy but smooths out. Gradually whisk in the chicken stock and milk. Once it’s all in, keep stirring till it thickens a bit—like a light gravy. (If it’s too thick, splash in more milk. Not an exact science!)
- Add All the Good Stuff. Stir in chicken, peas, carrots, thyme, salt, and pepper. Cook it all together for a few, just until bubbly and hot. Taste for seasoning—actually, I find it needs more pepper than I ever expect, but that’s personal.
- Get It Into the Dish. Scoop the mixture into a greased or lined casserole (mine’s roughly 9×13, but you can shoehorn it into something similar; just don’t overfill).
- Topping Time. Mix up the baking mix, egg, milk, and oil/butter in a bowl. Pour or spoon this over the casserole. Mine never spreads perfectly—fine, just swirl it around a bit so most of the filling is covered.
- Bake It. Pop the whole thing in the oven for 25 minutes or until bubbly, and the top is golden and just cooked in the center. Your nose will tell you—it smells like you meant to make dinner all along.
- Cool, Then Dig In. Let it rest for 5–10 min before serving—otherwise, you’ll burn your tongue (and say words the kids shouldn’t hear).
Stuff I Wish I’d Known Sooner
- The topping always looks paler than regular pot pie—don’t panic, it’ll brown a little more as it cools.
- If the sauce is too thick, milk saves the day. Too thin? Actually, just give it more oven time, or go in with a handful of extra baking mix—nobody notices.
- Sometimes I swap peas for frozen corn, but once tried broccoli and—never again, not for me.
Tried And Failed (and Sometimes Found) Variations
- I made it once with sweet potatoes instead of carrots (honestly—not my best work, but some folks loved it)
- Turkey works great, especially with leftovers—like post-Christmas when you just want to clear the fridge
- I sometimes sneak in a little sharp cheddar into the sauce—makes it super rich, but yeah, next day it’s even better
If You Don’t Have The Equipment—No Worries
All you really need is a big enough casserole dish; honestly, I’ve made it in a roasting pan or even a big cake tin once when the others were MIA. If you don’t have a whisk, a fork will do for the sauce. Use a regular spoon for topping, or just scoop and spread with the back of (clean) hands in an emergency. We make do!
Will It Last? (Maybe…)
If you have leftovers, it’ll keep in the fridge, covered, for about 3 days (but, let’s be real, it almost never makes it past the next lunch). Reheats in the microwave, fine. The topping gets a bit softer but—nobody’s complained here yet.
What To Serve With It (Or, What We Actually Do)
I like to pile on steamed green beans (with butter, or olive oil if you’re dairy-free) and sometimes a little salad on the side. My other half always dunks his in ketchup—don’t ask, I gave up arguing about that years ago. When we have company, I do a bowl of those sweet pickles too. Oh, and if it’s cold, a mug of apple cider is just grand.
Hard-Won “Pro Tips”
- I once tried rushing the sauce because we were late for soccer—don’t. Lumpy, weird filling—learn form my mistake.
- Don’t overbake thinking it’ll get darker on top; gluten-free mixes just aren’t showy that way, and it’ll dry out.
- Sometimes I forget to season before baking—so, put the salt in with the veggies, not the topping. Trust me.
FAQ (Or, Stuff People Keep Asking Me)
- Can I freeze this?
- Yup, but the topping softens when reheated. It’s handy, though. Just wrap tightly and bake from frozen (add 15 min or so). Works in a pinch!
- Is there a dairy-free topping?
- I use Earth Balance and almond or oat milk—works surprisingly well. The Bob’s Red Mill biscuit mix is my fav for this.
- Can I use all veggies, skip the chicken?
- Certainly, I’ve done it when out of meat, but add extra beans or chickpeas for heft. It’s not quite the same, but still cozy.
- Does it matter what brand of gluten-free flour I use?
- Not really; just make sure it says 1-to-1. I use Bob’s, but I’ve linked to Minimalist Baker’s homemade blend before—good stuff.
- Where do you get your baking mix?
- Try your local shop, but I get Bisquick Gluten-Free on Amazon, or order bulk when it’s on sale (no shame!).
And if you actually want to nerd out on gluten-free baking science, I’ve gotten lost in Gluten Free on a Shoestring late at night more than once. But hey, you do you.
That’s the scoop—if you give it a whirl, let me know how it goes (esp. if you out-do my topping—always room to improve!).
Ingredients
- 2 cups cooked chicken, shredded
- 1 cup frozen peas and carrots
- 1/2 cup frozen corn
- 1/2 cup diced onion
- 2 cloves garlic, minced
- 2 cups gluten-free chicken broth
- 1 cup milk (dairy or non-dairy)
- 3 tablespoons gluten-free all-purpose flour
- 2 tablespoons unsalted butter
- 1 teaspoon dried thyme
- 1/2 teaspoon salt
- 1/4 teaspoon black pepper
- 1 package gluten-free biscuit mix (prepared according to package instructions)
Instructions
-
1Preheat your oven to 375°F (190°C). Grease a 9×13-inch baking dish.
-
2In a large skillet over medium heat, melt the butter. Add diced onion and cook until translucent, about 3-4 minutes. Stir in the garlic and cook for 1 minute.
-
3Whisk in the gluten-free flour and cook for 1 minute. Gradually add chicken broth and milk, whisking constantly until the sauce thickens.
-
4Add shredded chicken, peas and carrots, corn, thyme, salt, and pepper. Stir well and simmer for 5 minutes.
-
5Pour the chicken and vegetable mixture into the prepared baking dish. Drop spoonfuls of prepared gluten-free biscuit dough evenly on top.
-
6Bake for 35-40 minutes, or until the biscuits are golden brown and the casserole is bubbling. Let cool for a few minutes before serving.
Approximate Information for One Serving
Nutrition Disclaimers
Number of total servings shown is approximate. Actual number of servings will depend on your preferred portion sizes.
Nutritional values shown are general guidelines and reflect information for 1 serving using the ingredients listed, not including any optional ingredients. Actual macros may vary slightly depending on specific brands and types of ingredients used.
To determine the weight of one serving, prepare the recipe as instructed. Weigh the finished recipe, then divide the weight of the finished recipe (not including the weight of the container the food is in) by the desired number of servings. Result will be the weight of one serving.
Did you make this recipe?
Please consider Pinning it!!

