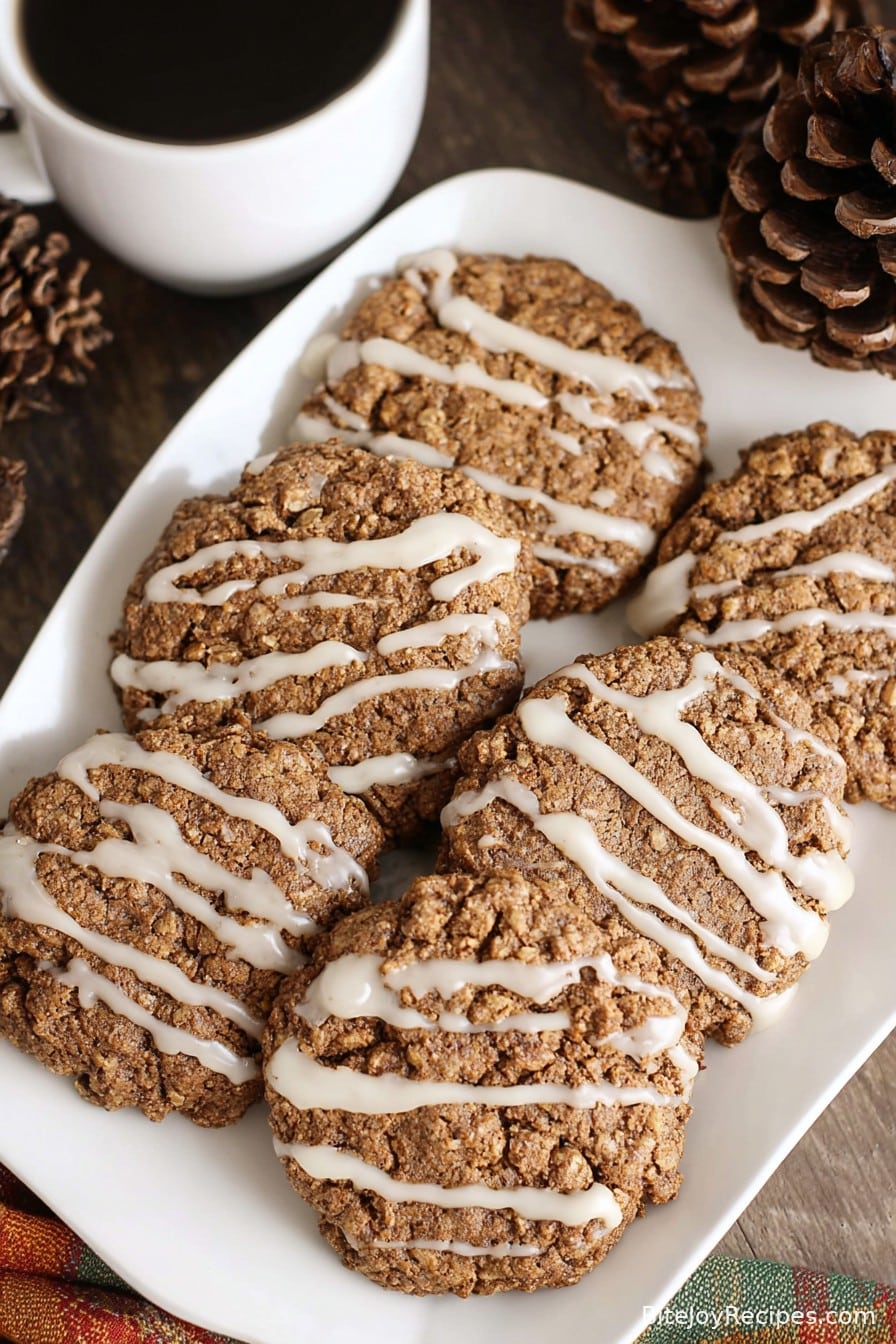
Gingerbread Breakfast Cookies (gluten-free, dairy-free, vegan option)
Can We Just Talk About Gingerbread in the Morning?
So, let me set the scene: it’s a cold, blustery Thursday, my coffee’s almost (okay, absolutely) gone cold because the kids are up early, and everyone’s already hungry. I needed something fast, warm, a little sweet but still pretending to be healthy—cue these gingerbread breakfast cookies. And honestly, they’re the kind of cookies I end up snacking on all afternoon, not just for breakfast—but maybe that’s just me. Actually, speaking of gingerbread, does anyone else still have half a jar of molasses lurking in their pantry leftover form the last time you baked actual gingerbread men? No? Just me then. Anyway, let’s get you sorted for breakfast!
Why I Keep Making These (And Maybe You Will Too)
I whip these up whenever I want something with all those warm, Christmassy spices, but not so sugary that you’ll crash by 10am. My family gobbles them up (my middle kid claims they taste just like mini cakes, which, I mean, I’ll take it). Sometimes when I’m tired of the standard oatmeal song and dance, these come to the rescue; plus, they’re like breakfast in one hand, coffee in the other, and you barely need a plate. Breaking news: they also taste pretty decent cold, if you forget about them during a hectic morning. Been there.
What You’ll Need (Substitution Chat Included!)
- 2 cups gluten-free rolled oats (quick oats work in a pinch honestly, though the texture changes a bit)
- 3/4 cup almond flour (my gran swore by hazelnut flour if you find it and want to feel posh)
- 1/3 cup pure maple syrup (sometimes I use date syrup if it’s cheaper, but it’s a bit stickier)
- 1/4 cup molasses (blackstrap is traditional, but whatever isn’t rock-hard in your cupboard does the trick)
- 1/3 cup nut butter (almond, peanut, sunflower seed—honestly, whatever’s lurking)
- 1 flax egg (1 tbsp flax meal + 2.5 tbsp water, or just use a regular egg if not vegan)
- 1 tsp ginger (sometimes I get fancy and grate fresh in, but don’t stress)
- 1 tsp cinnamon
- 1/2 tsp ground cloves (I’ve left this out and nobody noticed)
- 1/2 tsp baking soda
- 1/4 tsp salt
- 1/2 cup raisins or chopped dates (or honestly, any dried fruit—chopped apricots or cranberries it is some days)
- Optional: handful of chopped nuts or seeds; a sprinkle of chocolate chips if you’re feeling wild
Let’s Make These (Don’t Overthink It)
- First up, preheat your oven to 180°C (350°F), and line a baking tray. I sometimes use a battered old silicon mat because parchment always seems to vanish when I need it.
- In a big bowl, dump in the oats, almond flour, all the spices, salt, and baking soda. Give it a whisk or a fork stir (nobody’s judging—except maybe cats).
- I usually make my flax egg in a mug: flax meal with water, quick stir, let it sit for a few minutes ‘til it gets gloopy—science!
- Add the flax egg (or actual egg), maple syrup, molasses, and nut butter to the dry stuff. This is where I swap to a spoon because my wrist gets all crampy from whisking heavy batter.
- Once it’s mostly combined, throw in the fruit and nuts. It always looks a bit messy at this point—totally normal.
- Scoop out big spoonfuls onto your tray—aim for cookie-ish shapes, but honestly, they’ll taste great however you blob ‘em.
- Bake for 11–15 minutes; they should start smelling like you lit a gingerbread-scented candle (that you can eat!). I check them at 12 minutes, sometimes they need another minute or two depending how doughy you like them.
- Let ‘em cool for a few minutes on the tray so they don’t implode when you wrangle one off. That’s it. Sneak a warm one before the others notice—it’s allowed.
A Few Notes (Learned the Hard Way)
- The molasses really gives that gingerbread kick, but if you’re out, I tried half honey/half maple syrup once—wasn’t quite the same, but passable enough that no one boycotted breakfast.
- If you’re after the chewiest batch, don’t overbake. I mean it—crisp edges are nice, but these are best when a touch soft in the middle.
- Actually, I’ve found the batter looks stickier than regular cookie dough. Don’t panic. If it’s too runny, a sprinkle more oats makes everything right.
Experiments You May Want to Try (Or Skip)
- Swap raisins for dark chocolate chips. My eldest says it’s “basically cake,” but who’s complaining?
- I once tried using coconut flour instead of almond flour. Would not recommend unless you enjoy crumbly chaos—but live and learn!
- Pumpkin puree instead of some nut butter. Makes them super moist, great if you have stray pumpkin to use up.
Equipment (and My Usual Shortcuts)
You’ll want a large bowl, a baking tray, and some kind of mixing tool (spoon, fork, whatever’s clean). If you don’t have parchment or a silicone mat, just grease the tray with whatever oil’s within arm’s reach—just watch for sticking!
How to Store (If They Last That Long)
I usually stuff leftovers (on rare occasions we have them?) in an airtight tin or container. They’re fine for 3 days, maybe a touch longer in the fridge, but I think the texture’s best on day two. Though honestly, in my house, it never lasts more than a day; the gremlins eat them all.
How We Eat These at My Place (Serving Suggestions)
I like them straight up, coffee in hand, but my little crew pile them high with almond yogurt and orange slices on the side; it’s a breakfast that feels like dessert but sneakily isn’t. On weekends, I’ll put out a berry compote and everyone acts like I’ve gone all gourmet. Fancy.
Things I’ve Learned The Hard Way (Pro Tips)
- Letting them cool slightly is a must—once, I tried peeling them off hot and ended up with gingerbread goo all over the place.
- Mixing too vigorously made my oats fall apart once, so I’m fairly gentle now. Not sure if it actually helps, but comforting myself that it does.
- Don’t skip the spices—even if you’re not a clove fan, a pinch really makes a difference. Or so my tastebuds tell me anyway.
Real Questions I’ve Actually Been Asked (FAQ-ish)
- Can I use regular flour? – Sure, if gluten isn’t a thing for you, sub in plain flour for almond. You might need a splash of non-dairy milk if it gets dry, but it does the trick.
- Are these super sweet? – Nope, these are more breakfasty than dessert-sweet. Add extra maple syrup if you’re after a treat, though!
- Do they freeze? – Sort of. Texture changes a bit, but if you zap them in the microwave they’re pretty good. If you ask me, they’re still best fresh.
- What if I don’t have molasses? – See my earlier rant about honey/maple syrup. Not quite the same, but in a pinch, it’ll get you your cookie fix.
- Can I sneak in protein powder? – I haven’t, but a pal added a scoop saying it worked. If you do, you might need an extra glug of milk. Let me know!
- Kiddos friendly? – Absolutely, though mine pick out the nuts some days. (Also, I avoid super spicy ginger for the little ones, but if you like a kick, go wild!)
Anyway, let me know if you try any oddball swaps—I’m always up for hearing when recipes go a bit sideways. Good luck, and happy munching!
Ingredients
- 1 1/2 cups gluten-free rolled oats
- 1 cup almond flour
- 1/3 cup coconut sugar
- 2 tbsp ground flaxseed (or 1 large egg for non-vegan)
- 1/4 cup coconut oil, melted
- 1/4 cup unsweetened applesauce
- 3 tbsp molasses
- 1 1/2 tsp ground ginger
- 1 tsp ground cinnamon
- 1/4 tsp nutmeg
- 1/2 tsp baking soda
- 1/4 tsp salt
Instructions
-
1Preheat oven to 350°F (175°C) and line a baking sheet with parchment paper.
-
2In a small bowl, mix ground flaxseed with 5 tablespoons of warm water and set aside for 5 minutes to thicken (skip if using an egg).
-
3In a large bowl, combine oats, almond flour, coconut sugar, baking soda, salt, ginger, cinnamon, and nutmeg.
-
4Add melted coconut oil, applesauce, molasses, and the flaxseed mixture (or egg). Stir until a thick dough forms.
-
5Scoop dough onto the prepared baking sheet. Gently flatten each cookie with your palm.
-
6Bake for 10-12 minutes, until edges are golden. Let cool for 5 minutes before transferring to a wire rack.
Approximate Information for One Serving
Nutrition Disclaimers
Number of total servings shown is approximate. Actual number of servings will depend on your preferred portion sizes.
Nutritional values shown are general guidelines and reflect information for 1 serving using the ingredients listed, not including any optional ingredients. Actual macros may vary slightly depending on specific brands and types of ingredients used.
To determine the weight of one serving, prepare the recipe as instructed. Weigh the finished recipe, then divide the weight of the finished recipe (not including the weight of the container the food is in) by the desired number of servings. Result will be the weight of one serving.
Did you make this recipe?
Please consider Pinning it!!