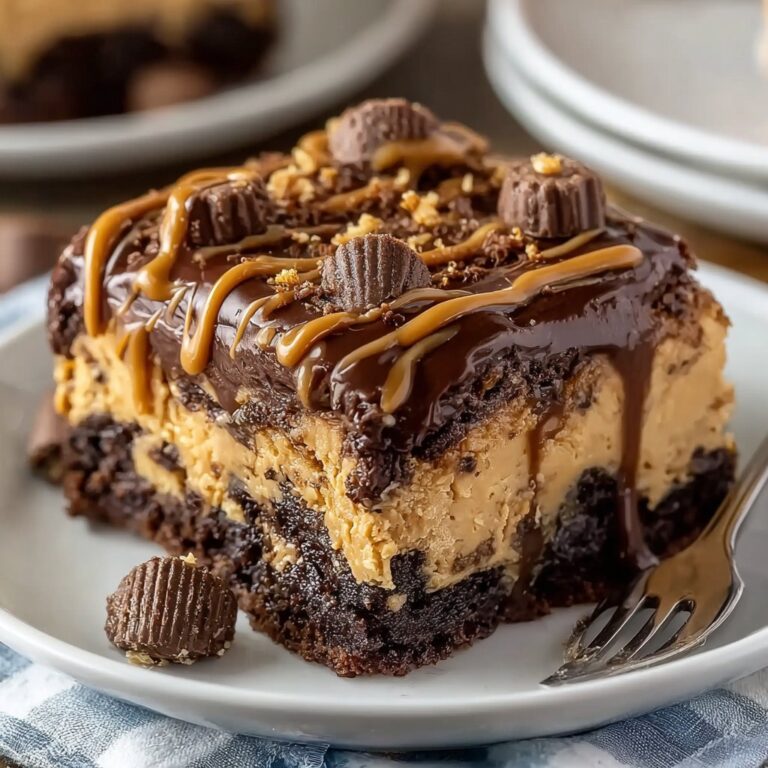
Fudgy Protein Brownies
Let’s Talk About These Fudgy Protein Brownies (and how they may have saved my sanity once or twice)
Alright, so imagine: It’s mid-afternoon, your energy’s sort of drifting off, maybe the weather’s dreary, and you want something chocolatey, but you’re also telling yourself, “Hey, maybe let’s not just eat another cookie.” That’s when I first came up with these protein brownies. Honestly, the first batch was a bit of a ‘frankenstein’—I think I threw in half a bag of random protein powder and a leftover banana. They came out a bit weird, but… actually kind of amazing? And then my little nephew (who’s a bit of a picky weirdo, bless him) actually asked for seconds. So yeah, these have stayed in the regular rotation ever since. Plus, cleanup is minimal if you line your pan like I sometimes remember to do (then feel like a genius the next day).

Why You’ll Fall for These (Just Like I Did)
I make these fudgy protein brownies when I’m craving that chewy-in-the-middle, slightly underbaked vibe but want my snack to have a little bite of actual sustenance (not just, you know, regret and empty wrappers). My family goes a bit bonkers for them because—well, let’s be honest, a brownie is a brownie. But these pass the snack-for-breakfast test; and I’ve even snuck them into picnic lunches with zero complaints. There was one time I tried to ‘healthify’ them more by cutting back on the chocolate chips. Big mistake. Don’t do what I did; live a little.
Stuff You’ll Need (and Some Handy Cheaty Swaps)
- 2 big eggs (sometimes I use 3 small ones if that’s what’s in the fridge… no biggie)
- 1/2 cup (about 120g) Greek yogurt (can swap for plain yogurt or, in a pinch, applesauce… actually, coconut yogurt works, but it’ll taste a bit more tropical. Not a bad thing?)
- 1/3 cup cocoa powder (my gran swore by Hershey’s, but store-brand’s fine)
- 1 scoop (about 30g) chocolate protein powder (I’ve even used vanilla when that’s all I had. Turns out it’s still delicious, just a hair sweeter)
- 1/2 cup (60g) almond flour (spelt flour works, too. I even tried oats, blended up, and it was OK, just a bit chewier)
- 1/4 cup maple syrup or honey (sometimes I just eyeball it; let’s call it a generous glug)
- 1/2 cup dark chocolate chips (I mean, measure with your heart, right? But try to save some for the top)
- 1 tsp vanilla extract (I’ve forgotten this more than once, lives still went on)
- Pinch of salt (don’t skip this!)
How to Bring These Brownies to Life
- First, turn your oven on to 175°C (350°F). If you forget and start mixing first, don’t worry, just let the batter chill while it preheats. Line an 8x8in baking pan with parchment (or just grease the heck out of it; I’ve done both with no disasters).
- In a mediumish bowl, whisk the eggs and yogurt until they look blended. If your wrist gets tired, you’re probably doing it right (or you need a smaller bowl … like me, every time).
- Add the cocoa powder, protein powder, almond flour, maple syrup, vanilla, and salt. Stir until—well, honestly, this mixture always looks a bit lumpy and thick. Don’t panic. That’s normal. This is usually where I sneak a mini taste (shhh, live dangerously).
- Fold in about 2/3 of the chocolate chips. (The rest are going on top. Not optional! Unless you, like me, sometimes forget and just dump them all in.)
- Scrape everything into your lined/greased pan and smooth the top with a spatula or the back of a spoon (sometimes I just whack the pan on the counter to even it out. No shame.)
- Sprinkle the rest of those chocolate chips over the top. I sometimes press them in a bit with my fingers, but that’s probably unnecessary?
- Bake for about 18–22 minutes. They should look set but still a little wobbly in the middle. If your oven’s like mine (i.e., has a mind of its own), check after 17 minutes. Don’t overbake them unless you want cakey brownies—who does?
- Let ‘em cool for at least 10 minutes before slicing. But who am I kidding? I always nick a warm piece from the edge. It’s hot—don’t burn your mouth like I have.
Notes—The Good, The Bad, and The Chocolatey
- If you let these sit overnight, they get fudgier. Or maybe that’s just my wishful thinking.
- Don’t skip the salt, I did once—flavor was just flat. Seriously.
- They freeze okay, but honestly, who ever has leftovers? (If you do, can we swap households?)
Variations (The Great, The Uh…Not-So-Great)
- Swapped almond flour for peanut flour once: super nutty! Highly recommend if you like that sort of thing.
- Tried adding a swirl of peanut butter on top. Looked messy, tasted heavenly.
- Just once I used plant-based protein powder and got weirdly rubbery brownies. Not my finest work; use plant-based blends at your own risk.
- Chopped walnuts stirred in? Trust me—chef’s kiss.
But What Do I Need In the Kitchen?
- An 8x8in baking pan (but I’ve used a loaf tin in desperation—came out a bit thicker, needed a couple extra minutes; all good!)
- A whisk (or a fork if you can’t be fussed)
- A spatula (you could use a spoon, but scraping every last bit of batter is immensely satisfying, right?)
How to (Attempt to) Store These
Just pop ‘em in an airtight container on the counter; they’re fine for 2–3 days. Or the fridge if you want them extra fudgy. But—I’m not kidding—mine rarely last more than 24 hours. I once tried hiding a few behind the oat milk but got caught red-handed.
Serving Suggestions – Not Fancy, Just Honest
Honestly, I love these warm with a scoop of vanilla ice cream, or just a cold glass of milk. My sister insists on eating them frozen—says it’s better for summer. Oh, and my Dad dunks his in coffee before anyone can stop him. We’re all weird.
Pro Tips (Or, How I Messed Up So You Don’t Have To)
- Don’t overmix! I got in a groove one time and stirred for ages—came out tough as shoe leather.
- Let them rest before slicing. Impatience led to a hot, chocolatey mess the first go-round. Learn form my faults.
- Check the bake with a toothpick, but don’t wait for it to come out clean—aim for a few sticky crumbs. That’s where the magic lives.
Questions I Actually Get Asked All the Time
- Can I make these dairy-free?
Yep—use coconut yogurt and a plant-based protein (but, you know, watch out for that rubbery texture I mentioned… might need a splash of plant milk to loosen the batter). - Is it okay to use sweetened protein powder?
Totally, just maybe pull back the maple syrup a notch. Or don’t—it’ll just be, well, sweet. - What if I don’t have almond flour?
Rolled oats, blitzed up, actually work alright. Texture’s a bit chewier, but not in a bad way. - Can I use more cocoa for extra chocolate?
Actually, I find it works better if you just up the chocolate chips. More cocoa can make it too dry unless you’re swapping out some of the flour. - Why is my batter so thick?
Doesn’t matter! It always looks a little odd before baking. Trust the process, as my mate Dave says (he’s not even a baker).
Bit off-topic but—has anyone else ever swapped brownies for cake at a birthday party? (No regrets, no one noticed. If you have kids, just say it’s a ‘cake square’ and keep it moving.)
Ingredients
- 1 cup chocolate protein powder
- 1/2 cup almond flour
- 1/3 cup unsweetened cocoa powder
- 1/4 cup coconut oil, melted
- 1/2 cup unsweetened applesauce
- 1/3 cup maple syrup
- 2 large eggs
- 1/2 teaspoon baking powder
- 1/4 teaspoon salt
- 1/2 cup dark chocolate chips
Instructions
-
1Preheat your oven to 350°F (175°C). Line an 8-inch square baking pan with parchment paper.
-
2In a large bowl, whisk together the protein powder, almond flour, cocoa powder, baking powder, and salt.
-
3In a separate bowl, mix the melted coconut oil, applesauce, maple syrup, and eggs until well combined.
-
4Combine the wet and dry ingredients, stirring until just blended. Fold in the dark chocolate chips.
-
5Pour the batter into the prepared pan and smooth the top. Bake for 25 minutes or until a toothpick inserted in the center comes out mostly clean.
-
6Let the brownies cool in the pan before cutting into squares and serving.
Approximate Information for One Serving
Nutrition Disclaimers
Number of total servings shown is approximate. Actual number of servings will depend on your preferred portion sizes.
Nutritional values shown are general guidelines and reflect information for 1 serving using the ingredients listed, not including any optional ingredients. Actual macros may vary slightly depending on specific brands and types of ingredients used.
To determine the weight of one serving, prepare the recipe as instructed. Weigh the finished recipe, then divide the weight of the finished recipe (not including the weight of the container the food is in) by the desired number of servings. Result will be the weight of one serving.
Did you make this recipe?
Please consider Pinning it!!