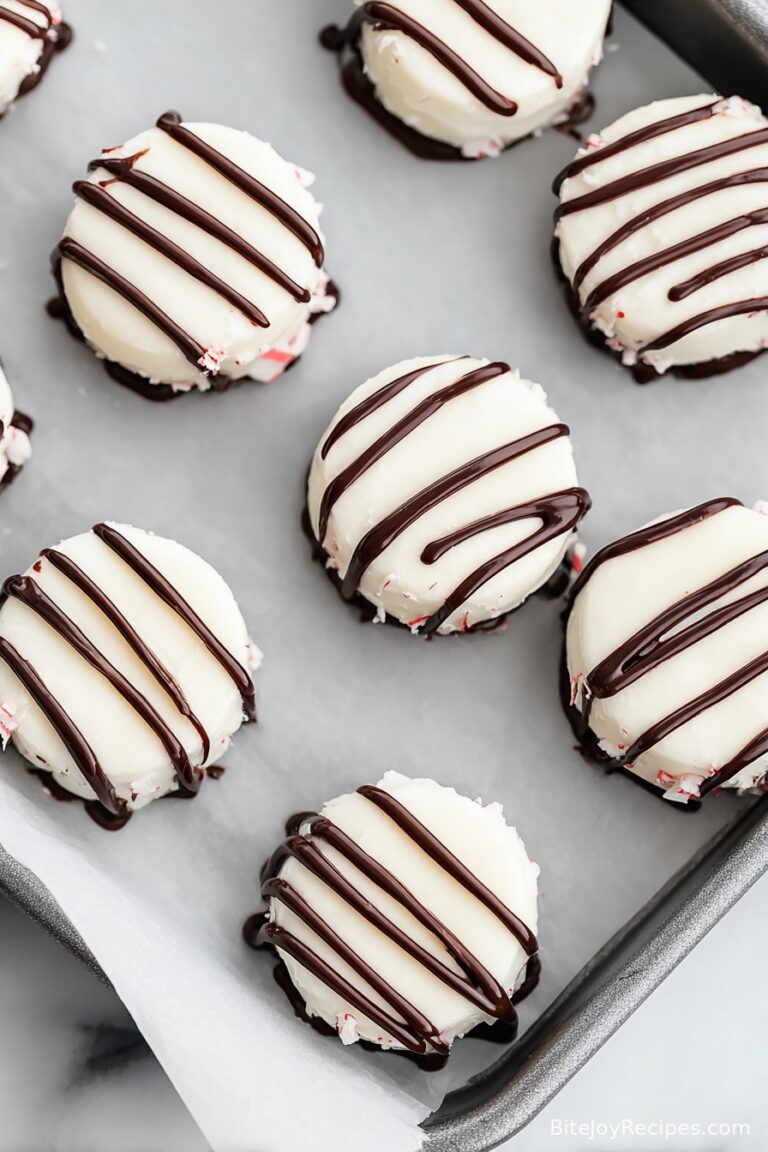
Easy, No Bake Peppermint Tart (Paleo, Vegan, Gluten Free)
How I Fell in Love (All Over Again) With Peppermint Tart
I’ll admit, the first time I made this no bake peppermint tart was partly because my oven broke and partly because, well, I was too lazy to make anything fancy. Turns out, sometimes bare minimum effort leads to max yum. Honestly, when you need a dessert that doesn’t judge your last-minute attitude, this little beauty has your back. Plus, last Christmas Eve, I forgot about dessert until after dinner (no judgment), so this tart came to the rescue and everyone thought I’d planned it for days – if only they knew.
And, not to get all poetic, but the cool peppermint with that silky filling feels like someone gave winter a hug. Just saying.
Why You’ll Love This Tart (Trust Me)
I make this tart when I’ve got zero patience left for baking. Or if it’s way too hot to even think about turning the oven on (Melbourne heatwaves, I’m looking at you). Also, my family goes absolutely bonkers for anything with peppermint; especially my brother, who insists on “just one more slice” (yeah, right). It’s what I reach for when I want to impress but not stress – plus, it’s that rare dessert where nobody grumbles about dietary stuff. Oh, and, if you’re anything like me, tired of the classic holiday puddings, this is your curveball dessert (the one that’ll actually get eaten).
Ingredients (And My Honest Swaps)
- 2 cups nutty cookie crumbs (almond flour + coconut sugar works; sometimes, I just blitz any paleo-ish storebought cookies if I’m in a mad rush)
- 1/3 cup melted coconut oil (honestly, olive oil works but then it’s got that olive oil thing going on, which is… interesting)
- 1 1/2 cups raw cashews, soaked 3 hours (I’ve skipped the soak before; it’s fine but not as dreamy-creamy)
- 1/2 cup full-fat coconut milk (the canned kind – any brand, really; Grandma once swore by Ayam, but whatever’s in the pantry)
- 1/4 cup maple syrup – or honey, if you’re not strict vegan
- 2 teaspoons peppermint extract (go easy – and taste as you go; some brands are super strong!)
- Pinch of sea salt (don’t skip it, trust me. The filling needs a tiny bit)
- Optional: chocolate shavings, crushed candy canes, or a drizzle of extra melted chocolate for on top
How To Throw This Together (For Real)
- Bash or blend your nutty cookies or almond flour and coconut sugar mix until they’re mostly crumbs. Mix in the melted coconut oil. You want something that clumps together when you squeeze it. Not rocket science – if it’s too dry, lob in more oil. Press this mixture into the base of an 8-inch tart tin (I use my fingers, but hey, a glass works too in a pinch), and shove it in the freezer while you sort the rest.
- Drain your cashews (unless you forgot, then I guess they’ll be a bit less creamy – no big deal, honestly). Blend cashews, coconut milk, maple syrup, peppermint extract, and salt until totally smooth. It might take a couple of minutes and I usually stop to scrape down the sides, and yes, this is where I always sneak a taste to check the mint situation.
- Pour all that gorgeous filling onto your chilled crust and smooth it out. Don’t worry if it looks a bit odd at first – it firms up in the fridge.
- Sling it into the fridge for at least 3-4 hours. More is better. (Overnight is best, but who can wait?)
- Just before serving, scatter on your toppings – go wild or keep it plain. Up to you.
Notes, aka Things I Learned the Hard Way
- If you skip soaking the cashews, the filling won’t be as smooth. I tried microwaving them in water once – kinda worked, but they went a bit weird, so maybe give yourself the extra time if you can.
- Don’t get cocky with the peppermint extract; too much and suddenly it’s like chewing toothpaste. Been there.
- If you use coconut cream instead of coconut milk, it’s just thicker, which isn’t bad, actually.
Let’s Talk Variations (The Good, the Bad, and the Odd)
- Once, I swapped out peppermint for orange extract and added grated zest; turned out surprisingly festive (but you miss that classic cool zing).
- Another time, I tried using sunflower seeds instead of cashews to dodge a nut allergy – texture got a bit gritty, but not terrible? But honestly, not my favorite.
- Chocolate crust! Toss in 2 tablespoons cocoa with your base – so good (my dad actually preferred it this way).
- I even sprinkled freeze-dried raspberries on top once. Looked a bit over the top, but tasted lovely.
Equipment – But Don’t Stress If You’re Missing Stuff
- Food processor or blender. A strong one is ideal, but I used to do this in two batches in my laughably small blender and it mostly worked (granted, the clean up was, uh, epic).
- 8-inch tart pan. Or a cake tin. Or, honestly, do cupcake-sized tarts in a muffin tin for something cute. It all works out.
- Rubber spatula (or just a regular spoon and a bit of patience)

Storing This Tart (Or, the Myth of Leftovers)
Keep leftovers chilled, preferably in an airtight container for up to 4 days – though, honestly, in my house it never lasts more than a day! Freezer also works for longer storage (tastes like peppermint ice cream straight form the freezer, just saying).
How I Love To Serve It
We usually go for chocolate curls and a little dusting of cocoa powder for birthdays, but at Christmas, candy cane shards are kind of the tradition. I sometimes serve slices with strong black coffee – cuts the sweetness perfectly. And, if it’s really warm, I’ll stick the tart in the freezer for half an hour before cutting, so it slices nice and neat.
A Few Lessons I’ve Learned (Sometimes the Hard Way)
- Don’t rush the chill time. I once tried to serve it after just an hour – filling basically puddled out onto the plate. Learned my lesson there.
- If you use low fat coconut milk, filling won’t set as firmly. Use the good stuff.
- When mixing the crust, I used to forget the pinch of salt. Sounds minor, but it really does make all the difference!
Your Questions (And My Slightly Scattered Answers)
Can I make this nut-free?
I get this one a lot. Kinda – you can try raw sunflower seeds instead of cashews, but the texture is, well, a bit less creamy. Worth a shot though (and let me know how it goes if you hack this better than I did!).
Can I freeze the whole tart?
For sure. Wrap it tight and freeze for up to 2 months. Just defrost in the fridge overnight so it’s sliceable (learned that the hard way when I chipped a knife – whoops).
Is peppermint oil the same as extract?
Not exactly. Oil is stronger – you only need a *tiny* bit. If using oil, maybe start with 1/4 teaspoon and taste, or check this article on strength differences.
Can I use another sweetener?
Yep, I’ve done this with agave and even date syrup before. Just taste as you go because each sweetener hits a bit differently (see more sweetener ideas here if you’re curious).
Do I need a fancy tart tin?
Nope – any pan works, really. Honestly, I once used a recycled takeaway container. High art, it was not, but did anyone care? Not a jot.
And oh, if you end up with a bit too much filling, it’s basically the best dip for apple slices or – look, I even ate it with a spoon once standing at the fridge. No shame, right?
Hope this brings you a bit of cool, creamy happiness – let me know (or tag me on Instagram!) if you put your own twist on it.
For more healthy-ish dessert ideas, here’s where I find tons of inspo: Natalie’s blog is a good rabbit hole.
Ingredients
- 1 1/2 cups almond flour
- 1/4 cup unsweetened shredded coconut
- 1/4 cup coconut oil, melted
- 2 tablespoons maple syrup
- 1 1/2 cups raw cashews, soaked and drained
- 1/3 cup coconut cream
- 1/4 cup pure maple syrup
- 1/2 teaspoon pure peppermint extract
- 1/4 teaspoon sea salt
- 1/4 cup dairy-free dark chocolate chips (optional, for topping)
Instructions
-
1In a food processor, blend almond flour, shredded coconut, 1/4 cup melted coconut oil, and 2 tablespoons maple syrup until a crumbly dough forms.
-
2Press the mixture firmly into the base of an 8-inch tart pan lined with parchment paper. Set aside.
-
3Drain soaked cashews and add them to the cleaned food processor with coconut cream, 1/4 cup maple syrup, peppermint extract, and sea salt. Blend until completely smooth and creamy, stopping to scrape down sides as needed.
-
4Pour the creamy peppermint filling over the tart crust and smooth the top with a spatula.
-
5Optional: Melt dark chocolate chips and drizzle over the top for a decorative touch.
-
6Refrigerate the tart for at least 2 hours, or until firm. Slice and serve chilled.
Approximate Information for One Serving
Nutrition Disclaimers
Number of total servings shown is approximate. Actual number of servings will depend on your preferred portion sizes.
Nutritional values shown are general guidelines and reflect information for 1 serving using the ingredients listed, not including any optional ingredients. Actual macros may vary slightly depending on specific brands and types of ingredients used.
To determine the weight of one serving, prepare the recipe as instructed. Weigh the finished recipe, then divide the weight of the finished recipe (not including the weight of the container the food is in) by the desired number of servings. Result will be the weight of one serving.
Did you make this recipe?
Please consider Pinning it!!