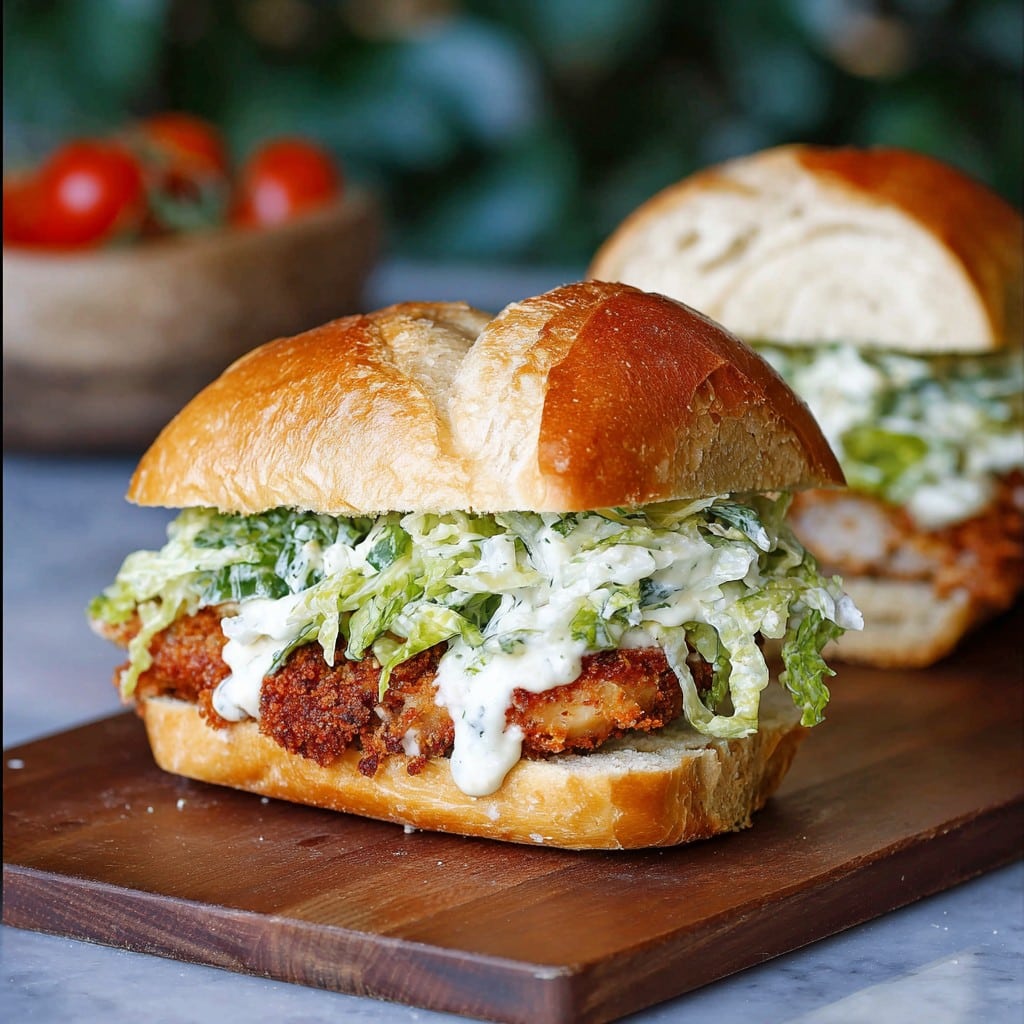
Crispy Chicken Caesar Sandwich Recipe—My Go-To Comfort Bite
Oh, This Chicken Caesar Sandwich—Let Me Tell You
I gotta spill: This crispy chicken Caesar sandwich is my absolute lifesaver on days when I crave something hearty but can’t deal with a zillion pans. The first time I tried making it, I botched the chicken…like, almost smoked us out—but now it’s basically become my calling card when friends drop by unexpectedly. (Actually, if you ask my mate Paul, he’ll say I only make it because I hate cleaning more than I love cooking, which…is not entirely wrong.) Also, yes, the breadcrumbs always end up everywhere. I mean, would it even be a homemade sandwich otherwise?
Why You’ll Love This—Or at Least Why I Do
I whip up this crispy chicken Caesar sandwich when I want big flavors without brain-melting effort. My family goes wild for the crunch (sometimes too wild—there have been actual fork battles for the best piece). And it seriously satisfies those times I just want ‘takeaway food vibes’ but with fewer mysteries. Sometimes I forget the lettuce. It’s still good.
Oh, and don’t get me started on my mild annoyance when the breading tries to come off in the pan—I’ve started using panko just to keep my sanity. But anyway, it makes Mondays better and Tuesdays too. You get it.
What You’ll Need—And What You Can Totally Swap
- 2 boneless, skinless chicken breasts (Chicken thighs work in a pinch—juicier, but a bit extra to handle)
- 1 cup panko breadcrumbs (I used to just smash regular sandwich bread, but panko is less fussy)
- 1/2 cup grated parmesan (I grew up on the pre-grated shelf stuff; proper parmesan is better, but no judgement)
- 2 eggs (I’ve subbed with a splash of mayo mixed with water when desperate. No one noticed.)
- 1/4 cup plain flour (Any flour, honestly.)
- 4 crusty sandwich rolls (Brioche is extra-nice, but hot dog buns in a pinch…)
- Caesar dressing (Homemade if I’m feeling fancy; otherwise, store-bought every. single. time. Just give it a little taste test)
- 1 large romaine lettuce heart (Iceberg gives it that nostalgia crunch—it’s not wrong)
- 1 tablespoon olive oil
- Optional: few slices of crispy bacon, thin tomato slices, even avocado once (wasn’t loved)
Let’s Get Cooking Somehow
- Pound the chicken out: Lay those chicken breasts between two bits of cling film. Use a rolling pin, wine bottle, your kid’s toy hammer—whatever. About half an inch thick is what you want. (This step is oddly satisfying.)
- Prep your breading station: Three plates—one flour, one beaten eggs in a shallow bowl, one with parmesan mixed into the panko (add some pepper here; it loves you back).
- Dunk and coat: Chicken gets dunked in flour, then eggs (let it drip off a sec!), then a good smush into the panko mix. If you’re lazy, use tongs, but honestly, just use your hands. The mess is part of the charm.
- Pan fry: Splash oil into a big frying pan and heat over medium. Fry each piece for maybe 4–5 minutes per side? Watch for golden brown, not black. It always looks a little odd at first, but trust me—it browns up. This is where I usually sneak a crusty bit for taste testing (quality control, right?).
- Toast your buns (ha!): Slice ‘em open, stick under a low grill or toss in a pan. If you forget, like I do, just call it “rustic.”
- Assembly line madness: Slather buns with Caesar dressing (go wild). Add lettuce, chicken, and any extras. If you’re me, maybe too much black pepper on top. Close up and press lightly—otherwise it’ll explode in your hands. Which, not terrible.
Notes from My Real Kitchen
- If the coating’s not sticking? Dry the chicken with kitchen roll first.
- Parmesan in the coating can crisp up real quick—keep it medium heat, not high.
- I always mean to add pickles, but never actually remember. Maybe you will?
- Tried making this in the oven once—it works, but the stovetop crunch is way better.
Variants—My “Genius” and Not-So-Genius Twists
- Used leftover roast chicken—delicious but not crunch city.
- Once did a buffalo Caesar version. Good, but…sort of defeats the Caesar point. Still fun, though!
- Baked a batch in my air fryer. Tasted great but my air fryer is so tiny I had to do four rounds—eh, not worth it unless you’re more patient than me!
What If You Don’t Have a Gadget?
No meat mallet? Take out some frustration with the bottom of a saucepan. Or—hear me out—just ask the butcher to do it. That’s what I do half the time now, since my rolling pin keeps vanishing (kids, I suspect…).
Keeping Leftovers—If You Even Get Any
Honestly, in my house, these get gobbled up by 9pm, so leftovers are rare. If you do have some: store chicken separately in a container in the fridge, up to two days. Reheat in a pan or oven to keep crunchy. Microwave gets it soggy. But sometimes I just eat the cold chicken for breakfast—don’t judge!
How We Serve This (And Maybe You Will Too)
We usually pile sandwiches and a heap of kettle chips on a board. If I’m feeling extra, I’ll toss together a tangy tomato salad (totally recommend this one from Smitten Kitchen). Kid loves dipping chips into leftover Caesar dressing—odd, but hey, keeps them happy.
Sometimes mom will insist on pickled onions. Sometimes we ignore her. Family tradition, I guess?
The “Ouch, Don’t Do What I Did” File
- I once tried to fry on super high heat to speed things up—result: black crust, raw center. Regret.
- Forgot to salt the chicken first; tasted flat, so now I just throw on a bit of seasoning always.
- Don’t over-sauce the bun! Turns into a drippy awkward mess—which, ok, sometimes I like, but it’s hard to eat.
Common Questions I Honestly Keep Getting
- Can I make these ahead for a picnic?
- Ohh, I have! Bread with a little olive oil layer first helps it not go soggy. Don’t build until ready to eat for best crunch.
- What’s your go-to Caesar dressing brand?
- I usually use Brianna’s if I’m buying. Homemade is great but sometimes I just can’t be bothered.
- Could I grill the chicken instead for fewer calories?
- Sure! It’s not going to be “crispy chicken Caesar sandwich” proper…but you do you. Maybe add extra parm for flavor?
- How do you handle the mess?
- Honestly? I don’t. I just keep a roll of paper towels nearby and delegate wiping-up to whoever didn’t help cook.
If you’re more sauce-obsessed than me (hard to imagine), check out Cookie and Kate’s scratch Caesar dressing recipe. Just remember, more sauce means more napkins—don’t say I didn’t warn ya.
Now, if you’ve got a can of something cold and fifteen minutes, you’re halfway there to sandwich bliss. Give it a go, let me know if yours explodes like mine sometimes do, and—well, here’s to many happy, crunchy lunches!
Ingredients
- 4 boneless, skinless chicken breasts
- 1 cup all-purpose flour
- 2 large eggs
- 1 cup panko breadcrumbs
- 1/2 cup grated parmesan cheese
- 4 burger buns, toasted
- 1 cup romaine lettuce, shredded
- 1/4 cup Caesar dressing
- Salt and black pepper to taste
- 2 tablespoons olive oil
Instructions
-
1Preheat oven to 400°F (200°C) and prepare a baking sheet. Season the chicken breasts with salt and black pepper.
-
2Dredge each chicken breast in flour, dip in beaten eggs, then coat with a mixture of panko breadcrumbs and grated parmesan cheese.
-
3Heat olive oil in a large skillet over medium-high heat. Sear the breaded chicken breasts until golden and crispy, about 2-3 minutes per side.
-
4Transfer the browned chicken to the prepared baking sheet and bake for 10-12 minutes or until internal temperature reaches 165°F (74°C).
-
5Toast the burger buns. Spread Caesar dressing on the bottom half, top with lettuce, crispy chicken, extra Caesar dressing, and the top bun. Serve immediately.
Approximate Information for One Serving
Nutrition Disclaimers
Number of total servings shown is approximate. Actual number of servings will depend on your preferred portion sizes.
Nutritional values shown are general guidelines and reflect information for 1 serving using the ingredients listed, not including any optional ingredients. Actual macros may vary slightly depending on specific brands and types of ingredients used.
To determine the weight of one serving, prepare the recipe as instructed. Weigh the finished recipe, then divide the weight of the finished recipe (not including the weight of the container the food is in) by the desired number of servings. Result will be the weight of one serving.
Did you make this recipe?
Please consider Pinning it!!