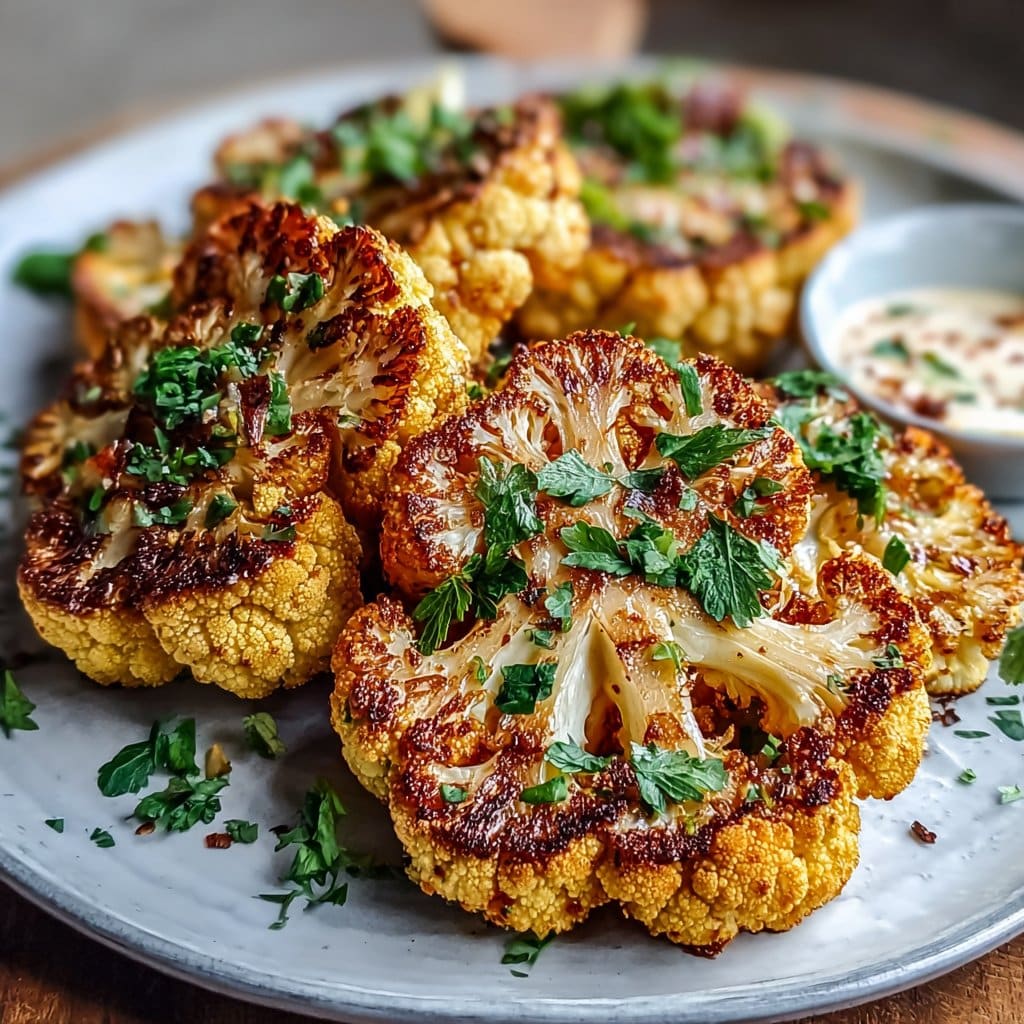
Crispy Baked Cauliflower Steaks Recipe You’ll Crave
If You’d Told Me Cauliflower Could Do This…
Honestly, I used to turn up my nose at cauliflower. My mum would try to sneak it in (usually boiled to within an inch of its life which, let’s face it, made it taste like a soggy raincoat). Then I stumbled on these crispy baked cauliflower steaks during a who’s-bringing-what potluck. I’ve never looked at a head of cauliflower the same way since. Last time I made this, my neighbor wandered over, lured by the smell—it’s always the garlic, isn’t it? Anyway, we wound up sitting on the porch with a plate of these, solving precisely zero of the world’s problems, but it was worth it.
Why I Keep Making These (and Maybe You Will, Too!)
I usually whip these up when I want something cozy but don’t want another heavy dish. Also, my family actually eats them (even the kiddo, who calls them “giant veggie nuggets”—take the win). When I really can’t be bothered with breading, I just slam everything onto one baking tray and call it rustic. If you’re trying to eat more plants without feeling like a rabbit, this is the ticket. Oh, and if you mess up the slicing… well, just call them “crispy cauliflower pieces”—I’ve done it more times than I care to admit.
What Goes Into This? (aka Ingredients)
- One large cauliflower head (you want it fresh—if it’s limp, it’s a losing battle)
- Olive oil, about 3 tablespoons (sometimes I use avocado oil—my aunt swears by it, but honestly, whatever’s on hand)
- 3/4 cup panko breadcrumbs (regular works, or even crushed cornflakes—I was desperate once and it totally sorta worked)
- 1/4 cup grated Parmesan cheese (or nutritional yeast if you’re vegan; one time I even used a sprinkle of that canned stuff and nobody complained)
- 1 teaspoon smoked paprika (hot or sweet, up to you)
- 1/2 teaspoon garlic powder (or bash up a clove if you’re a purist, but I get lazy)
- Salt and pepper to taste (I’m heavy-handed, you do you)
- 1-2 eggs, beaten (or plant-based milk mixed with a bit of flour as a sub—just goop it together somehow)
So, How Do You Make ‘Em?
- First things first: Preheat your oven to 220°C (425°F). Then stick a big ol’ baking tray in there to get hot while you sort everything else out. I swear, this part helps things crisp up properly.
- Trim the cauliflower, chop off those leaves, then slice the head into thick slabs—aim for about 2 cm. Don’t stress if you get crumbles; bits are good, they get extra crispy.
- Grab two shallow bowls (or plates with a bit of a lip so everything doesn’t end up all over the counter). Add beaten eggs in one, then breadcrumbs, Parmesan, smoked paprika, garlic powder, salt, and pepper in the other. Sometimes I add a pinch of cayenne for a kick—totally optional.
- Brush or drizzle cauliflower steaks with olive oil. Dip each steak first in egg, then press firmly into your breadcrumb mix. Get both sides. Don’t be shy, give them a little smush—this is where I usually sneak a taste of the coating.
- Carefully transfer the coated steaks onto the piping-hot tray (I basically use whatever spatula’s clean). If you lose a bit of coating—don’t panic, just press some more on.
- Bake for 25 minutes on one side, then flip and give it 10-12 more minutes. They should look golden and crispy. Sometimes mine get a little spotty. On second thought, spotty is good—don’t fight it.
- Leave to cool for five minutes if you can stand to wait—my husband always grabs one straight off the tray, burns his tongue every time.
Notes From the (Messy) Trenches
- I tried air-frying these once, but honestly the oven batch was crispier. Live and learn.
- If your cauliflower is giant, you’ll get funky-shaped pieces. Just embrace the chaos.
- Breadcrumbs stuck better when I used a bit more oil—I ignored a “low fat” tip and never looked back.
Stuff I’ve Tried That Worked (and Didn’t)
- Spices: Curry powder makes the whole thing taste a bit like takeaway—good in winter. Sumac was weirdly sweet, not sure I’d do it again.
- Cheese: Swapping in sharp cheddar? Delicious but a mess to clean up after. Gruyère worked but was a splurge.
- Not Great: I tried skipping the egg wash once… everything slid off onto the tray in a sad pile. Don’t do that.
Don’t Have All the Gear?
Baking tray is essential (or so I thought), but once I used a pizza stone—turned out beautifully uneven. If you don’t have a basting brush, your clean hands work. Or use some kitchen roll to dab on oil (not exactly pro, but it gets the job done).
How Long It’ll Keep (Kinda Moot If You Ask My Family)
Technically, you can stash leftovers in the fridge for 2 days in a sealed container (though honestly, in my house it never lasts beyond the evening). If they get a little soft, pop ‘em back in the oven for a blast at 200°C and they crisp up again.
If You’re Wondering How To Serve It…
I love these with a big dollop of plain yogurt and a handful of fresh herbs (parsley, coriander, whatever’s not wilted at the back of the fridge). My friend dips hers in sriracha mayo. At big family dos, we toss them onto a platter with a bed of lemony salad. Once, we ate them while watching the cricket, and honestly I can’t imagine a better snack. You do you.
Lemons I’ve Turned Into Lemony Lessons
- I tried to skip preheating the tray once—result: soggy bottoms. Learn from my pain.
- Flipping the steaks with a spatula rather than tongs keeps them in one piece. Tongs = heartbreak.
- Don’t walk off to gossip on the phone during the last 10 minutes. Ask me how I know.
Questions Folks Actually Asked Me
- Q: Can I freeze these?
- A: Sure, you can, but when you reheat them they’ll probably lose a bit of their crispiness. Honestly, I like them fresh best, but sometimes I double-batch and freeze the extras. Just don’t expect miracles.
- Q: Do I have to use eggs?
- A: Nope! A bit of plant milk and flour mixed up works just fine. Actually, I’ve found that a splash of oat milk and plain flour makes a goopy mix that clings pretty well.
- Q: Is there a gluten-free option?
- A: Absolutely, just swap the panko for gluten-free breadcrumbs, or even crushed rice crackers if you’re in a pinch (tried it, no regrets).
- Q: How thick should the cauliflower be?
- A: Thick enough that it doesn’t fall apart, but thin enough to cook through. Around 2 cmish is my usual. But hey, if you wind up with a chunky bit, just give it a few extra minutes in the oven and it’ll be grand.
- Q: Can I add more spices?
- A: You bet—go wild. I sometimes go overboard with the smoked paprika. One friend uses Italian seasoning and swears it’s the only way. Whatever floats your boat.
P.S. If you want to geek out about cauliflower varieties, this Bon Appétit guide is fun. Or if you’re after more veggie mains, Minimalist Baker’s take is ace, though I do things a little differently. Anyway, happy cooking!
Ingredients
- 1 large head cauliflower
- 2 tablespoons olive oil
- 1 teaspoon garlic powder
- 1 teaspoon smoked paprika
- 1/2 teaspoon salt
- 1/2 teaspoon black pepper
- 3/4 cup panko breadcrumbs
- 1/4 cup grated vegan parmesan cheese (or regular parmesan)
- 2 tablespoons chopped fresh parsley
Instructions
-
1Preheat the oven to 425°F (220°C) and line a baking sheet with parchment paper.
-
2Remove the leaves from the cauliflower and trim the stem slightly, keeping the head intact. Slice into 3/4-inch thick steaks, reserving loose florets for another use.
-
3Brush both sides of each cauliflower steak with olive oil. Sprinkle with garlic powder, smoked paprika, salt, and black pepper.
-
4In a shallow bowl, combine panko breadcrumbs, grated vegan parmesan cheese, and chopped parsley. Press each steak gently into the mixture, coating both sides.
-
5Arrange on the prepared baking sheet and bake for 25-30 minutes, flipping halfway, until the steaks are tender and golden brown.
-
6Serve hot, garnished with extra parsley or a squeeze of lemon juice if desired.
Approximate Information for One Serving
Nutrition Disclaimers
Number of total servings shown is approximate. Actual number of servings will depend on your preferred portion sizes.
Nutritional values shown are general guidelines and reflect information for 1 serving using the ingredients listed, not including any optional ingredients. Actual macros may vary slightly depending on specific brands and types of ingredients used.
To determine the weight of one serving, prepare the recipe as instructed. Weigh the finished recipe, then divide the weight of the finished recipe (not including the weight of the container the food is in) by the desired number of servings. Result will be the weight of one serving.
Did you make this recipe?
Please consider Pinning it!!