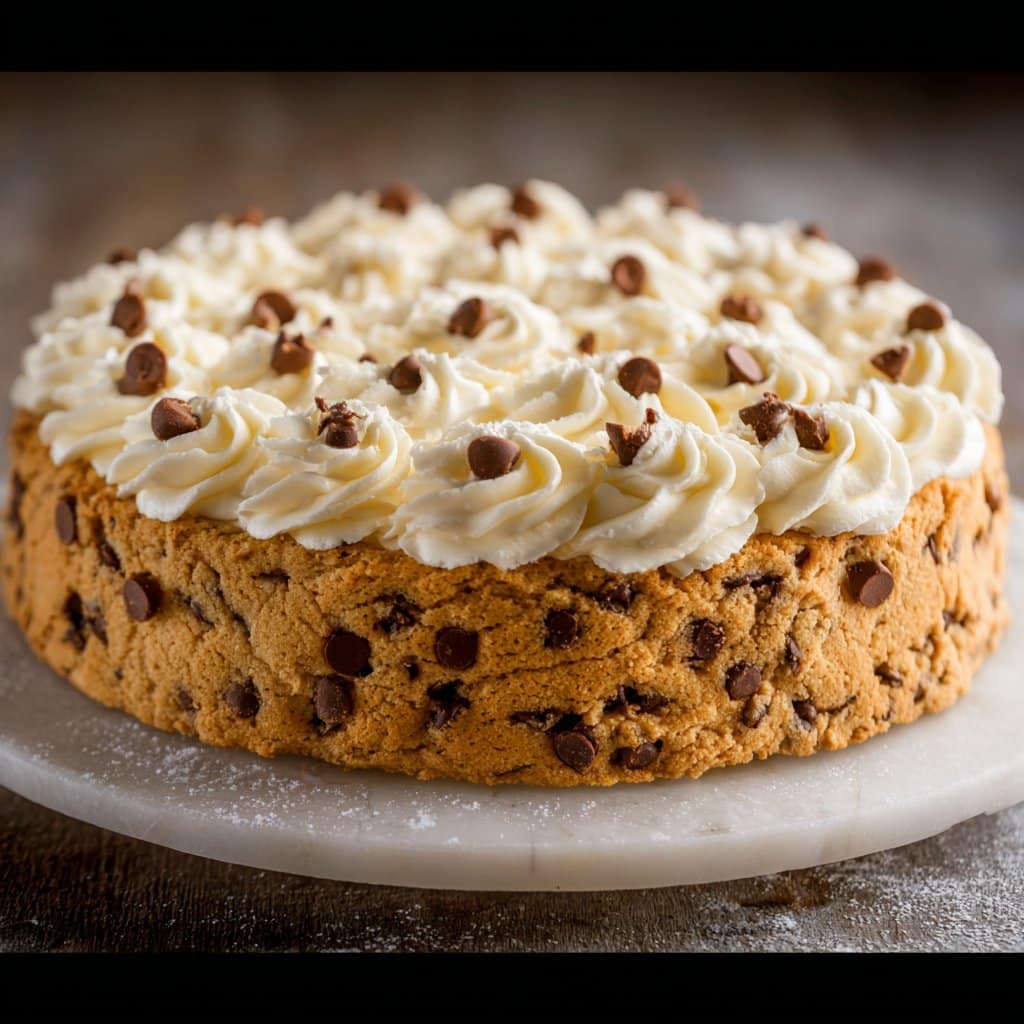
Chocolate Chip Cookie Cake with Buttercream Frosting: A Happy Mess
So, About This Chocolate Chip Cookie Cake…
I have to confess, the first time I tried making a Chocolate Chip Cookie Cake with Buttercream Frosting, I wrecked my mum’s favorite baking tin (don’t ask), and the center looked like some sort of volcanic crater. Funny enough, that’s when I started thinking, “Hey, maybe the slightly underbaked bit is the best part.” Now it’s a regular at our family birthdays and my neighbor Mary has even started dropping increasingly unsubtle hints around her “surprise” parties. Not gonna lie—when the smell of cookies + cake wafts through the house, it’s like instant happiness. And if you happen to have an awkwardly quiet cousin at your gathering? This cake gets everyone talking…mostly about getting seconds.
Oh, and a quick side note: assembling this tends to attract family members and flatmates like moths to warm socks—so guard your mixing bowl! Or, don’t, and embrace the chaos. Your call.
Why I Keep Coming Back To This One
I bake this when I want a cookie but also when I want cake (greedy, maybe, but honest). My family goes mad for it because let’s face it: who can be annoyed when handed a slab of cookie with swirls of buttercream on top? Plus, if you’re a bit on the lazy side (hi, that’s me on Tuesdays), you don’t even have to roll out dough—just smoosh it in the pan and bake. Even my brother, who’s had beef with raisins since some traumatic oatmeal cookie incident, loves this, because, well, chocolate rules. It rescued me from a dessert disaster once when I overbaked brownies so hard they could have stopped a door. So yeah, it’s my backup hero too.
Gathering the Stuff (AKA the Ingredients)
- 1 cup (225g) unsalted butter, melted and slightly cooled (I use salted sometimes, just halve the salt below)
- 1 cup packed light brown sugar (I’ve snuck in dark brown in a pinch and, actually, it’s good)
- 1/2 cup granulated sugar (or toss in raw sugar—my grandmother swore by it)
- 2 large eggs
- 1 tbsp vanilla extract (please don’t use the imitation stuff, unless you have to—that’s fine too)
- 2 1/4 cups all-purpose flour (bread flour has worked for me when I ran out once, it’s chewier)
- 1 tsp baking soda
- 1/2 tsp salt (if you use salted butter, like I sometimes do, use less or skip)
- 1 1/2 cups semisweet chocolate chips (milk chocolate will do or even chopped up bars—someone once used M&Ms. No complaints)
- Sprinkles (optional—my kids act like it’s mandatory, though)
For the Buttercream:
- 1/2 cup (115g) unsalted butter, room temp (some folks like to use margarine, but honestly, butter just wins here)
- 2 cups confectioners’ sugar (powdered sugar; icing sugar—pick your regional poison)
- 1–2 tbsp milk or cream (in an emergency, water has worked, but cream is dreamy)
- 1 1/2 tsp vanilla extract
- Pinch of salt
How I Make It—No Need for Perfection
- First, preheat your oven to 350°F (175°C). Spray or line a 9-inch cake pan, springform if you’ve got it, but honestly, I’ve used a deep pie dish and no one noticed.
- Grab a big bowl and whisk the melted butter with the brown and white sugar until it’s glossy, which takes less effort than you’d think. Taste it if you like—this is the fun bit.
- Add eggs one at a time, along with the vanilla. Stir until combined but don’t obsess over lumps. (If you want to use a mixer, feel free, but I often go old-school with a wooden spoon.)
- Dump in your flour, baking soda, and salt, and mix until just combined. It might look a bit rough around the edges; that’s perfectly fine, trust me.
- Fold in your chocolate chips (and snatch a few if you, like me, have little willpower).
- Scrape the dough into your pan. Squish it around so it mostly covers the base. If you want it thicker at the edges—do your thing.
- Bake 23 to 27 minutes—or until the edges look golden and the middle has a slight wobble. If you poke it and it springs back, you’re golden. Actually, underbaked is better than dry here.
- Let it cool completely before the frosting goes on. Or, if you’re impatient, let it cool mostly and just know your buttercream might go a bit melty (not a crisis).
- For the Buttercream: Beat butter and powdered sugar until fluffy, scraping down the bowl if you remember. Add the vanilla, salt, and a tablespoon of milk or cream, then beat again. If it’s stiff, add more milk—just a splash. If it’s runny, more sugar (I usually overshoot one way or the other!).
- Decorate with a swirl, star tip, or just smoosh it on with a spatula (my preferred method when I’m tired). Sprinkle like you mean it if you’re in the mood!
Notes I’ve Gathered Along the Way
- If your cookie cake comes out pale in the middle, don’t worry—better gooey than overdone.
- I used to be militant about cooling before frosting, but sometimes I just go for it, and honestly, warm buttercream is its own delight.
- Springform pans make things easier when it comes to slicing, but I’ve absolutely pried this out of ordinary pans with a butter knife and only lost minimal cake.
- If you chill the dough for 30 minutes, you’ll get a thicker, chewier cake (but again, I’m impatient and skip this 90 percent of the time).
Swaps, Tweaks, & A Failed Experiment
Substitute white chocolate chunks or butterscotch chips if you’re after something a bit different. Peanut butter chips? That’s a yes from me.
Once I tried mixing in chopped walnuts but my daughter declared, “Mum, you ruined it.” So maybe skip if you have nut skeptics around.
And for my gluten free mates, I’ve used King Arthur GF flour with solid results. Actually, slightly crumblier but still ace.
On Gear & Getting Creative
A stand mixer will save you an arm workout (mine’s from the charity shop and older than me). But if you haven’t got one, elbow grease and a wooden spoon work fine, though the icing does require a bit more gumption.
If you don’t have a cake pan, seriously, try a pie dish or even a square tray—just adjust your baking time and keep an eye on it. Or, once, I just spread the dough in a cast iron skillet and it turned out ace, if a bit rustic looking.
Keeping It Fresh (A Pipe Dream?)
Technically, you can wrap leftovers in clingfilm and keep it on the counter for two days, or in the fridge if you must. But honestly, in my house it rarely survives to the next morning unless I hide a piece and lie about it. If you actually manage to freeze a slice, just thaw at room temp before eating—though, between you and me, cold cookie cake is oddly great.
How We Serve It (A Totally Not-Mandatory Suggestion)
I’m a purist—just thick wedges with a decent cuppa. My husband claims a scoop of vanilla ice cream is “the only correct way.” For birthdays, add candles, but sometimes we go rogue and add leftover warm fudge sauce. Sunday afternoons, though, it’s usually all about licking the leftover buttercream straight from the spatula. Oops.
Oops, My Top Lessons (AKA Pro Tips!)
- Don’t overmix the dough! I tried to get fancy with my stand mixer, and it came out tough—lesson learned, just mix until everything holds together.
- Resist the urge to bake until super firm—it’ll set as it cools. Once, I left it in “just five more minutes” and regretted it. Dry cookie cake… it’s a hard sell.
- If you’re impatient, make the frosting while the cake cools—saves time, but do as I say, not as I do, because sometimes I end up with melty buttercream puddles (still delicious, though).
Real-Life Questions I’ve Actually Been Asked
Can I use store-bought frosting? Totally. I’ve done this when I was shattered after a long Monday—no one complained, probably because of all the chocolate chips.
Does the cake really need to cool all the way? In a perfect world, yes. But in my real kitchen, we usually start frosting when it’s just barely warm. Bonus: gooey icing.
Can I double this for a party? It’ll work! I use a sheet pan and watch the bake time—usually takes longer. And maybe double the chocolate chips because why not?
What’s the best chocolate to use? Semi-sweet is my favourite, but whatever’s in the cupboard works (I once used Easter bunny leftovers… desperate times, delicious results).
Do I have to frost it at all? Nope! I think it’s tasty naked—or just dust with powdered sugar if you’re in a hurry.
And on a totally unrelated note: did you know you can use leftover cookie cake to make an epic ice cream sandwich? Just cut, stack, and smoosh, then act innocent when everyone asks where it went (not that I’d ever do that…)
For more wobbly, overenthusiastic baking ideas, I seriously recommend Gemma’s Giant Cookie Cake—she’s got some cracking tips that helped me the first go round.
Ingredients
- 2 1/4 cups all-purpose flour
- 1 teaspoon baking soda
- 1/2 teaspoon salt
- 3/4 cup unsalted butter, melted and cooled
- 1 cup packed light brown sugar
- 1/2 cup granulated sugar
- 2 large eggs
- 2 teaspoons pure vanilla extract
- 2 cups semi-sweet chocolate chips
- 1/2 cup unsalted butter, softened (for frosting)
- 2 cups powdered sugar (for frosting)
- 2 tablespoons milk (for frosting)
- 1/2 teaspoon vanilla extract (for frosting)
Instructions
-
1Preheat oven to 350°F (175°C). Grease a 9-inch round cake pan and line with parchment paper.
-
2In a medium bowl, whisk together flour, baking soda, and salt.
-
3In a large bowl, combine melted butter, brown sugar, and granulated sugar. Beat in eggs and vanilla extract until smooth.
-
4Gradually add dry ingredients to wet ingredients, mixing until just combined. Fold in chocolate chips.
-
5Spread cookie dough evenly into prepared pan. Bake for 22-25 minutes, or until golden and set at the edges. Cool completely in pan.
-
6For the frosting, beat softened butter until creamy. Mix in powdered sugar, milk, and vanilla extract until smooth. Pipe or spread frosting over cooled cookie cake before serving.
Approximate Information for One Serving
Nutrition Disclaimers
Number of total servings shown is approximate. Actual number of servings will depend on your preferred portion sizes.
Nutritional values shown are general guidelines and reflect information for 1 serving using the ingredients listed, not including any optional ingredients. Actual macros may vary slightly depending on specific brands and types of ingredients used.
To determine the weight of one serving, prepare the recipe as instructed. Weigh the finished recipe, then divide the weight of the finished recipe (not including the weight of the container the food is in) by the desired number of servings. Result will be the weight of one serving.
Did you make this recipe?
Please consider Pinning it!!