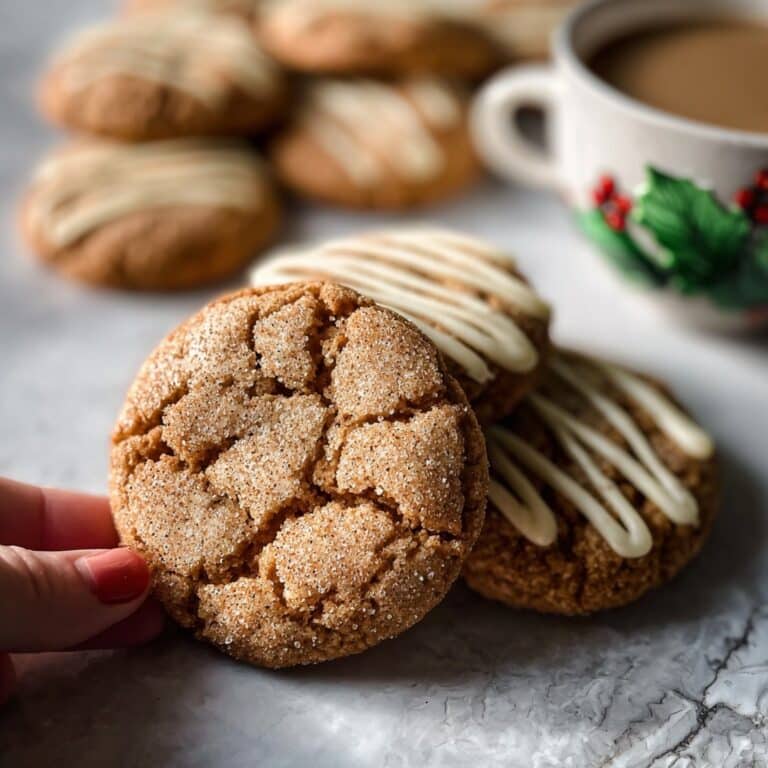
Cannoli Cookies Recipe: My Chatty, Real Life Guide
Let Me Tell You About Cannoli Cookies (You’re Gonna Fall for ‘Em)
Right, so ever since Nonna handed me her battered recipe card—stains, scribbles and all—I’ve been making these cannoli cookies for any excuse I can think of. A winter Sunday. A particularly dreary Tuesday. One time I made a double batch just ’cause my neighbor raved about them (which meant, naturally, that I just had to show off a little!). I mean, cannoli are those Italian pastries that look all fancy, but these cookies? Easier, less fiddly, and let’s face it, you don’t have to worry about deep-frying anything while chasing a toddler. Last week, my nephew called ‘em mini cannoli boulders, and honestly, he isn’t wrong.
Why You’ll Love This (At Least, I Do!)
I make this when the whole crew is coming over because they disappear fast. Like, poof—gone. My family goes crazy for this because somehow the cookies taste both creamy and crunchy at the same time (I know that sounds weird, but just trust me). Also, if you’re the sort who avoids traditional cannoli ’cause you’re not up for frying things (no judgment—I only braved it once), this is 100% for you. Plus, and this makes me absolutely delighted for reasons I can’t even explain, you can batch these for school bake sales and not have kids say, “uh, what is that?” Well…OK…sometimes they say it, but after one bite, you’re golden. And the best bit? The ricotta keeps these soft, but not wet. (Took me three tries to nail that texture—don’t get me started.)
What You’ll Need (And Some Swaps, ‘Cause Life Happens)
- 1 cup ricotta cheese (drain it a bit—sometimes I use whole milk, but part skim is fine if that’s all you have, just not too watery)
- 1/2 cup unsalted butter (room temp, or honestly, I stick it in the microwave for like 8 seconds if I forget)
- 3/4 cup granulated sugar (I’ve used half brown sugar in a pinch, changes the flavor but not in a bad way)
- 1 large egg (if your eggs are tiny, maybe use two—they’re not fussy cookies)
- 2 teaspoons vanilla extract (I’ve used a little orange zest too—not traditional, but tasty)
- 2 cups all-purpose flour (I tried using a gluten-free blend once and, well, maybe you’ll have better luck than me)
- 1/2 teaspoon baking powder
- 1/4 teaspoon salt (or a big pinch, if you go by feel)
- 2/3 cup mini chocolate chips (the minis are nicer but if all you’ve got is regular, go for it)
- 1/2 cup chopped pistachios (optional, sometimes I sub in toasted almonds ‘cause pistachios are expensive these days!)
- Powdered sugar, for dusting (My grandmother always insisted on a heavy snow, but you do you)
Here’s What To Do (Don’t Stress If It Gets Messy)
- Prep time! Fire up your oven to 350°F (175°C). Grab a baking sheet and either line it with parchment or a silicone baking mat—I started using those mats last year and, honestly, they’re magic.
- Mix the wet stuff. OK, beat the butter and sugar in a large bowl until it’s pale and fluffy—usually takes about 2-3 minutes with my old hand mixer (if you’re using a wooden spoon, it’s arm day, baby, but doable). Scrape the bowl. Add ricotta, egg, and vanilla. Beat again. It’ll look a bit runny and…kinda odd at this stage, but that’s normal. (This is where I usually sneak a taste—hygiene police, look away!)
- Add the dry stuff. Chuck the flour, baking powder, and salt in. Mix until you’ve got a dough. If it seems really sticky, add another spoonful of flour, but not much more. Stir in chocolate chips and pistachios. (It does look like it’s fighting you at this point; don’t panic.)
- Scoop & bake. Drop generous tablespoonfuls onto your tray, about 2 inches apart—don’t go mad, they spread a little, but not loads. If you want perfect rounds, roll ‘em gently, but I never bother. Bake for about 13-16 minutes. The edges should just color, middles stay pale.
- Cool & dust! Leave them on the tray for a few minutes—hot cookies are fragile—then transfer to a rack. Once they’re barely warm, give them a pretty (or haphazard, I’ve done both) sprinkle of powdered sugar. Gorgeous, right?
Stuff I Wish I’d Known Sooner (My Notes)
- If your ricotta is crazy wet, drain it in a mesh sieve with paper towels—seriously, it makes a difference. Or not, if you like extra-soft cookies, but I find it a tad much.
- The dough is stickier than regular cookies. Don’t worry about it; messy is normal here. I once dusted my hands with flour to help and it worked, sorta.
- Actually, I find it works better if you eat one while still a bit warm. Something about molten chocolate chips—dangerous but so good.
- I think these taste better the next day, no matter what I tell myself about fresh cookies being best…your call though!
Things I’ve Tried (Some Worked, Some…Eh)
- Orange zest in the dough is a winner—perkier flavor.
- Swapped pistachios for chopped dried cherries once. Nice, but too sweet for me; maybe if you dial down the chocolate…
- I keep threatening to roll them in mini chocolate chips before baking, but they looked weird and a bit crunchy. Learn from my mistakes!
Do You Need Fancy Gear? Ehh, Just Use What You Have
A cookie scoop is great but a regular spoon works fine—I’ve even used a melon baller (don’t ask). No wire rack? I’ve cooled cookies on a plate, or, heck, once atop a brown paper bag. It’s a bit rustic but gets the job done.

How Do You Store These? (Or Not…)
Seal in an airtight tin for 2-3 days—or so I’ve heard. Honestly, in my house, a batch never lasts more than a day, so I’m going by what my mom swears by. If you really need to keep them longer, the fridge works (layer with baking paper) but returns to room temp before eating. Freezer? Sure, I’ve frozen dough lumps for up to a month. Baked cookies get a bit soft but nothing tragic.
Serving—Or Just Gobble Them
I like these with strong coffee (or tea if it’s that kind of day). For parties, I’ve dusted them with cocoa powder, or stuck a maraschino cherry on top for drama. My cousin dunks them in melted chocolate and calls it ‘advanced mode’. Oh, and someone always sneaks one before dinner—fair warning.
Lessons I Learned the Hard Way (My Pro Tips…ish)
- Don’t rush creaming the butter and sugar. I once tried and the cookies wound up dense—regret. Take that two-minute arm workout, trust me.
- Bake just until edges have color. If you wait for the tops to brown, they’ll be dry. I know this ’cause I’ve done it—twice, shamefully.
- Baking when ricotta’s too wet = flat, odd cookies. Drain, drain, drain (see, I’m repeating myself, so it must be important?).
- On second thought, if you overbake them, slathering on Nutella helps—can’t hurt!
The FAQ Bit (Real Questions, Real Talk)
- Can I skip the nuts? Absolutely! My brother-in-law hates pistachios, so I’ve made plenty nut-free—they’re just as lush.
- What’s the deal with the ricotta? Get the firmest possible (I usually grab Galbani) but any brand is fine. If it’s watery, just drain; no drama.
- Do I have to use mini chips? No—regular, chopped chocolate, even white chocolate if that’s your vibe. But the mini ones do scatter more evenly.
- Why are my cookies flat? Ah, that’s usually ricotta too wet, or butter too melty. Try a bit more flour, or keep the dough in the fridge for 15 mins first; honestly, even professional bakers get surprises now and then.
- Any tips for making ahead? Absolutely, dough keeps in the fridge for 24 hours. Baked cookies—2 days, but you might want to refresh them in the oven for a few minutes.
- Are these like traditional cannoli? Not exactly—it’s the vibe, not the structure. For authentic cannoli shells, check Serious Eats. Or if you want to geek out about ricotta, I love this ricotta showdown from The Kitchn.
- How are these for kids? Well, the batch usually disappears when my nieces are around. Just maybe cut the nuts out for little ones (choking hazard, y’know).
Anyway, now you know my whole saga with cannoli cookies! If you’ve got ricotta and a mood for cookies with a little razzle-dazzle, go for it. Just don’t blame me if they vanish before you can brag.
Ingredients
- 1 cup ricotta cheese, well-drained
- 1/2 cup unsalted butter, softened
- 3/4 cup granulated sugar
- 1 large egg
- 1 teaspoon vanilla extract
- 1 1/2 cups all-purpose flour
- 1/2 teaspoon baking powder
- 1/4 teaspoon salt
- 1 teaspoon orange zest
- 2/3 cup mini chocolate chips
- 1/3 cup chopped pistachios
Instructions
-
1Preheat oven to 350°F (175°C) and line two baking sheets with parchment paper.
-
2In a large mixing bowl, cream together the butter, ricotta cheese, and sugar until light and fluffy.
-
3Add the egg, vanilla extract, and orange zest. Beat until well combined.
-
4In a separate bowl, whisk together the flour, baking powder, and salt. Gradually add the dry ingredients to the wet ingredients, mixing until just combined.
-
5Fold in the mini chocolate chips and chopped pistachios.
-
6Drop rounded tablespoons of dough onto prepared baking sheets. Bake for 12-14 minutes or until edges are lightly golden. Let cool on a wire rack before serving.
Approximate Information for One Serving
Nutrition Disclaimers
Number of total servings shown is approximate. Actual number of servings will depend on your preferred portion sizes.
Nutritional values shown are general guidelines and reflect information for 1 serving using the ingredients listed, not including any optional ingredients. Actual macros may vary slightly depending on specific brands and types of ingredients used.
To determine the weight of one serving, prepare the recipe as instructed. Weigh the finished recipe, then divide the weight of the finished recipe (not including the weight of the container the food is in) by the desired number of servings. Result will be the weight of one serving.
Did you make this recipe?
Please consider Pinning it!!