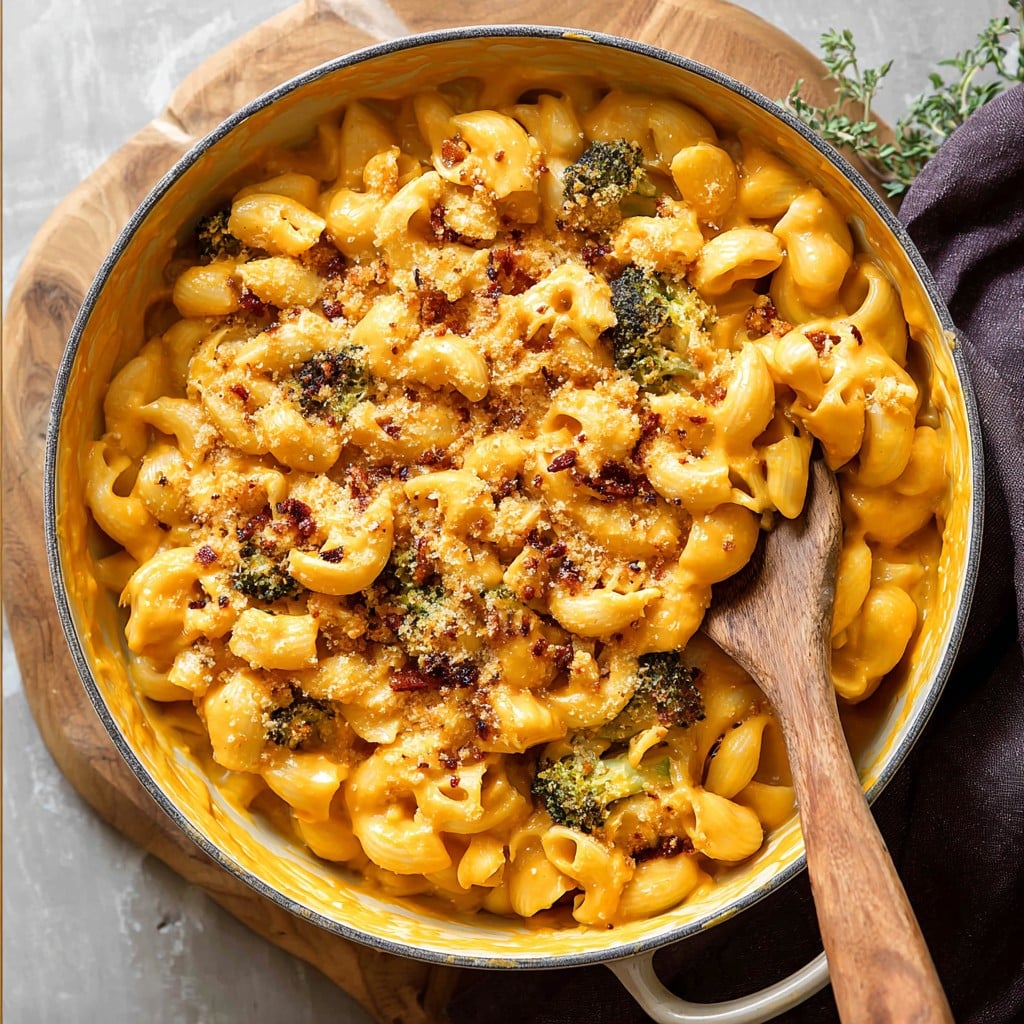
Butternut Squash Mac & Cheese: Cozy, Creamy, Cheesy Delight
Let’s Talk About Butternut Squash Mac & Cheese (and why I keep making it)
You know, the first time I made Butternut Squash Mac & Cheese, it was more of an accident than a plan. We had this giant butternut squash from the farmer’s market (the sort that sits on your counter judging you for weeks) and not a clue what to do with it. I remembered something about someone putting pureed veg in pasta, so I just sort of…went for it. And wow, total happy accident! The kids kept asking if I’d put extra cheese in and honestly, I just let them believe it was all cheddar magic. Don’t tell.
Actually, scratch that. Tell everyone. It feels a little like cheating your way to a healthier mac without sacrificing that creamy comfort-food vibe. Like, if mac and cheese decided to dress up just a tiny bit. Oh, and quick aside? If your cat tries to steal any cheese when you turn your back, that’s apparently mandatory in this house.
Why I Always Come Back to This (and You Might, Too)
I make this when a regular old boxed mac just feels… sad. My family goes bonkers for it because it’s got that velvety sauce and sweet, almost nutty background hint from the butternut (and I sneak in extra veggies, so I call it a win-win). If I’m feeling lazy or totally frazzled, I use pre-cut squash—honestly, who has time to wrangle a whole one every week? The best bit: you barely taste the squash as its own thing, it just sort of becomes this golden, creamy setup for all the cheese to shine.
Confession: sometimes the sauce goes a bit lumpy and I mutter at it under my breath, but it always smoothes out in the end, promise.
Here’s What You’ll Need (But Feel Free to Improvise)
- 1 medium butternut squash, peeled and chopped (about 3 cups, ish—pre-cut works if you’re short on time or patience)
- 250g (half a box or so) macaroni or any short pasta really; I’ve even used penne on a particularly scatterbrained day
- 1 cup milk (whole milk is best but hey, I’ve used oat milk and lived to tell the tale)
- 1 1/2 cups grated sharp cheddar (grandma swore by Seriously Strong Cheddar, but if all you’ve got is a store brand, that’ll do the trick!)
- 1/2 cup grated parmesan (I tend to use whatever hard cheese is at the back of the fridge)
- 2 tbsp butter (if you’re out, a splash of olive oil works but don’t tell the purists)
- 2 cloves garlic, minced (more or less to taste—I’m not judging)
- Salt & black pepper, to taste
- Pinch of nutmeg (optional, but I add it when I remember)
- Optional for the fancy types: breadcrumbs, fresh thyme, smoked paprika
How to Make It (Loose Instructions & Honest Thoughts)
- Preheat your oven to 400F/200C if you want to finish with a baked top. Or honestly, skip that if you’re feeling rebellious—it’s still darn good stovetop.
- First, tackle the squash: toss the pieces on a tray, drizzle of olive oil, pinch of salt; roast 25–30 minutes till golden and smooshable. (If you’re in a rush, boiling in salted water for about 15 min works. But roasting = more flavor, if you ask me.)
- Meanwhile, boil the pasta in a big-ish pot of salted water. Cook until just barely done (al dente is the fancy word; I just bite a piece to test, and occasionally burn my tongue. Classic.)
- Drain your squash and blitz it in a blender or food processor with the milk till it’s super smooth. If you don’t have time or a blender, just mash with a fork and accept minor lumpiness.
- Melt butter in a saucepan, then add garlic; fry gently until it smells amazing. Dump in the squash-milk mixture, give it all a good stir and bring up the heat, stirring now and then. There’s a moment where it’ll look almost weirdly thick—don’t panic! That’s normal.
- Stir in cheddar and parmesan, handful by handful. This is where I usually sneak a spoonful (for quality control, obviously). Season? Yes—loads of salt, pepper and that dash of nutmeg.
- Add the pasta to the sauce. If it seems too thick, a splash (or two) of pasta cooking water sorts it out. Trust me, it’s saved me more times than I care to admit.
- If you’re baking it: pour everything into a baking dish, top with crumbs, thyme, paprika or whatever else feels right. Bake about 15 min till golden and bubbling at the sides. Then again, half the time I skip this because people are clamoring for dinner and I don’t fancy the fuss.
Attempts, Accidents and Notes from My Kitchen
- I once tried microwaving the squash to save time. Didn’t love the result—kind of watery, honestly. Stick to roasting or boiling.
- If you forget the nutmeg, no one will notice but you.
- This gets even better, I think, on day two. That is, if you have any leftovers (doubtful).
- Freezer note: It technically freezes, but reheats kind of… grainy? I just don’t bother usually.
Variations (the hits and the, hmm, not-quite-hits)
- Once, I swapped half the squash with sweet potatoes when butternut was gone. Tastes lovely, but a tad sweeter—my partner looked skeptical but ate his entire plate, so?
- Broccoli florets stirred in during the last 2 minutes of pasta boiling add a nice green pop; this time, my youngest accused me of trickery (but also went back for seconds).
- I tried it with blue cheese once. Strong stuff. Maybe too strong. Proceed with caution.
Gear You Might Need (But Not Always)
- Biggish saucepan
- Pot to boil pasta
- Baking dish if you’re going for the oven-finish
- Blender or food processor (but a potato masher works in a pinch if all else fails—just expect a rustic vibe!)
Leftovers? (Ha!) — Storage Info
To be fair, in my house, this rarely makes it past dinner. But if you’re one of those enviably self-controlled types, pop it in a sealed container in the fridge for 2 days. Reheat gently on the stove with a splash of milk; if you nuke it in the microwave, be warned, you might get that weird curdle-y separation (still tasty, just less pretty).
How We Dish It Up (literally)
I love serving this with a big sage-y salad or, on especially lazy days, just a mound of peas and a couple of crispy rashers (that’s British for bacon, by the way). My sister swears by ketchup on the side, but… well, families are weird.
If I Could Go Back: A Few Pro Tips Learned the Hard Way
- If you rush the cheese melting part, it sometimes goes gloopy and a bit weird. Actually, I find it works better if you keep the heat low and go slow—you want creamy, not stringy (don’t ask how I know that, just trust me).
- I used to add all the milk at the same time, but I realized it’s best to go half at first, then top up; otherwise, you sometimes get soup, not sauce. Learned that one the messy way.
FAQ From My Real Life (And No, I Didn’t Make These Up)
- Can I make it vegan?
- Yeah sure, just use a good vegan cheddar (Violife is pretty decent) and oat milk or similar. The squash on its own is pretty rich, so you really don’t lose much. (I’ve got a vegan pal who swears by Nora’s method if you want an all-in spin.)
- Do I have to roast the squash?
- Nope! Boil it if you’re in a rush. Or, check out Cookie & Kate’s microwave trick—not my fave, but in a pinch, it works.
- Can I freeze it?
- You can, but it goes a bit weird when defrosted (grainy, as I mentioned before). For best texture, just make what you need for now—leftovers don’t last anyway, right?
- What cheese works best?
- Sharp cheddar is my go-to, but honestly, I’ve mixed in swiss, gouda—even those random cheese bits at the end of the week. Don’t overthink it.
Quick Digression—Why do they call it “mac” anyway?
This is random, but did you know my gran called any elbow pasta “mac” even if it wasn’t the elbow kind? Could be penne, fusilli, she’d say, “put more mac in the pot!” Maybe that’s a British thing, or more likely, just a her thing. Anyhow, it’s one of those family quirks I’m keeping alive, even if my daughter rolled her eyes the first time I did it. Tastes the same either way.
If you need proper visuals (I mean, who doesn’t sometimes?), Smitten Kitchen’s recipe photos always make me hungry, so peek there for some drool-worthy inspo.
Ingredients
- 2 cups butternut squash, peeled and diced
- 8 oz elbow macaroni
- 1 cup shredded cheddar cheese
- 1/2 cup grated parmesan cheese
- 2 tablespoons unsalted butter
- 2 tablespoons all-purpose flour
- 1 1/2 cups whole milk
- 1/2 teaspoon garlic powder
- Salt and pepper to taste
- 1/4 cup breadcrumbs (optional, for topping)
Instructions
-
1Preheat the oven to 400°F (200°C). Spread diced butternut squash on a baking sheet, drizzle with a little olive oil, season with salt and pepper, and roast for 20 minutes until tender.
-
2Cook the elbow macaroni according to package instructions until al dente. Drain and set aside.
-
3In a saucepan over medium heat, melt the butter. Stir in the flour and cook for 1 minute, then slowly whisk in the milk. Cook, stirring constantly, until the sauce thickens.
-
4Add roasted butternut squash to the sauce. Use an immersion blender to blend until smooth. Stir in cheddar cheese, parmesan, and garlic powder until melted. Season with salt and pepper.
-
5Combine the cooked macaroni with the sauce and mix well. Transfer to a greased baking dish and, if desired, sprinkle with breadcrumbs.
-
6Bake for 15 minutes at 400°F (200°C) until golden and bubbly. Serve hot.
Approximate Information for One Serving
Nutrition Disclaimers
Number of total servings shown is approximate. Actual number of servings will depend on your preferred portion sizes.
Nutritional values shown are general guidelines and reflect information for 1 serving using the ingredients listed, not including any optional ingredients. Actual macros may vary slightly depending on specific brands and types of ingredients used.
To determine the weight of one serving, prepare the recipe as instructed. Weigh the finished recipe, then divide the weight of the finished recipe (not including the weight of the container the food is in) by the desired number of servings. Result will be the weight of one serving.
Did you make this recipe?
Please consider Pinning it!!