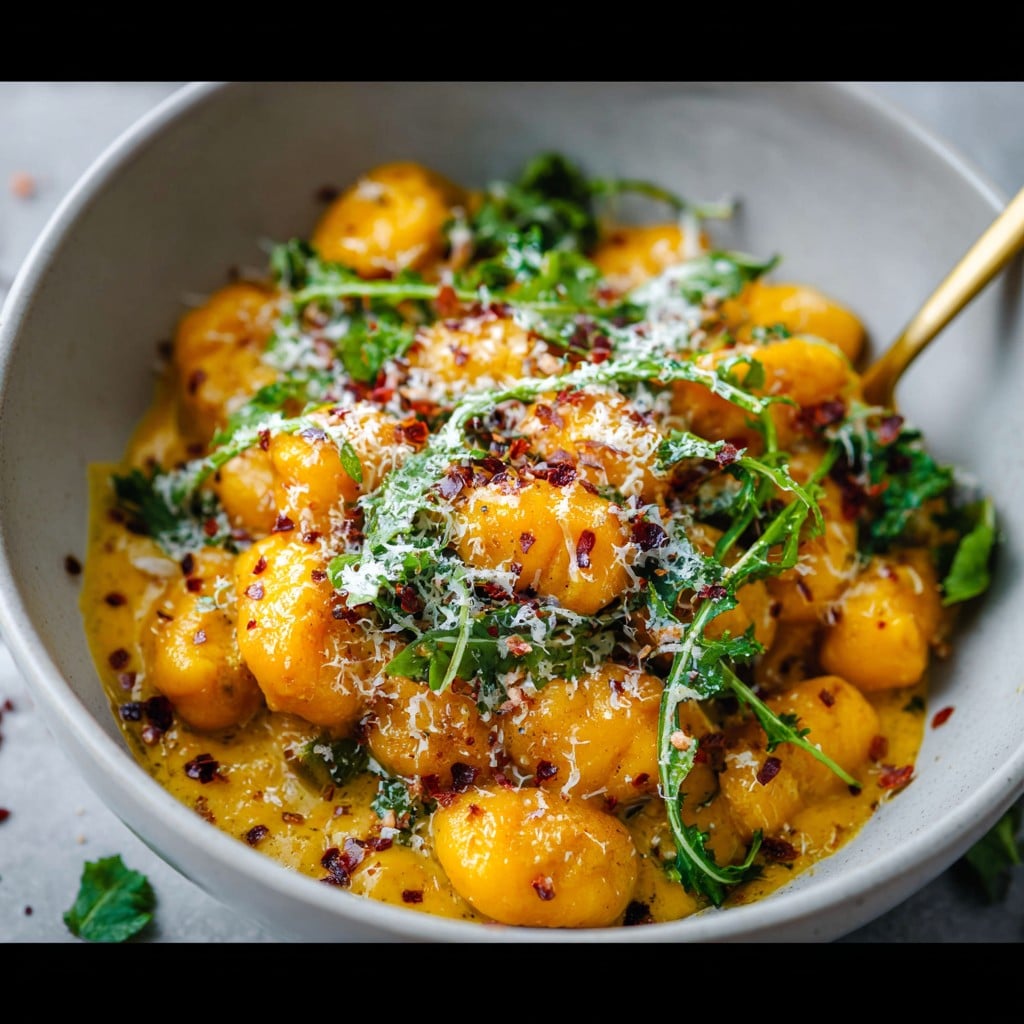
Butternut Squash Gnocchi Recipe: A Cozy Homemade Favorite
Hey there! So, butternut squash gnocchi—the first time I made these, it was pouring rain, I was out of potatoes, and honestly, my kitchen looked a bit like a Jackson Pollock painting by the end. But a steaming plate of these pillowy bites made me forget all about the mess (mostly). You know, sometimes you just want something cozy and a little extra, but not restaurant-fancy? That’s where this recipe hits the spot. Also, my neighbor tried them once and still talks about it every time he sees me out with the recycling. I take that as high praise—or maybe he’s just angling for another invite? No judgment.
So, Why Will You Love This?
I make butternut squash gnocchi when I’m craving something warm and, well, heavy in a good way. My family goes bananas for these because they’re slightly sweet and have that soft, almost melt-in-your-mouth thing going on (they also make a fantastic excuse for extra cheese). My cousin once tried to pass these off as store-bought, but let’s just say hers were more like oddly-shaped dumplings—I promise I won’t say a word if yours aren’t perfect little pillows either. And for anyone who hates wrestling with sticky dough, don’t worry—the flavor makes up for the doughy fingerprints you’ll probably find in weird places afterward.
What You’ll Need (With a Few Swaps If You’re Low on Stuff)
- 1 medium butternut squash (I sometimes use pre-cut cubes from the shop, because peeling squash before coffee is a no-go)
- 1 egg—well, unless your neighbor is vegan, then honestly, skip it and add a splash of olive oil
- About 2 cups of flour (all-purpose is what my grandma swears by, but I’ve tried wholewheat in a pinch—it’s fine, just nuttier)
- 1/2 cup freshly grated parmesan (or whatever cheese is in your fridge—one time I used pecorino and it was ace)
- Salt and pepper (honestly, just eyeball it)
- Extra flour for dusting (and possibly your shirt)
- A smidge of nutmeg (optional, but somehow it feels fancy)
- Butter and sage for the sauce (maple syrup in the sauce? Tried it once and… not my thing, but go wild)
How To Make These Gnocchi (Mess Optional, But Probable)
- Roast the Squash: Chop the squash in half, scoop out the seeds, and roast face-down on a baking tray at 400°F (200°C) for 45 mins or so. If you forgot to preheat the oven, don’t sweat it—just add five minutes. When it’s fork-tender, let it cool enough so you don’t scald yourself (been there… not fun).
- Make the Mash: Scrape out the roasted squash and mash it up in a big bowl. You want about 1 to 1 1/2 cups of mash—don’t fuss about a perfect measurement. Sometimes I sneak a taste here because, why not? Add the egg, a handful of parmesan, nutmeg if using, and a good pinch or two of salt and pepper.
- Add the Flour: Toss in one cup of flour and gently mix—don’t overwork it or the gnocchi get chewy. If you’re like me, you’ll probably need more flour, so keep an extra handful ready. It should be sticky, but not a complete nightmare to work with (though honestly, mine always ends up on my elbows somehow).
- Shape It: Flour your surface, plop the dough down, and cut it into a few chunks. Roll each into a long snake—about thumb-thick. Cut into bite-sized pieces. If you’re feeling fancy, roll them over a fork to get those ridges, but most days, I just leave them as is.
- Boil Water and Cook: Big pot, salted water—bring to a boil, drop gnocchi in batches. They’re done when they float. This always amazed my kids—“magic pasta!”
- Browning Up: Melt some butter in a skillet with sage leaves. Pan-fry the cooked gnocchi until golden. I dare you not to eat half the batch standing at the stove; it’s almost impossible.
Notes (a.k.a. What I Learned the Hard Way)
- If the dough is too sticky, add flour slowly—it’s easier to add than take out (I’ve tried scraping out extra flour and don’t recommend it).
- I once used a blender instead of a masher for the squash, but the texture got way too silky. Actually, a fork works well—no fuss.
- Don’t skip roasting. I tried microwaving the squash, thinking I was clever—but it made the gnocchi weirdly watery.
- Oh, and if you end up with way too many, you can freeze the uncooked gnocchi—just spread on a tray first or you’ll get a gnocchi glacier.
Some Fun Twists (And One That Went Pear-Shaped)
- I sometimes add a pinch of chili flakes to the butter sauce for heat. My partner is a spice fiend, so he adds chili oil on top, too.
- Swapped sage for rosemary once, not bad! Dill, on the other hand—nope. Gnocchi + dill just tastes…confused.
- If you want it even lighter, skip the parmesan and add a handful of chopped spinach into the dough. Honestly, it’s not traditional but tastes pretty fresh.
What If You Don’t Have All the Gear?
You technically need a baking tray and a big pot, but last time my trays were in the garden (don’t ask), so I roasted the squash right on the oven rack on a bit of foil. As for the fork ‘gnocchi grooves’ thing—lovely, but a dessert spoon works in a pinch, or just ignore it entirely!
How To Store (If It Even Lasts That Long)
If, by some miracle, you have leftovers, store them in an airtight container in the fridge for up to 2 days. Technically, you could freeze them, but honestly, in my house, it never lasts more than a day—my teen comes home and they’re gone. Reheat in a skillet with a knob of butter, and they’ll be almost better than fresh!
How We Serve It (At Least Round Here)
I love to shower the gnocchi with extra parmesan and serve it right from the pan—fewer dishes. Sometimes I throw on toasted pumpkin seeds for crunch. On Sunday evenings, we do a simple green salad on the side (makes us feel virtuous) and once in a blue moon, a splash of balsamic glaze. Apparently that’s not traditional, but it’s good anyway.
Pro Tips (That I Learned by Fumbling)
- I once tried shortcutting the flour step by dumping it all at once, but actually, I find it works better if you add slowly.
- Don’t rush roasting the squash. Impatience leads to watery dough, and watery dough leads to gnocchi soup (ask me how I know).
- Overcrowding the pan in the final butter fry is a rookie move. Trust me, gnocchi like space—otherwise they get sort of limp and sorry for themselves.
FAQs—Real Questions from My Real Friends (Mostly)
- Can I use canned butternut squash?
Yeah, you can! But drain it well, or you’ll need way more flour. It’s not quite the same, but in a tight spot, it works. - Do I need to peel the squash before roasting?
Actually, no; just scoop it from the skin after. Makes life easier—plus, I always miss a patch. - Can I make this gluten-free?
I haven’t tried it myself, but a friend swears by this recipe. You could try a 1:1 gluten-free flour blend. Might need to tweak a bit. - Is there a way to make it vegan?
Absolutely—just skip the egg and add a tablespoon or two of olive oil. The texture’s slightly different, but it totally holds up. More details here if you prefer. - My dough is a sticky mess. Help!
Don’t panic! Chill it for 10 mins, dust some more flour, and carry on. Or…call it rustic. - Can I freeze these?
Yep, freeze before boiling, single layer on a tray then bag ‘em up. Cook straight from frozen—just give them an extra minute to float.
Random side note—if you’re the kind of person who likes to eat gnocchi for breakfast (I’m not judging; I’ve done it), a fried egg on top is sublime. Anyway, you do you!
And if you want to dive deeper into gnocchi-making, I love the explanations at Serious Eats. They nerd out way more than me!
Ingredients
- 1 medium butternut squash (about 2 pounds), peeled and cubed
- 1 cup ricotta cheese, drained
- 1/2 cup grated Parmesan cheese
- 1 large egg
- 2 cups all-purpose flour, plus more for dusting
- 1/2 teaspoon salt
- 1/4 teaspoon ground nutmeg
- 2 tablespoons olive oil
Instructions
-
1Preheat oven to 400°F (200°C). Toss the cubed butternut squash with olive oil, salt, and nutmeg. Spread on a baking sheet and roast for 25-30 minutes or until tender. Allow to cool slightly.
-
2Transfer the roasted squash to a food processor and blend until smooth. Cool to room temperature.
-
3In a large bowl, combine squash puree, ricotta cheese, Parmesan, and egg. Gradually stir in flour to form a soft dough. Dust a clean surface with flour and gently knead the dough until smooth. Add more flour as needed if too sticky.
-
4Divide dough into 4 portions. Roll each into a rope about 3/4-inch thick. Cut ropes into 1-inch pieces and gently shape each piece with a fork for the classic gnocchi ridges.
-
5Bring a large pot of salted water to a boil. Add gnocchi in batches and cook until they float to the surface, about 2-3 minutes. Remove with a slotted spoon and serve with your favorite sauce.
Approximate Information for One Serving
Nutrition Disclaimers
Number of total servings shown is approximate. Actual number of servings will depend on your preferred portion sizes.
Nutritional values shown are general guidelines and reflect information for 1 serving using the ingredients listed, not including any optional ingredients. Actual macros may vary slightly depending on specific brands and types of ingredients used.
To determine the weight of one serving, prepare the recipe as instructed. Weigh the finished recipe, then divide the weight of the finished recipe (not including the weight of the container the food is in) by the desired number of servings. Result will be the weight of one serving.
Did you make this recipe?
Please consider Pinning it!!