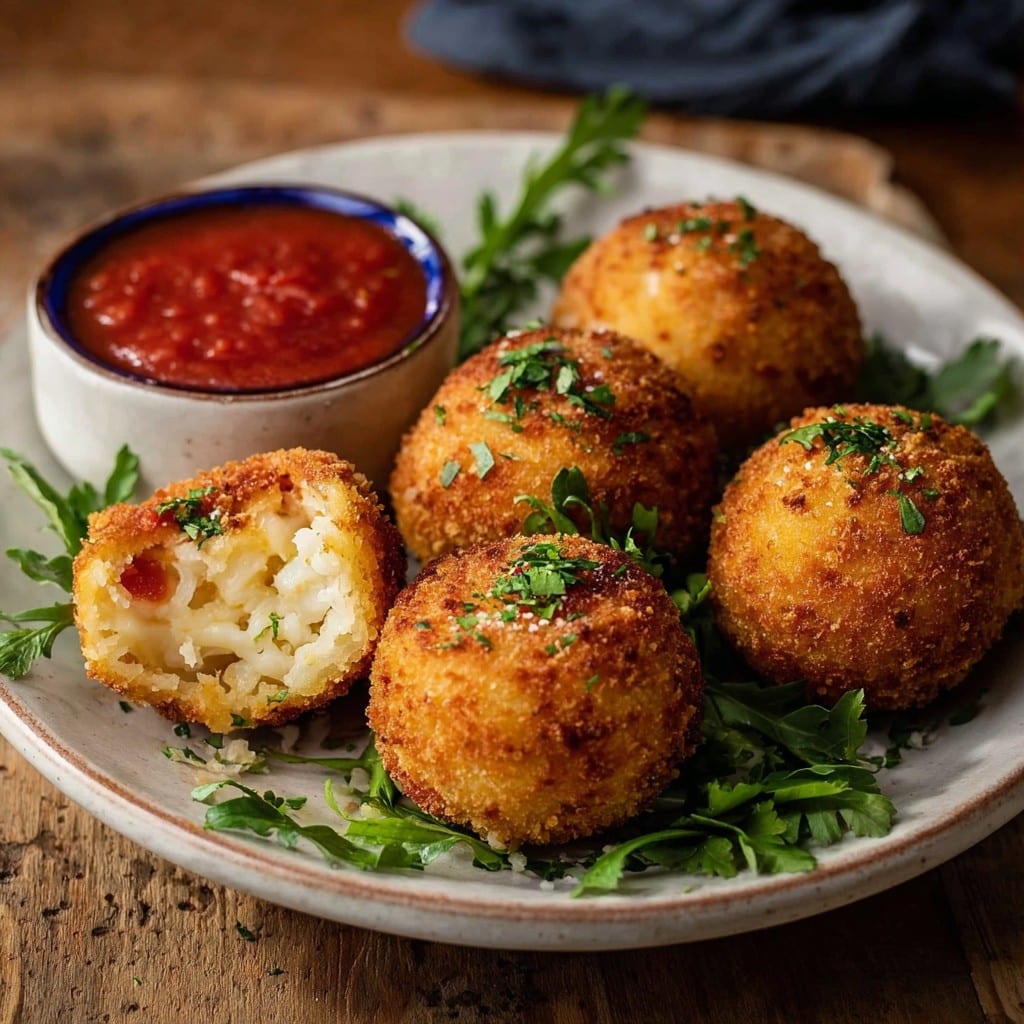
Authentic Baked Arancini: A Real Home Cook’s Guide
All right, so… arancini. The first time I decided to make these, I figured it’d be a total car crash—sticky rice, weirdly shaped balls, the whole hands-covered-in-goop situation. Honestly, the only reason I kept at it was because Nonna (my gran) used to say, “No one minds a messy kitchen when there’s cheesy rice involved.” She wasn’t wrong. And these baked arancini are my nod to her—minus the clouds of frying oil, because, well, I never quite mastered deep frying (or maybe just can’t be bothered with the cleanup after a long Tuesday, you know?).
Anyway, if you’ve ever had that slightly smug feeling of saving calories by baking instead of frying—then immediately undoing your good work by eating six—hey, you’ll fit right in here. Let’s get into it.
Why I Keep Making These (And Why You Might Too)
I make authentic baked arancini when it’s cold out, or when I’ve got leftover risotto that’s begging not to be compost. My family basically turns into a stampede when they see these cooling on the counter (even my picky nephew, who normally turns up his nose at “green bits”—thanks, peas). Also, when I’m feeling like skipping the gym, I can convince myself the effort of rolling and stuffing is exercise-ish. Not gonna lie—sometimes I curse myself in the middle when my hands are stuck together with sticky rice, but honestly, the payoff’s worth it. Plus, baking means I can walk away for a bit, go have a natter with the neighbour, and not worry about burning anything to a crisp.
What You’ll Need—Don’t Sweat the Small Stuff
- 2 cups (about 500g) cooked Arborio rice (I’ll sometimes use leftover risotto; long grain sort of works in a pinch, though it’s less creamy)
- 1/2 cup grated Parmesan (nonna would be appalled I use the tub stuff sometimes, but, no one’s perfect)
- 1/2 cup mozzarella, cubed (honestly, any melty cheese left lurking in your fridge will do; I’ve even bunged in cheddar on a lazy Monday)
- 2 eggs (if you’re low, one big egg’s fine)
- 1 cup breadcrumbs (store bought is fine, or smash up stale bread with a rolling pin; sourdough is pretty posh in this)
- 1/3 cup frozen peas (skip if “green bits” upset anyone under 6)
- Salt and pepper to taste (I actually like a twist of smoked paprika here sometimes, but that’s just me)
- A splash of olive oil, for brushing (any neutral oil’s fine, I’m not fussy)
- Optional: a handful of ham, cooked sausage, or whatever protein you fancy, diced (I’ve even used leftover roast veg—tasted grand)
The Rough and Ready Method (Don’t Panic—it Looks Messy!)
- Preheat your oven to about 200ºC (425ºF), or nearly that if your oven’s as temperamental as mine. Line a baking tray with parchment paper—less stickage that way.
- In a big bowl, chuck in your rice, parmesan, half the egg (save the rest for egg washing later), peas, and a bit of salt and pepper. Mix it up; your hands are probably going to get in there. It’s normal.
- Time to shape! Wet your hands—seriously, it stops everything gluing to you—and grab a golf-ball sized chunk. Flatten it in your palm, pop in a cube of mozzarella (and a hunk of ham or whatever, if using), then close it up and roll into a ball. Some filling might ooze. That’s just the universe testing you. Persevere.
- Repeat until you run out of rice or patience. Usually patience, in my case.
- Whisk the rest of the egg in a shallow bowl. Roll each ball first in the flour (if you like, but I sometimes skip it…), then the egg wash, then the breadcrumbs. Smoosh them a bit if breadcrumbs won’t stick; it’s not a beauty contest.
- Space out on the tray. Drizzle or brush with olive oil. Don’t drown them—just a light sheen, like your face after running for the bus.
- Bake 20 to 25 minutes, turning once, till golden brown and crispy. This is where I always want to eat one immediately; try to wait, though, unless you enjoy a lava tongue.
Notes from My Kitchen Disasters
- Using cold rice works tons better for shape—warm, fresh rice gets sticky like a toddler with jam.
- I once tried skipping the cheese center to save time—don’t. It tastes sad.
- Bake on a wire rack if you want extra crispiness underneath, but a basic tray is fine, honestly.
- If your arancini are a tad pale, hit the broiler for two minutes (just watch them with an eagle eye—I’ve burned the tops more times than I’ll admit).
Mixing Things Up (Because I Get Bored Easily)
- Swapped in wild mushrooms and truffle oil once—fancy! Worked surprisingly well.
- Tried adding spicy sriracha mayo instead of mozzarella… Meh, wouldn’t bother again. Too messy.
- Some folks do veggie-only with sweetcorn and courgette—tasted good, but I missed the gooey center.
- On a bet, I made mini ones for parties, but they vanished so quick, I barely got one myself. Lesson learned.
Not Essential But Handy Equipment… And Cheeky Workarounds
- Mixing bowl (big old salad bowl works too). No, you don’t need a fancy stand mixer—just your hands.
- Baking tray (I’ve used the grill tray in a pinch—just line with foil or baking paper if it’s dodgy).
- Pastry brush for oil (fingers work! Or a bit of kitchen towel dipped in oil if you’re feeling rebellious).
- No food processor? Don’t fret. Smash up bread in a bag with a tin of beans, like I do. Therapy and breadcrumbs all in one.
How to Store These—If They Even Last That Long
Best kept in an airtight box in the fridge; lasts about 2-3 days. They’re chewier the next day—which I actually love. Zap ’em in the oven 10 minutes at 180ºC (or 350ºF-ish). In my house, they’re usually gone before breakfast the following day, so storage isn’t often needed… but you never know.
How We Serve It (Or: My Favourite Bit)
Usually with a quick homemade tomato sauce (my go-to recipe is here if you want a goodun), plus a crisp salad and a bottle of table wine. Occasionally, I’ll toss a few olives and pickled peppers on the side, which my husband says is “fancy restaurant stuff”—he’s easily impressed. If you want something more kid-friendly, ketchup apparently does the trick. Honestly though, Saturday nights with arancini and a proper footie game on the telly? Heaven.
Pro Tips: Don’t Be Me
- I once tried skipping the cooling-the-rice bit—bad idea. They turned into sad rice pancakes. Let it chill. Trust me.
- If you overstuff the cheese, it’ll leak and make a baked mess (though, tasty baked cheese bits on the tray aren’t the worst thing!).
- Don’t use old breadcrumbs that smell a bit musty (ask me how I know…)
- On second thought, if it seems like the balls will fall apart, pressing them a bit tighter helps. No need to squeeze like a bodybuilder, though.
FAQ Time! (Real Questions, Real Answers)
- Can you use any rice?
Hmm, technically yes, but Arborio or risotto rice is creamier and helps the balls stick. Regular white rice is a bit unruly—I’ve tried, and I spent more time patching up cracks than rolling balls! - What if I’m gluten free?
No worries! Use gluten free breadcrumbs (I like the ones here), or skip the crumbs and just brush with oil for a crisper finish (won’t be the same, but still good). - Can I freeze them?
Yep, after baking. Just let them cool off first or they stick together like mad. Re-bake from frozen at 180ºC (or so). Texture’s not quite the same, but still pretty lush on a busy night. - Why bake instead of fry?
Less mess, less oil, less chance of me setting off the smoke alarm. Fried is classic, but if you’re feeling a bit lazy or want the kitchen to not smell for hours—you do you. - How do you stop them sticking to your hands?
Wet hands are the key! I forgot once, and it was like trying to roll glue balls. Never again… - Can I add meat?
Absolutely, I sometimes toss in a bit of whatever’s in the fridge. Chopped sausage, ham, cooked chicken—it’s all fair game.
Look, if all else fails, call it “rustic” and serve with a smile. Arancini are basically happiness in bite-sized form. Wouldn’t dream of gatekeeping it. If you’re after more rice ball love, there’s a lovely video at Great British Chefs that’s worth a gander—though, don’t feel compelled to follow every step, life’s too short.
Ingredients
- 2 cups cooked Arborio rice, cooled
- 3/4 cup grated Parmesan cheese
- 1/2 cup mozzarella cheese, cubed
- 2 large eggs
- 1/2 cup frozen peas, thawed
- 1/2 cup Italian-style breadcrumbs
- 1/4 cup all-purpose flour
- 1/2 teaspoon salt
- 1/4 teaspoon black pepper
- Olive oil spray
Instructions
-
1Preheat your oven to 400°F (200°C). Line a baking sheet with parchment paper and lightly coat with olive oil spray.
-
2In a large bowl, combine the cooked Arborio rice, grated Parmesan, 1 beaten egg, peas, salt, and pepper. Mix well until fully combined.
-
3Take a small handful of the rice mixture, flatten it in your palm, and place a cube of mozzarella cheese in the center. Enclose the cheese with rice and shape into a ball. Repeat with the remaining mixture.
-
4Set up a dredging station: place flour in one bowl, beat the remaining egg in a second bowl, and place breadcrumbs in a third bowl. Roll each rice ball in flour, then dip in egg, and coat with breadcrumbs.
-
5Place the coated rice balls onto the prepared baking sheet. Spray the tops lightly with olive oil spray.
-
6Bake for 25-30 minutes, or until golden and crispy. Serve warm.
Approximate Information for One Serving
Nutrition Disclaimers
Number of total servings shown is approximate. Actual number of servings will depend on your preferred portion sizes.
Nutritional values shown are general guidelines and reflect information for 1 serving using the ingredients listed, not including any optional ingredients. Actual macros may vary slightly depending on specific brands and types of ingredients used.
To determine the weight of one serving, prepare the recipe as instructed. Weigh the finished recipe, then divide the weight of the finished recipe (not including the weight of the container the food is in) by the desired number of servings. Result will be the weight of one serving.
Did you make this recipe?
Please consider Pinning it!!