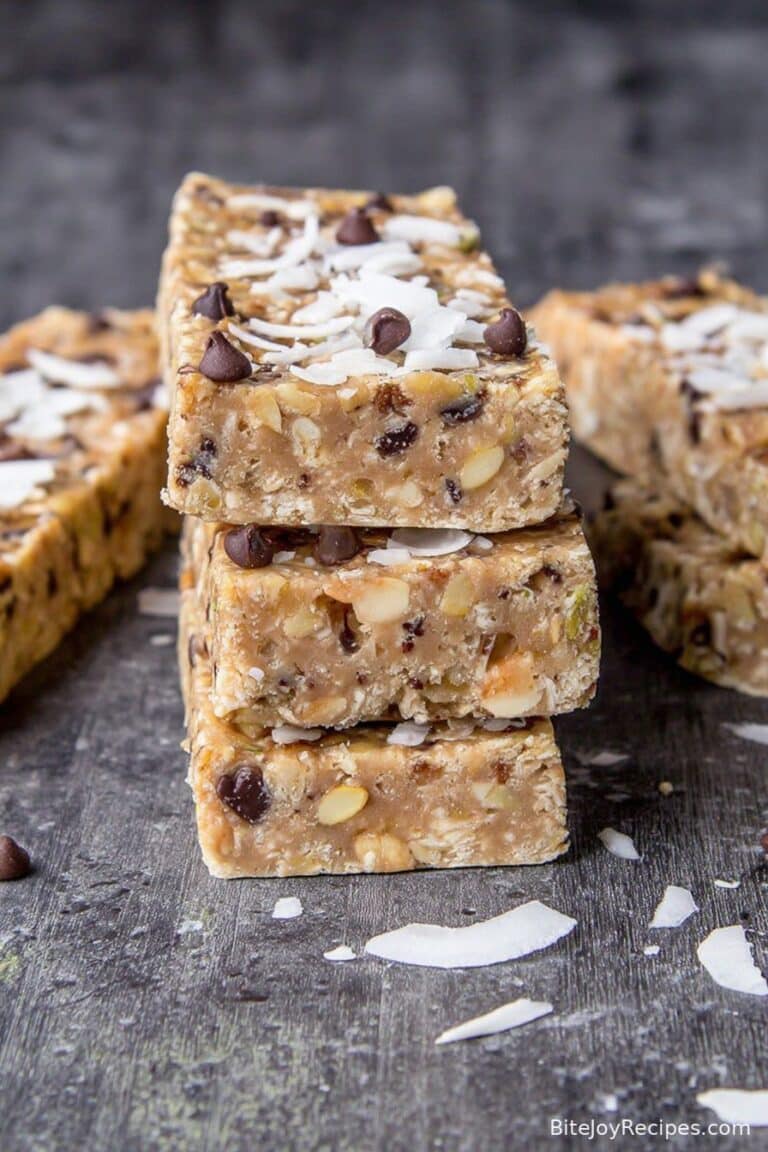
No-Bake Oatmeal Protein Bars
So Here’s the Scoop on My Favorite No-Bake Oatmeal Protein Bars
If you’re anything like me, you love snacks that are easy, fast, and don’t require you to turn your kitchen into a sauna. That’s exactly why I keep coming back to these no-bake oatmeal protein bars—actually, the first time I made them, I intended to share with my neighbors but, spoiler alert: barely any made it over there. (I felt justified at the time. These things are irresistable when you’re standing in the kitchen at 3pm.) Anyway, I sort of fell in love with how unfussy the whole process is. And hey, they taste like those expensive health bars, only better because you can pronounce everything, and you didn’t have to remortgage your house to buy them.

Why I Make These All the Time
I reach for this recipe when I’m running late but still need something to bite, and honestly, my family goes a bit bonkers for these — especially when I throw in some chocolate chips (not traditional, but it keeps the peace). The real charm is that you don’t need to plan ahead. Just sort of rummage through the pantry, stir stuff together, and boom, you’re done. Oh, and cleanup isn’t a nightmare. I’ve tried plenty of recipes where you need, like, six mixing bowls and a stand mixer bigger than my dog; not here! Sometimes the bars are gone so quick I wonder why I bothered with parchment paper at all.
Everything You’ll Need (Plus a Few Shortcuts)
- 2 cups rolled oats (I use old-fashioned oats but quick oats will work if you like things less chewy—my aunt swears by Bob’s Red Mill, but, honestly, the store brand is just fine)
- 1 cup nut butter—peanut, almond, cashew, sunflower seed butter when I’m out of everything else (smooth or crunchy, I can’t decide which I love more)
- 1/3 cup honey or maple syrup (sometimes I use agave, though it’s a tad sweeter)
- 1/2 cup protein powder (whey, pea, or whatever’s rattling around at the back—sometimes I skip it if I’m feeling lazy, but it helps them hold together)
- 1/4 cup unsweetened shredded coconut (optional, but I usually toss it in if I’ve got it)
- 1/2 cup add-ins: chocolate chips, dried cranberries, chopped nuts, or even a handful of raisins (but the raisins always start debate in my house)
- Pinch of salt (I forget this step, like, every third batch, and they’re still good)
How I Actually Make Them (Don’t Stress Over Perfection)
- In a big bowl, mix up your oats, protein powder, coconut, pinch of salt, and whatever fun stuff you’re tossing in. (This is when I usually realize I left the chocolate chips somewhere too warm and they’re half-melted, but in they go anyway!)
- Now, grab a smaller bowl and whisk your nut butter and honey until it turns kind of glossy. If it’s too stiff, a quick zap in the microwave (about 20 seconds) works wonders. Don’t overthink this part; just get it smoother than chunky paint.
- Pour the wet stuff over the dry, and stir—use some muscle—or even your hands. It’ll look crumbly, and you may think “did I mess up?” You didn’t. It always does. After a minute or two, it magically comes together—sticky but not dripping.
- Line a pan (8×8 or just whatever you have) with parchment. Honestly, in a pinch, I once used a greased freezer bag cut open, and it worked fine. Dump the mixture in, then press it down hard. I’ll admit, I use the bottom of a measuring cup for this and it’s oddly satisfying. I sneak a bite of the mix at this stage nearly every time. No regrets.
- Pop the whole pan in the fridge for about an hour. Or half an hour if you’re starving. Once it’s firm-ish, slice it into bars or squares. Odd shapes are cool; these are homemade, after all.
Notes (Things I Wish Someone Had Told Me Sooner)
- Bars too dry? Probably too much protein powder. Actually, I find it works better if I stir in a little extra nut butter next time.
- Too sticky? Try a few extra oats, it’s not rocket science.
- Using natural peanut butter? It can be runnier, so maybe add a scoop more oats; I learned that the hard way!
What I’ve Tried (and What Didn’t Totally Work)
- Cocoa powder is fun for a chocolatey batch—about 1-2 tablespoons mixed into the dry.
- Chia or flax seeds add a healthy vibe, but don’t throw in more than a couple tablespoons or the bars get a bit bird-seedy.
- Once, I experimented with dried apricots (for science!), but nobody really liked the texture. Too sticky. Not all ideas are winners.

What You’ll Need—And What To Do If You Don’t Have It
- Mixing bowls (but once I pre-mixed stuff in a big saucepan—don’t judge, it was all I had handy)
- 8×8 pan or anything vaguely square; a loaf tin will give you thicker bars, which is sometimes nice
- Parchment paper, or even plastic wrap. If all else fails, just grease the pan really well and cross your fingers.
- Measuring cups or, if you’re flying by the seat of your pants, just wing it—honestly, a handful of oats here or there won’t break it.
Storage—If Any Survive
These keep for about a week in the fridge, just in a container (or wrapped up in foil). Though, honestly, in my house they’re usually devoured the next day. If you want to stash some for the long haul, toss them in the freezer. Just don’t stack them without parchment between or you’ll have one mega bar to chisel apart.
How I Serve Them (And Sometimes, When)
Honestly? Most often I eat them standing over the sink, but occasionally I’ll serve them sliced into triangles for after-school snacks—my daughter likes hers dipped in yogurt, which I initially thought was odd but now I’m on board. Sometimes I crumble them over ice cream (for breakfast — just kidding, kind of).
What I’ve Learned (So You Don’t Make My Mistakes)
- Pressing the bars down firmly is key; I once rushed this and ended up with oat confetti instead of slices.
- Don’t skip chilling! They’ll slice so much cleaner if they’re cold—I found this out after some major bar crumbling incidents.
- You can double the recipe, but don’t use a smaller pan or you’ll have a sticky Everest on your hands.
Real FAQs (You Do Ask, and I Actually Read Them!)
- Can I make these vegan? Yep! Just use maple syrup or agave instead of honey and make sure your protein powder is plant-based.
- Do steel cut oats work here? Erm. No, not really—they make everything weirdly chewy and kind of gritty. Old-fashioned oats work best, promise.
- How do I keep these from sticking together? Parchment paper between layers is my move. Or just eat them fast enough it doesn’t matter, ha!
- Anything nut-free? Yes! Sunbutter is great, and there are seed-based protein powders out there too.
- Can I pack these in a lunch box? Absolutely. But if your bag gets warm, they might get a bit gooey. I wrap mine in foil, mostly because it feels less fussy than plastic wrap.
So, in a nutshell, these no-bake oatmeal protein bars are my favorite snack hack when life gets a bit mad. Plus, they’re about as hard to mess up as boiling water—which, come to think of it, I’ve actually managed to do wrong before, but that’s a story for another recipe. Give them a whirl and let me know how you sub them up, or if you’ve managed to make them last a whole week (seriously, what’s your secret?).
Ingredients
- 2 cups old-fashioned rolled oats
- 1 cup creamy peanut butter
- 1/2 cup vanilla protein powder
- 1/3 cup honey or maple syrup
- 1/4 cup mini chocolate chips
- 1/2 cup chopped almonds or walnuts
- 1/4 cup unsweetened shredded coconut
- 1/2 teaspoon vanilla extract
- 1/4 teaspoon sea salt
Instructions
-
1Line an 8×8-inch baking pan with parchment paper, leaving some overhang for easy removal.
-
2In a large mixing bowl, combine the rolled oats, protein powder, nuts, shredded coconut, and salt.
-
3In a microwave-safe bowl, heat peanut butter and honey together for 30 seconds until smooth. Stir in the vanilla extract.
-
4Pour the wet mixture over the dry ingredients and mix thoroughly until everything is well combined.
-
5Fold in the mini chocolate chips. Press the mixture firmly and evenly into the prepared pan.
-
6Chill in the refrigerator for at least 1 hour. Lift out and cut into 12 bars. Store in an airtight container in the fridge.
Approximate Information for One Serving
Nutrition Disclaimers
Number of total servings shown is approximate. Actual number of servings will depend on your preferred portion sizes.
Nutritional values shown are general guidelines and reflect information for 1 serving using the ingredients listed, not including any optional ingredients. Actual macros may vary slightly depending on specific brands and types of ingredients used.
To determine the weight of one serving, prepare the recipe as instructed. Weigh the finished recipe, then divide the weight of the finished recipe (not including the weight of the container the food is in) by the desired number of servings. Result will be the weight of one serving.
Did you make this recipe?
Please consider Pinning it!!