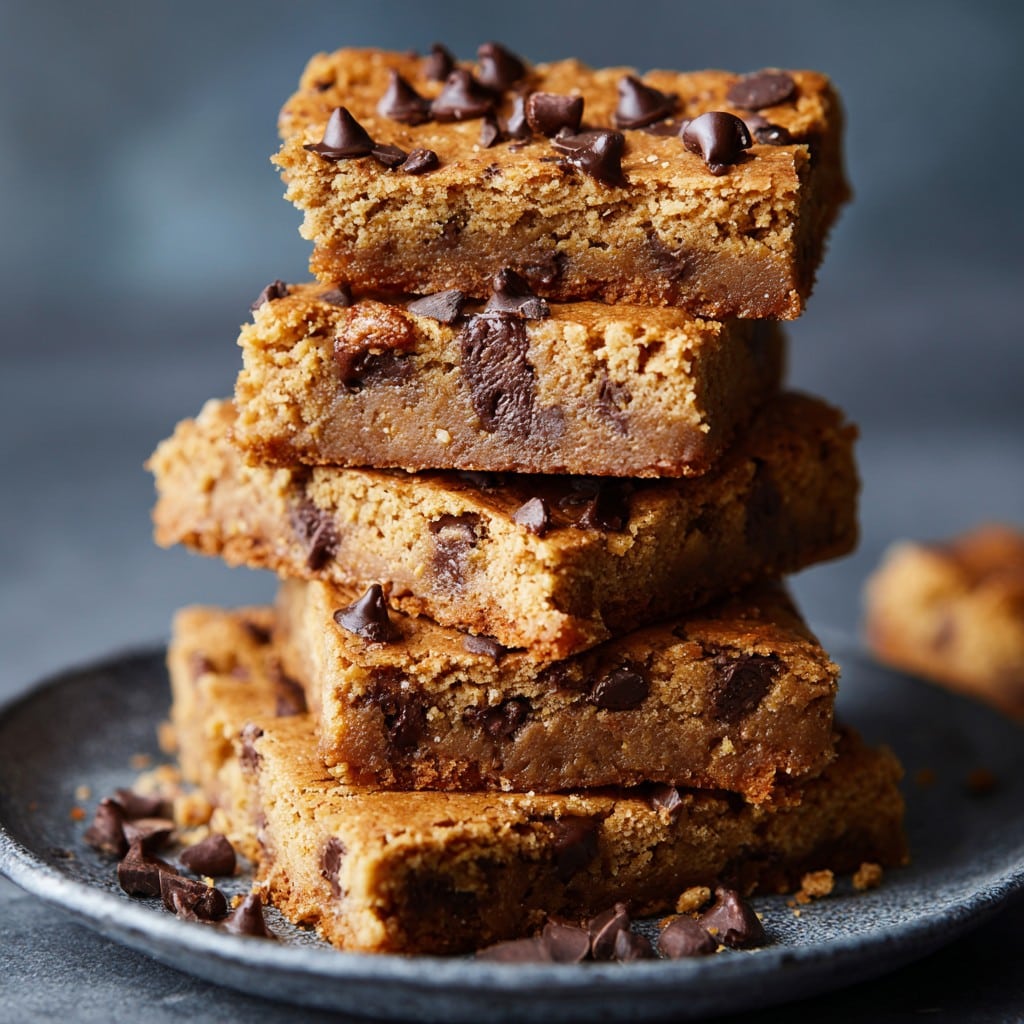
Chickpea Blondies (Vegan + Egg Free + Gluten Free)
My Accidental Obsession With Chickpea Blondies
If you’d told me a few years back that I’d be raving about chickpea blondies, I’d have probably laughed and made a joke about eating dessert for the health benefits (ha, as if). But let me set the scene: it’s a rainy Sunday in London, I’ve run out of eggs again, and my sweet-toothed little niece is visiting. I cobble these together on a whim, slightly suspicious they’ll taste… basically like hummus. Spoiler: they don’t. Now, these blondies are a keeper in my house — even my skeptical older brother asks for them. Honest truth: the first time I made them, I forgot the baking powder, and they came out a bit sad and flat like, well, pancake bricks. Learned my lesson there!
Why I Keep Coming Back To This Recipe
I make this when I want something sweet without a big fuss or when it’s too late to nip round the shop for eggs (happens a lot, not gonna lie). My family goes crazy for these, and no one’s guessed what’s in them until I spill the beans (sorry). Also, there’s something satisfying about watching people’s faces when they realize they’re made form chickpeas — like, they’re so sure it’s just another sugary traybake until you drop that little bombshell. Got a mate who’s allergic to half the things in usual blondies? Bring this. Oh, and if you like snacks you can justify eating for breakfast and dessert, I’m with you. This is that snack.
What You Need (With a Few Cheats!)
- 1 can (400g) chickpeas, drained and rinsed (Honestly, sometimes I grab the store-brand cans; doesn’t matter. Dried and cooked works too, if you’re feeling ambitious)
- 1/2 cup peanut butter (or almond butter, or even tahini… my friend Lucy swears by sunbutter, but it’s a bit earthy for me)
- 1/3 cup maple syrup (Agave works, or even honey if you’re not bothered about strict vegan. Gran used to just use golden syrup, bless her.)
- 1/4 cup oat flour (Blitz oats in a blender — don’t sweat precision. Almond flour works fine, or just plain flour if you eat gluten)
- 1 teaspoon baking powder (The magic lifter. I once forgot this, don’t recommend.)
- 1/2 teaspoon salt (I eyeball this, honestly)
- 1 teaspoon vanilla extract (sometimes I run out, turns out it’s still tasty without it)
- 1/3 cup chocolate chips (plus a handful for sprinkling — or chopped dark chocolate, or even raisins if you’re in a pinch. My mum isn’t a choco fan so she uses walnuts.)
How To Make Chickpea Blondies (Vibes: Not Fussy)
- Preheat your oven to 180C/350F. Line a small baking tray (around 8×8 inches, though mine is more of a rectangle) with parchment paper. Or don’t — just grease it. I’m not the tray police.
- Grab a food processor or blender (even a stick blender, if you’re patient) and whizz the chickpeas until smooth-ish. Add the peanut butter, syrup, oat flour, baking powder, salt, and vanilla. Blitz till it looks like thick batter. This is where I usually sneak a taste — for science! Don’t worry if the batter looks weird at this point. Trust the process, mate.
- Stir in the chocolate chips (I do this by hand so they don’t get mulched).
- Scoop it all into your prepared tin and smooth the top. Sprinkle a few extra choc chips for dramatic effect (or, like, because they’re tasty).
- Bake for 22 to 25 minutes. The edges will look slightly golden; the middle might look a bit wobbly. That’s fine, it’ll set as it cools.
- Try, TRY to let it cool before slicing. Or just eat with a spoon straight from the tin — far be it from me to judge.
Some Notes (Learned the Hard Way)
- The first time I made these, I overbaked them hoping for distinct squares. They just went crumbly. Actually, I find it works better if you slightly underbake — they firm up as they cool.
- If you only have a huge baking tray, double the recipe — otherwise you just get sad, thin blondies, which sounds like a failed band name.
- I once tried swapping peanut butter for coconut oil. Nope, didn’t work for me — totally different texture, a bit greasy.
Have a Go With These Variations
- Fruit swirl: I swirled a bit of raspberry jam through the batter once, and oh wow — instant upgrade.
- For an autumn vibe, stir in a teaspoon of cinnamon and a handful of chopped apple (trust me — great with a mug of tea).
- I tried adding shredded coconut once and thought it’d be a winner. Actually, made the texture kind of weird. Would not repeat — but you might love it!
The Stuff You Need (And Some You Don’t…)
- Food processor — kinda essential, unless you want arm ache. But, I did once mash everything with a potato masher (took me ages, but it works in a pinch).
- Baking tin (any shape, just adjust baking time if it’s a weird one. I once used a loaf tin and just baked it a little longer.)
- Spatula or good old wooden spoon (seriously, I once used a soup ladle — you work with what you’ve got)
Keeping Them Fresh (Well, If They Last…)
Technically, these last 3 days in an airtight box (I just use a container I found in the back of the cupboard), or up to a month frozen. But honestly, in my house they last maybe six hours. If you want that oven-fresh feel again, just give a square a quick zap in the microwave.
Serving It Up: Family Favourites
I love them best slightly warm, with a scoop of (vegan) vanilla ice cream on top. My brother dunks his in coffee, which always made me roll my eyes — until I tried it myself. We usually eat them straight outta the pan, crowded around the kitchen counter. It’s become a bit of a Sunday thing.
Hard-Earned Pro Tips
- I once tried rushing cooling, slicing while hot. Regretted it because it just smooshed into a heap (still tasty though).
- If you’re doubling the recipe, don’t forget to up the baking powder. I did. Not my finest hour. Turns out you can taste the difference!
You Ask, I Answer (Real Life FAQs)
- Do they actually taste like chickpeas? Nope! Pinky promise. If you taste more than a hint, add extra vanilla or a sprinkle of cinnamon. Plus, the choc chips hide all.
- Can I make these nut free? Yep! Sunflower seed butter works, though it gives a different, slightly toasted flavour. Worth a shot though.
- Can I use dry chickpeas I cooked myself? Absolutely, just make sure they’re soft — like, super soft — or your batter won’t blend!
- Do I have to use oat flour? Not really! I sometimes blitz up old-fashioned oats. In a crunch, have even used plain flour (shhh, don’t tell the gluten free crowd).
- What if I don’t have a food processor? I’ve mashed chickpeas by hand — takes some elbow grease, but can work. Or borrow a mate’s blender. Here’s a fun article on mashing things if you’re curious about options!
- Any other add-ins? Oh, heaps. White choc chunks, chopped dates, mini marshmallows (for ultimate gooeyness). Just don’t go too wild — you want it to bake through!
- Are these as good as classic blondies? Look, nothing beats the real butter-and-eggs classic for some folks. But for a plant-based, super-easy treat, these absolutely hit the spot.
For more inspiration, check out Minimalist Baker’s take or peep Chocolate Covered Katie (her site’s a treasure trove). Or just come back and tell me your own wild variations!
If you want to chat about more weird and wonderful vegan bakes, or swap kitchen mishaps, I’m probably in the comments or somewhere making another batch — just in case.
Ingredients
- 1 can (15 oz / 425 g) chickpeas, drained and rinsed
- 1/2 cup peanut butter or almond butter
- 1/3 cup pure maple syrup
- 1/4 cup coconut sugar
- 1 tsp pure vanilla extract
- 1/2 tsp baking powder
- 1/4 tsp baking soda
- 1/4 tsp fine sea salt
- 1/3 cup vegan chocolate chips
Instructions
-
1Preheat oven to 350°F (175°C) and line an 8×8 inch baking pan with parchment paper.
-
2In a food processor, add chickpeas, peanut butter, maple syrup, coconut sugar, vanilla, baking powder, baking soda, and salt. Process until completely smooth.
-
3Remove the blade and gently fold in the vegan chocolate chips using a spatula.
-
4Spread the batter evenly into the prepared baking pan and top with additional chocolate chips if desired.
-
5Bake for 22-25 minutes, or until the edges are golden and a toothpick inserted into the center comes out mostly clean.
-
6Let cool in the pan for at least 10 minutes before slicing into blondies. Enjoy!
Approximate Information for One Serving
Nutrition Disclaimers
Number of total servings shown is approximate. Actual number of servings will depend on your preferred portion sizes.
Nutritional values shown are general guidelines and reflect information for 1 serving using the ingredients listed, not including any optional ingredients. Actual macros may vary slightly depending on specific brands and types of ingredients used.
To determine the weight of one serving, prepare the recipe as instructed. Weigh the finished recipe, then divide the weight of the finished recipe (not including the weight of the container the food is in) by the desired number of servings. Result will be the weight of one serving.
Did you make this recipe?
Please consider Pinning it!!