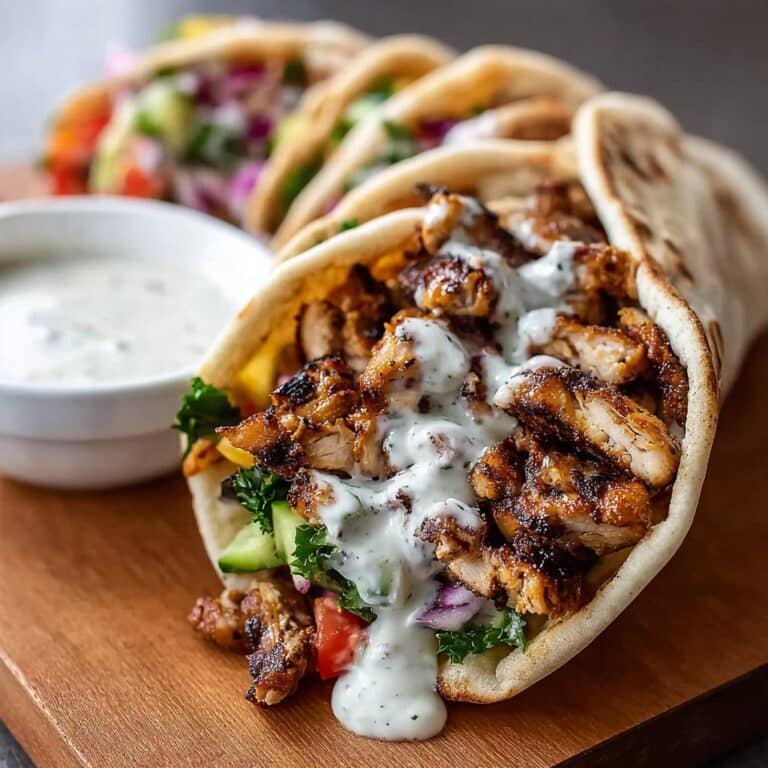
Cheesy Beef and Mushroom Pita Pockets: My Go-To Easy Dinner
OK, the Story Behind These Cheesy Beef and Mushroom Pita Pockets
You ever have those days when the fridge is looking a bit sad, you’re famished, and you just want something *good*—but not the kind of meal that eats up half your Sunday? Well, that’s how these Cheesy Beef and Mushroom Pita Pockets started for me. I think it was a Thursday? Anyway, my friend Sarah was over, rummaging through my cupboards (she does that, bless her) and roasted me a bit for my questionable ketchup choices, but then she showed me how tossing just a few leftovers together can actually turn into some genuinely crave-worthy comfort food. This is the result. I’ve tweaked it since—on accident and on purpose. Also, did you know pita pockets freeze if you forget about them? That’s a lesson for another day…
Why You’ll Love This (Besides the Fact It’s So Cheesy)
I make this when everyone’s cranky and hangry; it’s basically dinner therapy around here. My family goes a bit bananas when they catch a whiff of beef and mushrooms getting all cozy in the pan. (Last time I tried using quinoa instead of beef—it’s a long story, but don’t.) It’s quick, filling, forgiving, and even reheats pretty well—if, you know, you have leftovers. Plus: cheese. Gobs of it. I will admit that one time the pita pockets ripped apart on me, and I thought I’d lost the plot, but I just squished them together and called it rustic. No one minded.
What You’ll Need—But I’ve Swapped Stuff, Too
- 250g ground beef (or turkey—honestly, even lentils in a pinch, but then you’ll want extra seasoning)
- 1 medium onion, chopped (I sometimes just whack a bit off a red onion if that’s all I have)
- 200g mushrooms, sliced (white button, cremini, whatever’s cheap—my grandma swears by Portobello, but I’m cheap)
- 2-3 cloves garlic, minced (powder if you’re in a rush)
- 1/2 tsp smoked paprika (or just regular, or leave it out if you don’t do smoke—it’s not mandatory)
- 1 tsp Worcestershire sauce (or soy sauce if you’re out—works fine, promise)
- Salt & pepper to taste (I go heavy-handed, but you do you)
- 4-6 pita pockets (the supermarket ones, but if you make ‘em homemade, you’re a wizard and I bow down)
- 1 heaping cup grated cheese (cheddar most days, but mozzarella is stretchy and weirdly fun; feta gets a maybe from me)
- Olive oil for cooking (sometimes I forget and use butter—no regrets)
- Optional add-ins: handful spinach, splash of hot sauce, chopped parsley (if you’re feeling fancy)
How I Pull These Together (with Hands Half-Clean)
- Start by heating a drizzle of olive oil in your frying pan over medium heat. By the way, don’t stress if you don’t have a fancy non-stick—mine’s basically vintage at this point. Toss in the chopped onion and sauté until it starts smelling sweet and gets a bit golden. Sometimes I wander off for a second here but try not to.
- Add in the mushrooms and a little more oil if the pan’s looking dry. Mushrooms always seem to drink oil like it’s happy hour but just keep stirring now and then. They’ll shrink down. Don’t panic, promise.
- Now’s the time for garlic, paprika, Worcestershire sauce, and that trusty ground beef. Crank the heat a notch. Break up the beef with your spoon—don’t worry if a chunk escapes; it happens. Let it all brown and mingle together. If the mixture looks like it’s swimming in fat, just spoon a little off (I sometimes forget and honestly, it’s just extra flavor).
- Season with salt and pepper. At this point, I sometimes sneak a forkful. You should too! Adjust anything that feels off. Toss in chopped spinach now if you’re adding it.
- Take the pan off the heat, then stir in your cheese. It’ll melt and get all gooey. Resist the urge to eat it straight out of the pan—well, mostly. If the filling seems dry, a splash of water or more Worcestershire does the trick.
- Slice the pita pockets halfway to open them up—don’t go wild or you’ll end up patching holes with bits of pita, and then you’ll have a pocket jigsaw. Stuff each with the beef-mushroom-cheese goodness. Extra cheese on top? Always.
- I sometimes throw the stuffed pitas back in the pan for a minute or two, just to warm them and melt the cheese more. If you want the outside crisp, go for it. Or wrap them in foil and pop in a low oven. Dealer’s choice.
Notes I Figured Out the Hard Way
- If the pita falls apart, just call it a ‘beef and mushroom flatbread’. No shame.
- Actually, I find the filling tastes better the next day when everything’s had a good mingle (if you can wait that long).
- Don’t skip the cheese—unless you absolutely have to, in which case, I salute your restraint.
- Mushrooms release loads of liquid, so try not to crowd the pan—or they just steam; learned that one quick.
Variations—What Worked and What… Didn’t
- I’ve tried this with leftover shredded chicken and it was grand. Pork? Eh, not my vibe, too rich.
- Adding a dollop of Greek yogurt after stuffing—surprisingly delicious and cooling with the hot filling.
- One time I added pickled jalapeños. Yikes; too tangy for my bunch, but maybe you’ll love it?
- A friend made it with vegan cheese once. It didn’t melt, but the flavor still worked.
What If You Don’t Have the Gear?
Any big-ish fry pan will do—I lost my trusty skillet once (long story involving a bonfire and marshmallows), so I just used a saucepan. Even a wok if you’re feeling wild. For slicing, a blunt-ish knife is frustrating, but hey, it builds character?

Storing (If You Don’t Eat It All at Once)
These eat well cold, but warm is best. Keep leftovers in the fridge in a lidded container for up to two days. You can nuke them (microwave, for the non-Brits) for 30 seconds or wrap in foil and reheat in the oven. But honestly, in my house it never lasts more than a day, so I’m usually just guessing here.
How I Like to Serve ‘Em
We pile them up with a big green salad and some crunchy dill pickles. Sometimes I cut them into wedges and serve as party snacks with a squeeze of chili sauce. My brother dips his in ketchup, but I don’t judge—much.
Pro Tips (Learn form My Fumbles)
- I once tried rushing the mushroom stage and got soggy filling. Don’t do it—let them cook down fully. Patience pays off here.
- Don’t overstuff the pita. I always think I can cram more in, but it’s a trap!
- If you’re swapping the beef for something leaner, splash in a bit more oil or broth so it doesn’t dry up.
What People Usually Ask Me (Frequently!)
- Can you freeze the filling?
- Yep, you sure can—just let it cool first. The texture gets a bit firmer, but nothing to write home about. I wouldn’t freeze stuffed pitas, though—they go a bit sad.
- Is this spicy?
- Not as written, but sneak in hot sauce if you need more kick. Or chili flakes. Or just a big smirk.
- What mushrooms are best?
- Fancy ones if you’ve won the lottery, but plain white works fine. I did try rehydrated mushrooms once—chewy, not my favourite.
- Vegetarian version possible?
- Yup, use lentils or crumbled tofu. I probably wouldn’t go for TVP (textured vegetable protein)—it tastes a bit like cardboard to me, but that’s just me.
- Where do you get your pita?
- I usually grab mine at the supermarket. Or try making your own—my mate Tim swears by this recipe (he gets a bit extra with it but go off, Tim).
- Do you have a recommended cheese?
- It’s usually cheddar here, but honestly, anything gooey and melty works. Got extra cheese? Try mixing two kinds, and you might stumble on something brilliant. (I learned a lot about cheese combos from this guide when I wanted to get nerdy about it.)
And last thought (promise): if you need some inspiration for easy side salads, this collection saved my sanity more than once. Now, go make some pockets, and don’t sweat the mess.
Ingredients
- 1 lb (450g) ground beef
- 1 cup mushrooms, sliced
- 1 small onion, finely chopped
- 2 cloves garlic, minced
- 1 cup shredded mozzarella cheese
- 4 pita breads
- 1 tablespoon olive oil
- 1 teaspoon dried oregano
- Salt and black pepper, to taste
Instructions
-
1Heat olive oil in a large skillet over medium heat. Add onions and garlic, sauté until fragrant and onions soften, about 2-3 minutes.
-
2Add the ground beef to the skillet and cook, breaking it apart with a spoon, until browned and cooked through, about 6-8 minutes.
-
3Stir in the sliced mushrooms and cook until they release their moisture and become tender, about 5 minutes. Season with dried oregano, salt, and black pepper.
-
4Reduce heat to low, sprinkle shredded mozzarella cheese over the beef and mushroom mixture, and stir until the cheese is melted and combined.
-
5Warm the pita breads, then slice open to form pockets. Spoon the cheesy beef and mushroom mixture evenly into each pita pocket and serve immediately.
Approximate Information for One Serving
Nutrition Disclaimers
Number of total servings shown is approximate. Actual number of servings will depend on your preferred portion sizes.
Nutritional values shown are general guidelines and reflect information for 1 serving using the ingredients listed, not including any optional ingredients. Actual macros may vary slightly depending on specific brands and types of ingredients used.
To determine the weight of one serving, prepare the recipe as instructed. Weigh the finished recipe, then divide the weight of the finished recipe (not including the weight of the container the food is in) by the desired number of servings. Result will be the weight of one serving.
Did you make this recipe?
Please consider Pinning it!!