Strawberry Crunch Cheesecake Tacos: My Whole Family’s Guilty Pleasure
Let Me Tell You About These Crazy Good Cheesecake Tacos
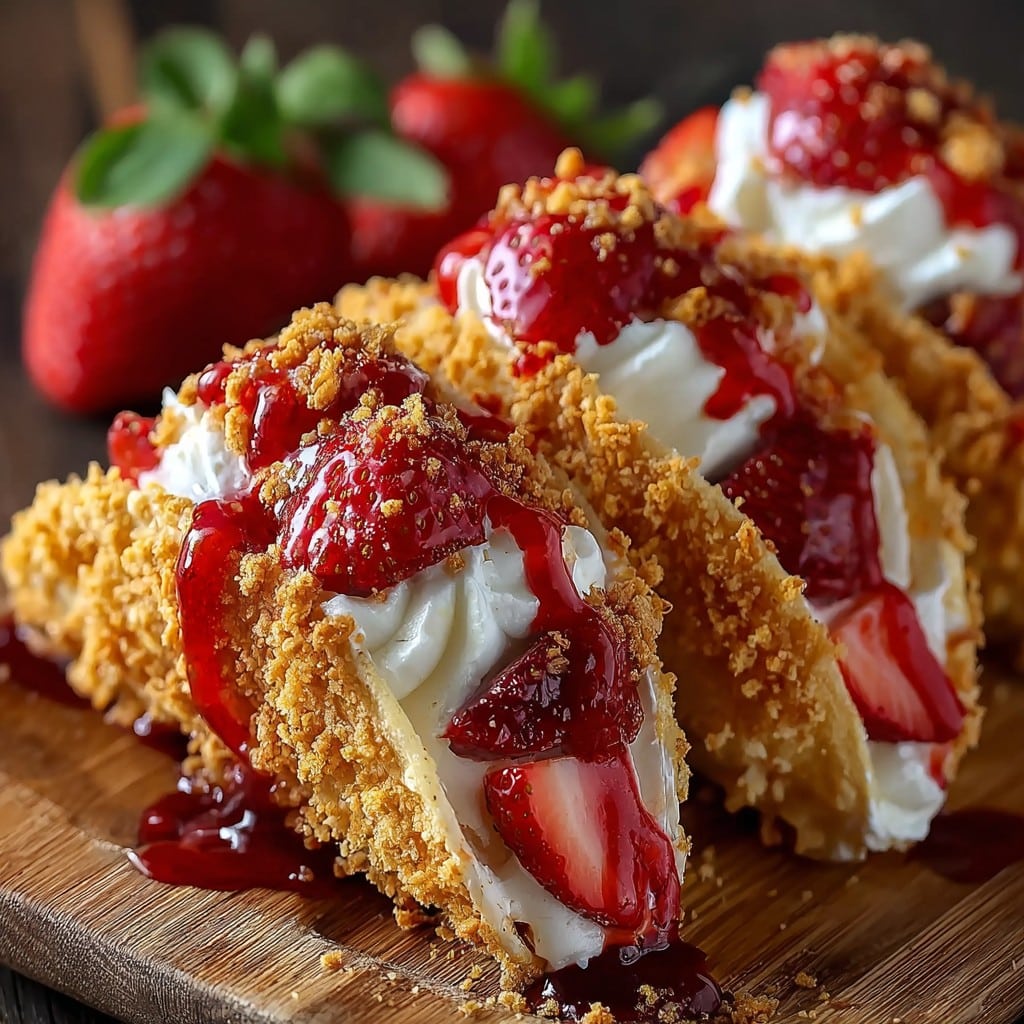
Okay, confession time: The first time I saw a picture of Strawberry Crunch Cheesecake Tacos, I honestly thought they looked a bit ridiculous. But then, one weekend, my niece begged me to make them for her birthday and—well, let’s just say my entire family’s been hooked (read: requesting them at every gathering since). If you picture a taco shell that tastes like the crunchy outside of an ice cream bar plus creamy cheesecake filling and those neon red strawberry bits that get stuck in your teeth—yep, that’s it. Also, quick warning: these disappear faster than socks in the laundry. You’ve been warned!
Why These Are Always a Hit (Even When I Mess Up)
I make these when I want dessert to be a little over-the-top but not actually fussy (honestly, frying taco shells is about as wild as I get some days). My family pretty much loses their minds over the strawberry crunch topping—it’s that nostalgic ice-cream-truck vibe! And, sidenote, I once tried skipping the crunch part thinking no one would notice. They definitely noticed. So now I always make extra! I’ve also had a shell or two fall in the oil but, hey, few kitchen disasters are as tasty to nibble on.
What You’ll Need (But Substitutions Happen!)
- 8 small flour tortillas (I’ve used corn in a pinch, but, uh, not the same)
- Vegetable oil for frying (grandma swears by Crisco but, honestly, whatever oil you’ve got is fine)
- 230g (8oz) cream cheese, softened (store brand works—don’t let anyone tell you different)
- 1/3 cup granulated sugar (sometimes I use half powdered sugar if I run out)
- 1 tsp vanilla extract (yep, the fake stuff will do)
- 1 cup heavy cream (whipping cream if you’re feeling fancy)
- 2 cups crushed Golden Oreos (I’ve actually used digestive biscuits before in an emergency—still good!)
- 3/4 cup freeze-dried strawberries, crushed (or use strawberry Jello powder if you’re completely out of luck)
- Fresh strawberries, diced (optional but I always add for bonus points with the kids)
- Sprinkles or whipped cream, optional—but why not?
Alright, Let’s Make These Strawberry Crunch Cheesecake Tacos
- Heat about 2 inches of oil in a deep saucepan or skillet over medium heat. (If you’re nervous, use a thermometer—aim for about 175C/350F. But TBH I just test it by dropping a tiny piece of tortilla in and seeing if it sizzles.)
- Fry the tortillas, one at a time, folding them gently with tongs (or two forks if you’re like me and can never find your tongs). Hold them in taco shape while they fry—about 1-2 mins per side. Don’t worry if they look a bit uneven at first, they crisp up nicely off the heat.
- Let the shells drain and cool on paper towels. (This is usually when someone tries to steal one right out from under my nose…)
- Mix up your strawberry crunch: stir together the crushed Golden Oreos and freeze-dried strawberries. Sometimes I toss in a little melted butter; other times I don’t remember to.
- For cheesecake filling: beat cream cheese and sugar together until smooth. Add vanilla; beat in the cream slowly until it’s thick and almost like frosting. (Actually, I find it works better if everything is room temp. One time my cream cheese was cold and it came out a bit lumpy—still tasty, just had to call it “rustic style.”)
- Spread or pipe the filling into each taco shell. Gob it on, honestly—it’s the best part.
- Sprinkle a generous handful of the strawberry crunch over the top. Add the diced fresh strawberries and whatever other decorations you fancy.
- Chill for about 20 minutes if you like things firmer—or just eat straight away if patience is not your thing.
A Few Notes I Learned (Sometimes the Hard Way)
- Let the taco shells cool before filling or you’ll end up with runny cheesecake goo. Not…that I’ve done this. More than once.
- If you don’t have freeze-dried strawberries, strawberry Jello mixed with the cookies totally works (just use less sugar in the filling).
- Don’t crowd the frying pan; otherwise, you’ll get soggy tacos. Or fused together—mine once looked like an abstract sculpture.
- Actually, leave the shells a tad chewy for a softer bite if you don’t love super crunchy desserts. My mum prefers it this way.
I’ve Tried These Variations (Some Better Than Others…)
- Used chocolate sandwich cookies for the crunch—pretty good, but sort of overpowers the strawberry.
- Pulled a ‘lazy day’ and used pre-made waffle bowls instead of tortillas. They’re a bit sweet, but actually pretty tasty.
- Once made them with blueberry powder and Oreos… Let’s just call that an “interesting learning experience.” Would not recommend.
What If I Don’t Have All the Right Kitchen Gadgets?
If you don’t have tongs, just use a couple of forks—it’s a bit more fiddly, but it totally works. No mixer? Beat that filling with a sturdy wooden spoon and some elbow grease. I do love using a piping bag, but a plastic freezer bag (with a corner snipped off) does the job. Or just spread it on with a spatula; no one’s judging around here.
How to Store Them (Though Not For Long, Honestly)
Supposedly, you can keep these in the fridge (covered) for up to two days. Real talk? Mine have never lasted longer than about 20 hours, because someone is always sneaking ‘just a half’ for breakfast. They do get a little softer overnight, but I think that’s part of the charm; like a trifle, things meld together.
How I Like To Serve (And My Nephew’s Odd Tradition)
I usually put the tacos on a platter and hand everyone a napkin, then let people add more strawberries or a dollop of whipped cream themselves. My nephew once started dunking his in chocolate sauce (I was skeptical… then tried it. Not bad, actually!). Sometimes I’ll stick a little cocktail umbrella in each for summer parties because why not?
Lessons Learned (So You Don’t Have To Make My Mistakes)
- Don’t try to fry more than one shell at a time—seriously, I got a mess of stuck-together taco ruins once.
- Room temp cream cheese blends smoother, but I never remember to take it out ahead. Zap it in the microwave for a few seconds if you forget.
- Patience is key with the crunch mix—crush the Oreos pretty small or you’ll just end up with cookie chunks (which, honestly, isn’t so bad either).
- I once tried to use low-fat cream cheese…well, the texture was a bit odd. On second thought, stick with regular for best results.
Some Actual Questions People Have Thrown at Me
- Can I use store-bought taco shells? Yep, but they’re a bit thick and don’t have that fresh-fried flavor. Still tasty though!
- Does the crunchy topping get soggy? A little, after a while, but honestly, if you’re serving these up right away it’s all good. If you want to prep ahead, keep the shell and filling separate until ready to eat.
- Is it messy? Oh, absolutely. Just lean over your plate and embrace it! (Seriously though, small bites help.)
- Can I make them gluten free? Actually, yes! I used gluten-free tortillas and a different brand of sandwich cookies and it worked a treat. Even my picky cousin loved them. More on gluten free baking here.
- Where do I get freeze-dried strawberries? They’re in the snack aisle or with the baking stuff, or you can order them online. I like Nuts.com’s version.
- Can I double the recipe? Oh, for sure. I usually do, actually—otherwise, there are never enough.
One last digression: if you ever find yourself stuck with extra strawberry crunch, sprinkle it over ice cream, or, better yet, swirl it into yogurt with a drizzle of honey. It’s honestly magical. And if you give these a go, drop me a note (or just brag on social, it still counts). Happy taco-ing!
Ingredients
- 6 small flour tortillas
- 2 tablespoons unsalted butter, melted
- 1/2 cup granulated sugar
- 1 teaspoon ground cinnamon
- 8 ounces cream cheese, softened
- 1/3 cup powdered sugar
- 1 teaspoon vanilla extract
- 1 cup heavy whipping cream
- 1 cup fresh strawberries, diced
- 1/2 cup golden sandwich cookies, crushed
- 2 tablespoons freeze-dried strawberries, crushed
Instructions
-
1Preheat oven to 375°F (190°C). Brush both sides of each tortilla with melted butter, then coat with cinnamon sugar mixture.
-
2Drape tortillas over oven rack bars to form taco shapes. Bake for 8-10 minutes until golden and crisp. Let cool completely.
-
3In a mixing bowl, beat cream cheese, powdered sugar, and vanilla until smooth. In a separate bowl, whip heavy cream to stiff peaks; gently fold into cream cheese mixture.
-
4Prepare the crunch topping by combining crushed golden sandwich cookies and freeze-dried strawberries in a small bowl.
-
5Fill each taco shell with cheesecake filling, top with diced strawberries, and sprinkle generously with the strawberry crunch mixture.
Approximate Information for One Serving
Nutrition Disclaimers
Number of total servings shown is approximate. Actual number of servings will depend on your preferred portion sizes.
Nutritional values shown are general guidelines and reflect information for 1 serving using the ingredients listed, not including any optional ingredients. Actual macros may vary slightly depending on specific brands and types of ingredients used.
To determine the weight of one serving, prepare the recipe as instructed. Weigh the finished recipe, then divide the weight of the finished recipe (not including the weight of the container the food is in) by the desired number of servings. Result will be the weight of one serving.
Did you make this recipe?
Please consider Pinning it!!