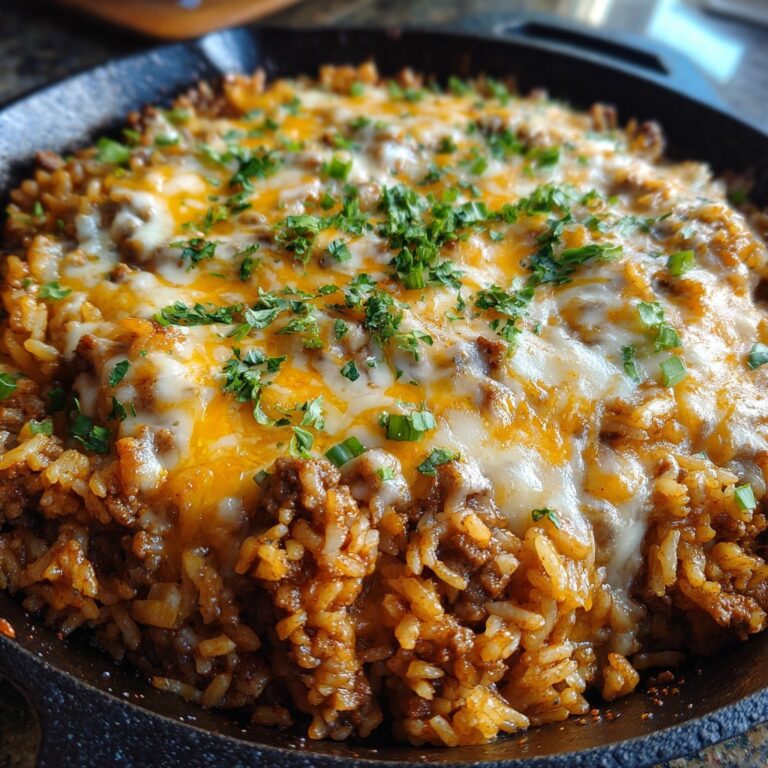
Chili Relleno Casserole: My Messy, Cheesy Go-To Recipe
Let Me Tell You About This Chili Relleno Casserole Adventure
Okay, first, I have to admit: I never planned to fall in love with Chili Relleno Casserole. The first time I tried to make it, I was mostly just looking for an excuse to avoid deep-frying (nobody needs hot oil splatters for breakfast!). My aunt, who had a sixth sense for finding comfort food, used to bring something kinda like this to family get-togethers. It never lasted long. One time, I dropped an entire (opened!) can of chiles on the floor—good news is, you can still make this with less than a full can. That’s real life, right?
Why You’ll Love This (Probably As Much As I Do)
I make this when life’s a bit much and the grocery store rotisserie chicken is calling my name. My family goes a little bonkers for it because it’s just cheesy enough to feel indulgent but still packed with those roasted chiles (which, by the way, taste way fancier than they cost).
I used to get frustrated, trying to peel those stubborn roasted chiles, until I realized buying the canned sort is basically a sanity saver. If there’s leftover casserole (rare at my place), I swear it tastes even better for breakfast with a fried egg—give it a shot.
Let’s Talk Ingredients (and Little Shortcuts)
- 1 can (about 7oz) whole green chiles – I usually grab Old El Paso, but honestly, store brand is just fine. If I’m in a hurry, I use pre-diced, and don’t stress about it.
- 2 cups shredded cheese (cheddar or Monterey Jack, but hey, chihuahua cheese is next-level if you can find it—my old neighbor swore by it)
- 4 large eggs
- 1/2 cup all-purpose flour (sometimes I use a heaping 1/3 cup, it works out)
- 1 1/2 cups milk – whole is creamier, but 2% is usually what’s in my fridge
- 1/2 tsp baking powder (I once totally forgot this and it turned out fine, but don’t skip it if you want it fluffy)
- 1/2 tsp salt
- A pinch of black pepper or smoked paprika (the smoked stuff is my not-so-secret addition)
- 1/2 cup cooked crumbled sausage or bacon – totally optional, but I’m a fan when hosting brunch; or just skip for veggie vibes
Very (Mostly) Reliable Directions
- First things first: Preheat your oven to 350°F (that’s 175°C for my metric friends). Grease up an 8×8-inch baking dish. Or a 9×9—don’t sweat the tiny difference.
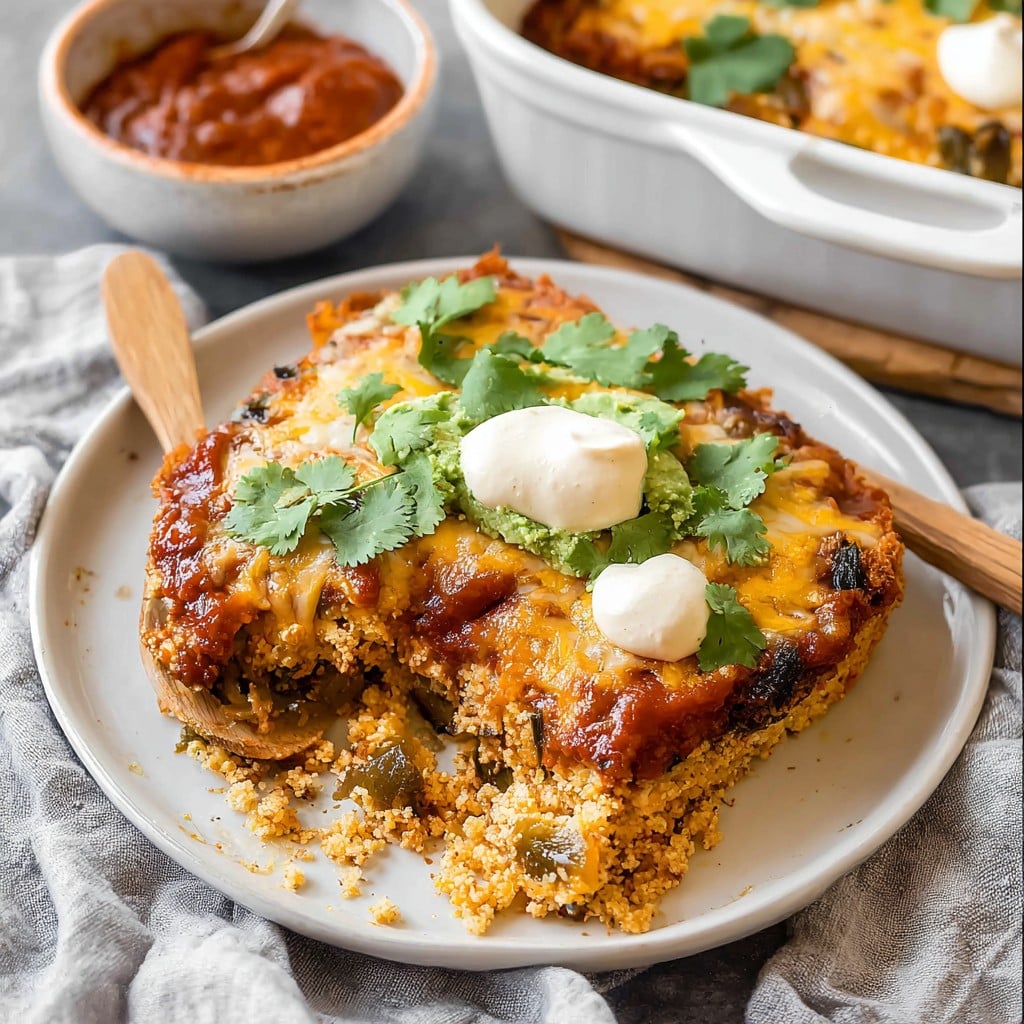
- Take those chiles, split them open, and lay half on the bottom of your baking dish. Don’t worry if they look a little scraggly—mine always do at this stage. Cover with half the cheese, then scatter any sausage or bacon on top if you’re using it.
- Layer the rest of the chiles, more cheese. If your layers look uneven, just call it rustic (that’s my move).
- In a bowl, whisk together eggs, flour, milk, baking powder, salt, and pepper. Sometimes I get a little lazy and toss it all in the blender. Pour this mixture gently over everything.
- Bake uncovered for about 40-45 minutes. Here’s where I peek in at 35 minutes—sometimes my oven gets ambitious. It’ll be golden and puffed when it’s done.
- Let it cool for 10 minutes (I know—it’s hard to wait). The center sets up better that way. This is usually when I “taste test” just a corner, for science of course.
Notes, aka Stuff I Figured Out the Long Way
- If you want more heat, layer in a few slices of jalapeño (pickled or fresh). But don’t do what I did and use a whole can of chipotles—blowtorch central.
- This isn’t the time for fancy cheese—shredded bag cheese is totally fine. Mix it up, toss in what you’ve got languishing in the fridge.
- The flour helps make it soufflé-esque, but I made it once with masa harina and I think it’s even tastier (though a little grittier—some folks like that, some don’t).
I Got Curious and Tried Variations—Here’s the Scorecard
- Chicken Added: Shredded rotisserie chicken is surprisingly awesome. I make it this way for potlucks now, actually.
- Veggie Heavy: Mushrooms and corn—fantastic combo. My cousin said it was “like Mexican lasagna.”
- Gluten-free: Tried with almond flour once; uh, it got a bit sad. Not my favorite, but maybe I just messed it up.
Equipment You (Might) Need…Or Not
- An 8×8 or 9×9-inch baking dish (mine is Pyrex, but honestly, I’ve used a big oven-proof skillet in a pinch, lid slightly askew and all)
- Mixing bowl, whisk or fork (if your whisk is missing, a fork totally gets the job done—I’ve done it)
- Can opener, unless you’re feeling extra and roasting fresh chiles (good for you!)
If For Some Reason There Are Leftovers: Storage
Let it cool, then whack it into an airtight container and tuck in the fridge. Keeps 2–3 days. Though honestly, in my house it never lasts more than a day. Reheats nicely in the microwave, or oven if you’re feeling patient.
When It’s Time to Serve (My Favorite Part)
I’m partial to a scoop of this alongside a simple salad dressed with lots of lime. My husband piles on extra hot sauce at the table—almost offensively so. And if we have refried beans hanging around, I sneak those on the side too. If it’s brunch, serve with mimosas or just good strong coffee. Oh, and here’s a fun trick I learned for chilling white wine in no time if you’re brunching.
Straight Talk: Things I Wish I Knew Earlier
- Pat those canned chiles dry if they’re swimming in liquid—too much juice makes it sloshy and weird. Trust me, learned that the messy way.
- Once, I tried to rush the cooling step—slice too soon and you’ll get a puddle, not a slice. Wait the 10 minutes (or at least 7, minimum).
- Don’t stress about a perfect top; sometimes the cheese browns funny. Won’t matter a bit!
FAQ – People Actually Ask Me These!
- “Can I make this ahead?” Yup; I sometimes put it together the night before, stash it in the fridge, and bake fresh the next morning. Works a treat.
- “Can I freeze Chili Relleno Casserole?” You can! I wrap cooled squares in foil plus a zip bag (or just toss it, guilt-free, into a container). Thaw before reheating so you don’t get odd texture.
- “Do I have to use canned chiles?” Nope; go for fresh if you’ve got the time/patience. Roast them yourself, peel, and use them instead. Also, here’s a quick guide on roasting chiles at home
- “Is this super spicy?” Not really! It’s mild as written. Add more heat if your crowd loves that burn.
- “Why does mine look flatter than yours?” Actually, ovens and pans totally affect how high it puffs. Sometimes mine gets lofty, sometimes not so much—don’t panic.
Quick side note—not casserole related, but since you’re here: if you’re looking for ways to eat more veggies painlessly, Cookie and Kate has legit creative ideas (and her salads totally changed my lunch game).
Ingredients
- 2 cans (7 oz each) whole green chilies, drained
- 2 cups shredded Monterey Jack cheese
- 1 cup shredded Cheddar cheese
- 4 large eggs
- 1 cup whole milk
- 1/4 cup all-purpose flour
- 1/2 teaspoon baking powder
- 1/2 teaspoon salt
- 1/4 teaspoon black pepper
Instructions
-
1Preheat the oven to 350°F (175°C) and lightly grease a 9×13-inch baking dish.
-
2Split and lay half of the green chilies flat in the bottom of the prepared baking dish.
-
3Sprinkle half of the Monterey Jack cheese and Cheddar cheese evenly over the chilies.
-
4Layer the remaining green chilies over the cheese, then top with the remaining cheese.
-
5In a medium bowl, whisk together eggs, milk, flour, baking powder, salt, and black pepper until well blended.
-
6Pour the egg mixture evenly over the layered chilies and cheese. Bake for 40 minutes, or until golden and puffy. Let cool slightly before serving.
Approximate Information for One Serving
Nutrition Disclaimers
Number of total servings shown is approximate. Actual number of servings will depend on your preferred portion sizes.
Nutritional values shown are general guidelines and reflect information for 1 serving using the ingredients listed, not including any optional ingredients. Actual macros may vary slightly depending on specific brands and types of ingredients used.
To determine the weight of one serving, prepare the recipe as instructed. Weigh the finished recipe, then divide the weight of the finished recipe (not including the weight of the container the food is in) by the desired number of servings. Result will be the weight of one serving.
Did you make this recipe?
Please consider Pinning it!!