Ground Beef & Rice Casserole: My Cozy, Easy Weeknight Recipe
Straight From My Kitchen (and Sometimes My Heart)
Alright, so let me paint you a picture: it’s a Wednesday night, the wind’s howling, and everyone is giving you that look (you know the one—hungry, slightly dramatic). That’s basically when I break out this Ground Beef & Rice Casserole recipe. To be honest, it’s been my dinner savior more times than I care to admit. My mum used to call it “pantry magic,” which felt a bit grand, but hey, it does the trick. Once, I even tried to double the garlic and couldn’t stop sneezing for ten minutes straight—so, yes, I’m committed.
I remember throwing this together after burning a tray of garlic bread (it’s a long story, don’t ask) and swearing to the food gods that next time I’d just stick with the basics. Guess what? Casserole never lets me down. If mine comes out slightly crispy on one edge? Well, I call it chef’s privilege and snack on that bit before serving. Plus, if you leave dirty dishes to soak overnight, that’s basically self-care right?
Why I Keep Making This (And You Will Too, Probably)
I make this Ground Beef & Rice Casserole when I need dinner that everyone will eat, minus the sighing and salad negotiations. My family goes a little frantic for this, honestly—it’s like someone rang the dinner bell at a Texas roadhouse. (Confession: I pretend it takes longer to make than it really does, so I can hide out in the kitchen for an extra 20 minutes with my audiobook!)
It’s flexible and forgiving. Like, last week I ran out of cheddar and tossed in a handful of those pre-shredded pizza blends (blasphemy, according to my gran). And guess what? Nobody noticed. Plus, you don’t have to have every ingredient perfect. If you’re feeling lazy, canned tomatoes work. I once tried to swap in brown rice to feel virtuous. Took forever (abandon all hope, or precook it at least!).
What You’ll Need (And What I’ve Subbed In A Pinch)
- 500g ground beef – Or honestly, turkey or chicken mince if that’s what’s lurking in your fridge. Veggie mince works too; I’ve done it and survived.
- 1 onion, diced – Red or white, don’t sweat it. I actually like a red for a bit of sweetness.
- 3 cloves garlic, minced – More or less, you do you. Jarred garlic if you just can’t face chopping.
- 1 cup uncooked white rice – I’ve used basmati, long-grain, jasmine (once even microwaved rice—don’t judge).
- 2 cups beef broth – Bouillon + hot water is totally fine. My grandma would gasp, but it tastes the same, honestly.
- 1 bell pepper, diced – Red, green, yellow—makes no odds. No bell pepper? Chuck in some frozen peas.
- 1 can (400g) diced tomatoes – Or, passata or even fresh chopped ones if feeling Martha Stewart-y.
- 1 cup shredded cheese – Cheddar, mozzarella, or that “taco blend” that’s always on sale. Mix is fine.
- 1 tsp Italian seasoning – Or just oregano and a pinch of thyme. I sometimes throw in chili flakes. Live a little.
- Salt & pepper – I usually salt with a bit too much enthusiasm. Taste as you go.
- Optional bits: handful of chopped parsley, paprika, or even a splash of Worcestershire sauce (proper tongue-twister, that one).
Let’s Get Cooking! (Mess Welcome)
- Get that oven going. Preheat to 180C/350F. Yes, this is the one step I never forget. Well, except for that One Time.
- Brown the beef: In a big frying pan (use a Dutch oven if you’re fancy), chuck in your ground beef over medium heat. Break it up, let it get nice and brown. If you’re like me, this is when you snack on a few cheese bits meant for later. Drain off any extra fat, but if you skip this, the world won’t end.
- Add the aromatics: Toss in the onion and bell pepper. Sauté until softened, about 5 minutes. Add in the garlic and your seasoning (Italian herbs, salt, pepper, whatever floats your boat). Smells great, right?
- Add the rice: Stir in the uncooked rice so it gets a bit toasty—not burnt, just a touch golden. Trust me, it’s worth the thirty-second drama.
- Time for tomatoes and broth: Pour in the diced tomatoes (juice and all) and the broth. Give it all a good mix. Don’t worry if it looks soupy—this always looks kind of weird, but it sorts itself out in the oven.
- Into the baking dish: Pour everything into a big casserole dish (9×13 inch or similar). Spread it out so everyone gets a bit of everything. Cover with foil (or an upside-down baking sheet if your foil is trapped behind the blender… been there).
- Bake: Pop into the oven for 35 minutes, covered. My timer is a stubborn kitchen chicken, but it does the job.
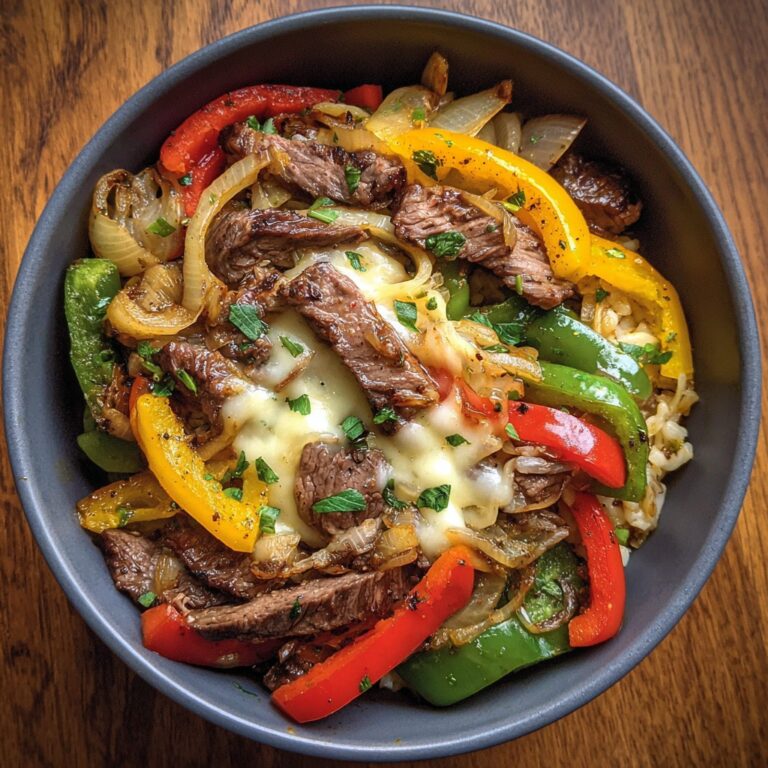
- Cheesify: Remove the foil, sprinkle on the cheese, and bake another 10 minutes or so until it’s golden and bubbly around the edges. This is the hardest step because… cheese. But don’t dive in yet—it’s lava-hot.
- Cool and serve: Let it rest 5-10 minutes (if you can wait—my household rarely manages). Top with parsley if you feel like impressing someone. Or just dig in, no judgement.
Notes (Aka My Lessons Learnt the Hard Way)
- If your rice is stubborn and stays crunchy, cover and give it another 10 minutes. The top layer sometimes dries out—just stir, it’ll even out.
- Once I forgot to preheat the oven and just stood there, casserole sitting on the bench, questioning my life choices. It turned out fine (just took longer).
- Don’t use super-lean beef unless you want it dry. A bit of fat is flavour, as my Uncle Dave says (right before offering unsolicited grilling advice).
Mixing It Up (Tried and… Occasionally Failed)
- Mushroom twist: I tossed in sliced mushrooms once—tasted good, looked a bit brown. Maybe use less next time.
- Tex-Mex vibe: Subbed in black beans and a sprinkle of taco seasoning for that happy hour feeling at home.
- Epic flop: Tried with quinoa instead of rice. The texture was, well, confused. Would not recommend (unless you enjoy dinner debates).
What If I Don’t Have a Casserole Dish?
No worries—use a deep roasting tin, or even a foil tray if you’re feeling reckless. I once used a big paella pan (don’t ask, long story again) and it worked fine. As long as it holds everything, it’s fair game.

Storing (But Don’t Bet on Leftovers)
In theory, you can store leftovers in an airtight container for up to 3 days in the fridge. Reheat in the microwave or oven. But honestly, in my house, this casserole rarely survives past breakfast the next day—someone usually sneaks a midnight snack. If you do freeze it, wrap it tight and you’re good for about a month.
How We Serve It (And a Family Quirk)
I like it best with a squeeze of hot sauce on top and maybe a scoop of sour cream. My kids pile on kettle chips for crunch (go figure). Sometimes, if it’s Sunday, we’ll have a salad, but more likely it’s just hunks of crusty bread for mopping up. Bon Appetit’s no-fuss bread is a keeper.
What I’ve Learned—And Occasionally Ignored
- Resist lifting the foil too early. Tried it once, rice was crunchy as gravel.
- Let it rest. I once rushed because I was late for the school run—molten cheese everywhere, and my tongue still hasn’t forgiven me.
- Use a decent beef stock. I tried those weird jelly cubes and it came out, um, bland. These days, I mostly go with Serious Eats’ recommended brands—the difference is wild.
You Asked—Here’s What I Know
- Can I make this ahead? Sure thing. Actually, I think it tastes even better the next day—something about the flavors making friends overnight. Just don’t add the cheese topping til you reheat.
- Can I use brown rice? Yes, but cook it part way first or it’ll take ages. On second thought, maybe just stick with white unless you really love a project.
- Is it spicy? Not unless you want it to be. Dash in chili flakes if you like the heat. Or, toss in a spoonful of salsa. Up to you.
- Gluten-free? Yep, assuming your broth is safe and you haven’t snuck in any questionable toppings!
- Can I make this for a crowd? Oh yeah. Just double everything and fret about the oven space later. Life’s too short for precise baking math.
- What if my casserole dries out? Add a splash or two more broth, cover, and heat gently. Or, spoon sour cream over the top—problem solved.
Totally unrelated, but has anyone else noticed casserole leftovers taste best eaten cold, straight from the dish? Maybe it’s just me.
Anyway, hope this brings as much comfort (and, let’s be honest, chaos) to your table as it has to mine. For more cozy dinner ideas, Spend With Pennies is loaded with casseroles I steal ideas from all the time—no shame in borrowing.
Ingredients
- 1 lb ground beef
- 1 cup long grain white rice, uncooked
- 2 cups beef broth
- 1 can (10.5 oz) cream of mushroom soup
- 1 cup shredded cheddar cheese
- 1 medium onion, finely chopped
- 1 cup frozen peas and carrots
- 2 cloves garlic, minced
- 1/2 teaspoon paprika
- 1/2 teaspoon salt
- 1/4 teaspoon black pepper
Instructions
-
1Preheat oven to 350°F (175°C). Grease a 9×13 inch baking dish.
-
2In a large skillet over medium heat, cook ground beef and chopped onion until beef is browned and onion is soft. Add minced garlic and cook for 1 minute. Drain excess fat.
-
3In the baking dish, combine cooked beef mixture, uncooked rice, beef broth, cream of mushroom soup, frozen peas and carrots, paprika, salt, and black pepper. Mix until well combined.
-
4Cover the dish with foil and bake for 35 minutes.
-
5Remove foil, sprinkle shredded cheddar cheese evenly over the top, and bake uncovered for an additional 10 minutes or until the cheese is melted and bubbly.
-
6Let cool for a few minutes before serving. Enjoy!
Approximate Information for One Serving
Nutrition Disclaimers
Number of total servings shown is approximate. Actual number of servings will depend on your preferred portion sizes.
Nutritional values shown are general guidelines and reflect information for 1 serving using the ingredients listed, not including any optional ingredients. Actual macros may vary slightly depending on specific brands and types of ingredients used.
To determine the weight of one serving, prepare the recipe as instructed. Weigh the finished recipe, then divide the weight of the finished recipe (not including the weight of the container the food is in) by the desired number of servings. Result will be the weight of one serving.
Did you make this recipe?
Please consider Pinning it!!