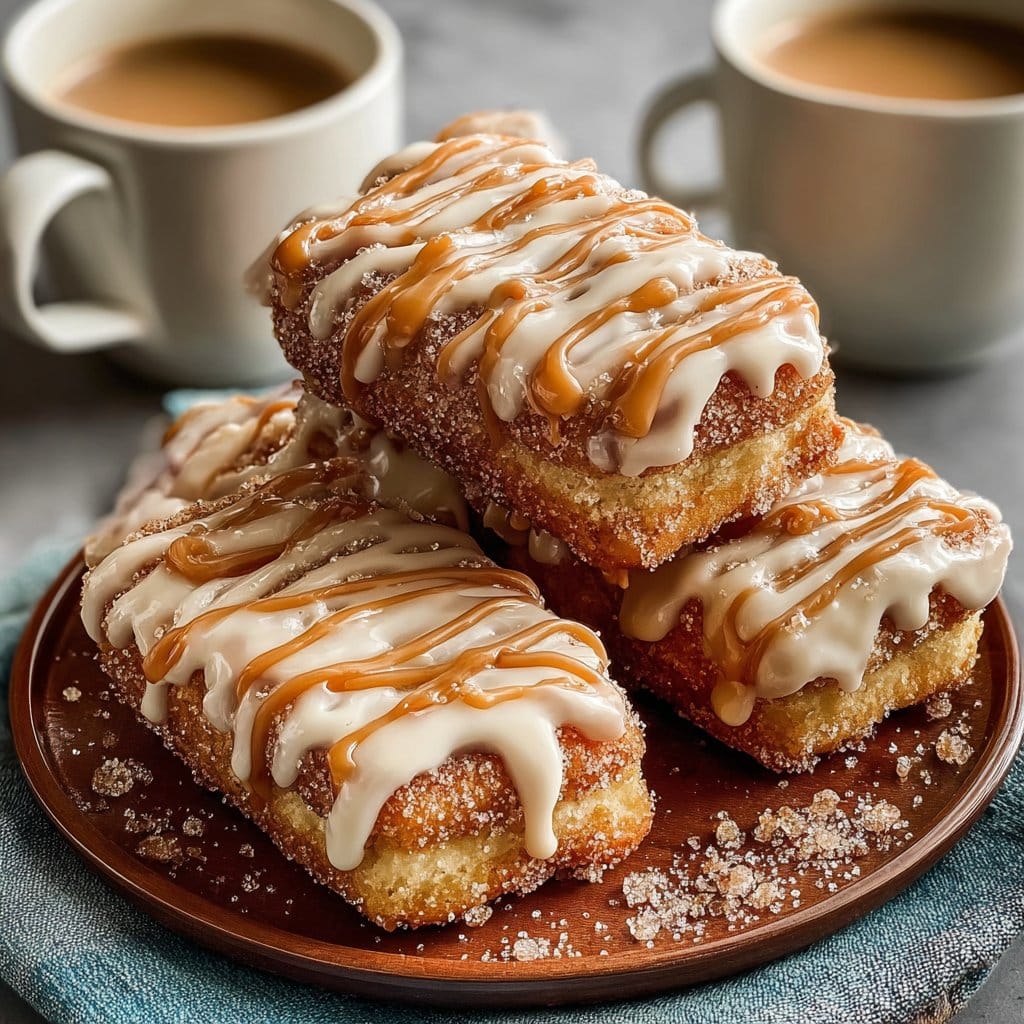
Maple Donut Bars: Easy, Homestyle Maple Treats You’ll Love
How These Maple Donut Bars Became My Sweet Spot
You know that moment when you’re at a donut shop, meanin’ to just grab a coffee but then the sweet maple scent smacks you in the face? That’s how these Maple Donut Bars entered my life—pure, glorious accident. I tried making them for the first time on a rainy Sunday (the kind you just want to stay in slippers all day), and I gotta admit: my first batch were more like sweet bricks than bars. Turns out, getting the texture just right took a few tries—plus more flour on my shirt than in the bowl. But honestly, they ended up being that cozy, homey treat I reach for whenever the weather gets weird or my sweet tooth gets stubborn. Or, you know, when I can’t be bothered to drive to the bakery eight blocks away.
Why You Really Oughta Try These (Even if You’re on the Fence!)
I make this recipe whenever my family starts giving me those puppy-dog eyes for donuts, but I cannot stand the whole deep-frying mess (the splatter, the cleanup, the slightly frazzled mood that follows). Plus, these bars are basically cheat codes for impressing picky eaters. My sister once texted me for the recipe at 2am after a family dinner. And the maple glaze? Oh, don’t get me started. I sometimes make extra just to drizzle over oatmeal, no joke.
I had a moment of panic once, realizing I was out of dark maple syrup, so I used the light stuff and it still worked—bit less punchy, but totally passable. So yeah, use what you got!
What You’ll Need (Plus a Few Real-Life Swaps!)
- 2 cups all-purpose flour (I’ve done half whole-wheat for a nuttier bite, but nobody noticed much difference)
- 1/2 cup granulated sugar (brown sugar works fine, though it’s a bit softer)
- 2 tsp baking powder (my grandmother swore by Clabber Girl, but I just grab store-brand)
- 1/2 tsp kosher salt
- 2/3 cup milk (I’ve used oat milk in a pinch—works okay but bars are a tad less rich)
- 1/4 cup unsalted butter, melted (sometimes I use coconut oil if I’m feeling experimental)
- 1 large egg
- 1 tsp vanilla extract (but I’ve skipped it and… it’s sorta fine?)
- For the maple glaze:
- 1 & 1/2 cups powdered sugar (sifted… or not, I’ve gone rogue plenty of times)
- 1/4 cup real maple syrup (dark is my top pick, but I’ve gone with supermarket “pancake syrup” in emergencies and survived)
- 2 tbsp melted butter
- Pinch salt
- 2-3 tsp milk (more or less for desired drippiness)
Let’s Go! How I Actually Make These Maple Donut Bars
- Preheat: Crank the oven up to 350°F (that’s 175°C in my Canadian kitchen). Grease and line an 8×8 square pan—parchment paper is your best mate here, but butter works if you’re out.
- Mix the dry stuff: In a biggish bowl, chuck in your flour, sugar, baking powder, and salt. Give it a quick whisk (or a vigorous fork-flailing—just get the lumps out).
- Incorporate the wets: Pour the milk, melted butter, egg, and vanilla right in. Stir gently until just mixed—don’t beat it sense-less or you’ll lose the tender vibe we want.
- Pan time: Spread the sticky batter into your pan. This is where I sometimes taste a tiny blob—raw egg and all; take your own risks, I guess?
- Bake: Pop into the oven for about 23-27 minutes. The top should be faintly golden and a toothpick stabbed in the middle should come out with just a crumb or so.
- Cool (sort of): Let the pan hang out for 10-15 minutes. Yes, it smells amazing, but patience is your pal.
- Glaze: Whisk together powdered sugar, maple syrup, melted butter, and salt, thinning with milk just enough that it runs off the spoon in lazy ribbons. Pour or spread over the warm bars. I press some chopped pecans on top if I’m feeling fancy, but that’s purely showing off.
- Slice and enjoy: I like rectangles because, well, they’re called bars and it feels right, but triangles are fun too. Let glaze set if you can manage not to eat one first.
Notes From a Barnstorming Baker
- If you overmix the batter, things turn oddly chewy (not the good kind). Just fold until barely combined. Actually, I find it works better if you go for lumpy over smooth.
- I once tried swapping all the butter for oil: don’t. The maple flavor just disappears—go for at least half butter.
- Leaving a bit of parchment overhang makes for lifting the bars SO much easier. Otherwise, you’re kind of prying them out with a spatula and some hope.
Wild Swaps & Surprisingly OK Variations
- Chocolate chips mixed in aren’t half bad, if you want a maple-chocolate situation.
- A vegan version (with flax egg, coconut oil, and oat milk) turned out a bit denser, but still totally edible—just expect cake, not donut.
- I tried making these into cupcakes once. Regret. Stick with bars!
- Pecans on top? Delightful. Bacon bits? My uncle swears by it, but I found it a bit much, to be honest.
What Gear I Use (Or Don’t… Honestly)
- Mixing bowl (I use the big old Pyrex, but a salad bowl worked in a vacation rental once!)
- Whisk or fork
- 8×8 square baking pan—but I’ve divided batter between two loaf pans in a bind
- Parchment paper—skip if you must, but butter that pan within an inch of its life
- Wire rack (or flip the bars onto a dinner plate; it gets the job done)
Keeping These Tasty (Tho They Never Last in My House)
Technically you can store these in an airtight box for about 2 days on the counter. Fridge works too if your kitchen’s a sauna. I think the flavor’s even better the next day; my kids say I’m crazy—but what do they know? To freeze, wrap individual bars in clingfilm, then into a freezer bag. But honestly, ours get inhaled in a day.
How I Love Serving Maple Donut Bars
We eat these for breakfast, dunked in hot coffee—but they’re killer with vanilla ice cream for dessert, too! Sometimes I warm up a slab in the microwave for 10 seconds, then drizzle a bit of maple syrup on top (just because I can). On chilly Saturday mornings, I’ll plop one into a bowl and add a dollop of creme fraîche—sounds odd, but it’s lush.
Things I’ve Learned the Hard Way (Pro Tips-ish)
- Don’t rush the cooling before you glaze. I got impatient once and it all melted right off—looked like it’d been out in the rain.
- Don’t bother with fancy vanilla—grocery store is just fine here (save the good stuff for birthday cakes).
- If your glaze is too thick, don’t keep pouring maple syrup to thin it—add a splash of milk. Learned that after a batch that was sickly sweet even for me, yikes.
Questions I Get (More Than You’d Expect!)
- Can I double the recipe? Yep! Just use a 9×13 pan, and maybe tack on another 5-ish minutes bake time. Test it a bit early, though. Ovens act up.
- Is there a gluten-free version? I haven’t tried one yet myself, but my neighbor Doug used Bob’s Red Mill 1:1 flour with success—maybe check this gluten-free donut guide for more ideas.
- Help! My glaze is lumpy! Happens sometimes. Honestly, a quick blitz with a hand mixer or even a wire whisk (with some elbow grease) fixes it. Or leave it lumpy—no big deal!
- Is it super maple-y? Sure is, but if you want even more, add a splash of maple extract to the batter or glaze (like this one from King Arthur Baking), though I never bother.
- Can I make these ahead? Absolutely. Sometimes I bake the bars at night, glaze them in the morning, and take them along for brunch potluck. (Oh, and here’s a distracting sidenote—I once got distracted watching the neighbor’s dog frolic with a squirrel and let them bake 5 minutes extra… still totally edible, just a bit chewy.)
If you’re keen for more maple ideas, check out Pure Maple From Canada’s recipe hub. And—fun fact—there’s practically a town-wide donut rivalry over glaze vs. sprinkle toppings here, but that’s a story for another time.
Ingredients
- 2 cups all-purpose flour
- 1/2 cup granulated sugar
- 2 tsp baking powder
- 1/2 tsp salt
- 1/2 cup whole milk
- 1/4 cup unsalted butter, melted
- 2 large eggs
- 1/3 cup pure maple syrup
- 1 tsp vanilla extract
- 1 cup powdered sugar (for glaze)
- 2 tbsp pure maple syrup (for glaze)
- 2 tbsp milk (for glaze)
Instructions
-
1Preheat oven to 350°F (175°C). Grease a 9×9-inch baking pan or line with parchment paper.
-
2In a large bowl, whisk together flour, sugar, baking powder, and salt.
-
3In a separate bowl, mix milk, melted butter, eggs, maple syrup, and vanilla extract until well combined.
-
4Gradually add the wet ingredients to the dry ingredients, stirring just until combined. Do not overmix.
-
5Pour the batter into the prepared baking pan and smooth the top. Bake for 15 minutes, or until a toothpick inserted in the center comes out clean.
-
6Allow to cool. Whisk together powdered sugar, maple syrup, and milk for the glaze. Spread glaze evenly over cooled bars before slicing.
Approximate Information for One Serving
Nutrition Disclaimers
Number of total servings shown is approximate. Actual number of servings will depend on your preferred portion sizes.
Nutritional values shown are general guidelines and reflect information for 1 serving using the ingredients listed, not including any optional ingredients. Actual macros may vary slightly depending on specific brands and types of ingredients used.
To determine the weight of one serving, prepare the recipe as instructed. Weigh the finished recipe, then divide the weight of the finished recipe (not including the weight of the container the food is in) by the desired number of servings. Result will be the weight of one serving.
Did you make this recipe?
Please consider Pinning it!!