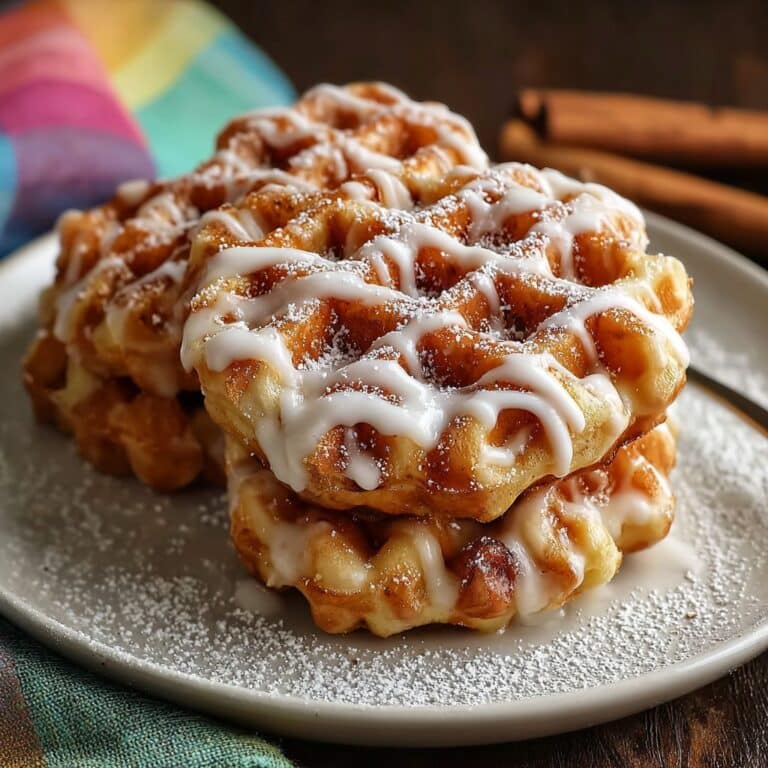
Apple Cider Waffles: My Cozy Breakfast Recipe with a Twist
Let’s Make Apple Cider Waffles (with a Side of Chaos)
Okay, so picture this: It’s Saturday morning, I’m wearing my (ancient) but beloved flannel pajama bottoms, and the kitchen smells like apples—real, proper apples, not that weird fake candle smell. That’s how things usually go when I make these apple cider waffles. The first time I made them, I was mostly just trying to use up that jug of cider leftover from a fall orchard trip. But now? It’s become a ritual my crew won’t let me escape (seriously, if I even look at pancake mix they give me the look!). Also, one time, I dropped an egg on the floor and my old cat just kind of stared at me like “what, again?” So yeah, these waffles have seen some things.
Why You’ll Love This (Or Why I Keep Making It!)
I tend to throw this recipe together when autumn is trying to muscle its way in, or let’s face it, anytime I feel like pretending it’s apple-picking season again. My family absolutely loses their minds over that caramelised crispy edge and the way the cider just sort of hums through every bite. I’ll admit, sometimes I worry they love these more than me, but that’s another topic. Honestly? These saved me from the pit of bland frozen waffles and microwave sorrow. (I tried once to use shelf-stable cider and it was… not great. Live and learn, right?)
What You’ll Need: Ingredients (and My Oddball Swaps)
- 2 cups all-purpose flour (sometimes I use half whole wheat; it’s denser, still tasty)
- 2 tablespoons sugar (granulated is fine, but brown sugar is magic if you’ve got it—my grandma swore by it, for what that’s worth)
- 1 tablespoon baking powder (any kind, though once I accidentally used baking soda and whoa, don’t do that)
- ½ teaspoon salt (table salt is fine; sea salt if you’re fancy or just out of the other kind)
- 2 eggs (room temp if you remember, but I rarely do)
- 1½ cups apple cider (good stuff, not apple juice! But, if you must, it works with juice too, it just misses that zing)
- ½ cup milk (whole, 2%, almond — I tried oat milk once, it tasted fine but was a bit heavy)
- ⅓ cup melted butter (I use unsalted, but salted works – just go easy on added salt)
- 1 teaspoon vanilla extract (the real stuff ideally, but honestly, extract with a weird old label will get you by)
- 1 teaspoon ground cinnamon (sometimes I cheat and sprinkle in a little nutmeg – do with that what you will)
How I Throw These Together (with Occasional Chaos)
- Start with the dry stuff: In a big bowl—I mean BIG, I always go too small and regret it—mix the flour, sugar, baking powder, salt, and cinnamon. If it gets all over the counter you’re doing it right.
- Crack your eggs into another bowl and give them a little whisk. Pour in the cider, milk, melted butter (try not to splash), and vanilla. Mix ‘til it’s mostly smooth; it’ll look weird but trust the process.
- Dump the wet into the dry, all at once. This is where people get scared of lumps. Don’t worry about it—lumps are friends here, kind of like life. Stir it, not too much, just so you’re not seeing dry flour pockets.
- Let the batter sit for five mins. Or longer, if you get distracted scrolling pancake videos, it’s chill.
- Preheat your waffle iron (if you don’t have one, you could technically do this in a skillet, like pancakes, but it’s really not the same).
- Spoon the batter in – usually about ½ cup per waffle on mine, but seriously, just eyeball it after the first one. It’ll sizzle and maybe ooze a bit. That’s the good stuff.
- Cook ‘til golden and crisp (I go for about 4–5 mins, but sometimes I open too soon—don’t be me). Remove, try not to eat immediately and burn your tongue… but honestly, who waits?
- Repeat with the rest. My kitchen is usually a war zone of flour at this point and that’s how I like it.
Random Notes From My Kitchen Mishaps
- If your batter is really thick, add a splash more cider or milk. I learned that the hard (scrapy) way.
- The first waffle is always a throwaway (or chef’s snack!)—consider it quality control.
- Grease the waffle maker, even if it says “nonstick.” Trust me. Or don’t, but then you’ll be chiseling out waffle bits with a fork like I did.
Variations (Some Genius, Some Not)
- Chopped apples in the batter: pretty good if you dice them tiny—but honestly, big chunks make the waffle rip apart (ask me how I know).
- Swap cinnamon for pumpkin pie spice. That’s… okay? My kid liked it, but I missed the real cinnamon punch.
- If you’re feeling wild, toss in a handful of chopped pecans or walnuts. Not for me, but my neighbor loves it (hi, Lou!)
- Once, I tried to drizzle caramel syrup in the batter before cooking. Please don’t. It just fused to the iron and the smoke alarm had opinions.
Kit You Might Want (Or Not)
- Waffle maker—obviously. I have a cheap one (here’s some picks if you’re hunting), but any type works—Belgian, regular, heart-shaped, whatever makes you happy.
- Mixing bowls—one extra large, one medium. But in a pinch, I just use a big pot, don’t tell anyone.
- A whisk or, let’s face it, a fork. Fork works fine! I’ve done it.
- Ladle or small measuring cup—just easier for batter pouring but, hey, a mug works.
Storage (But Good Luck with Leftovers)
Technically these will keep in a zip-top bag in the fridge for 2–3 days. Or freeze ‘em—pop in toaster to revive. But, uh, honestly, I can count on one hand the number of times there were leftovers. These just go. Serious Eats has some good freezing tips if you’re planning ahead, unlike me.
Serving Suggestions (Aka, The Best Bit)
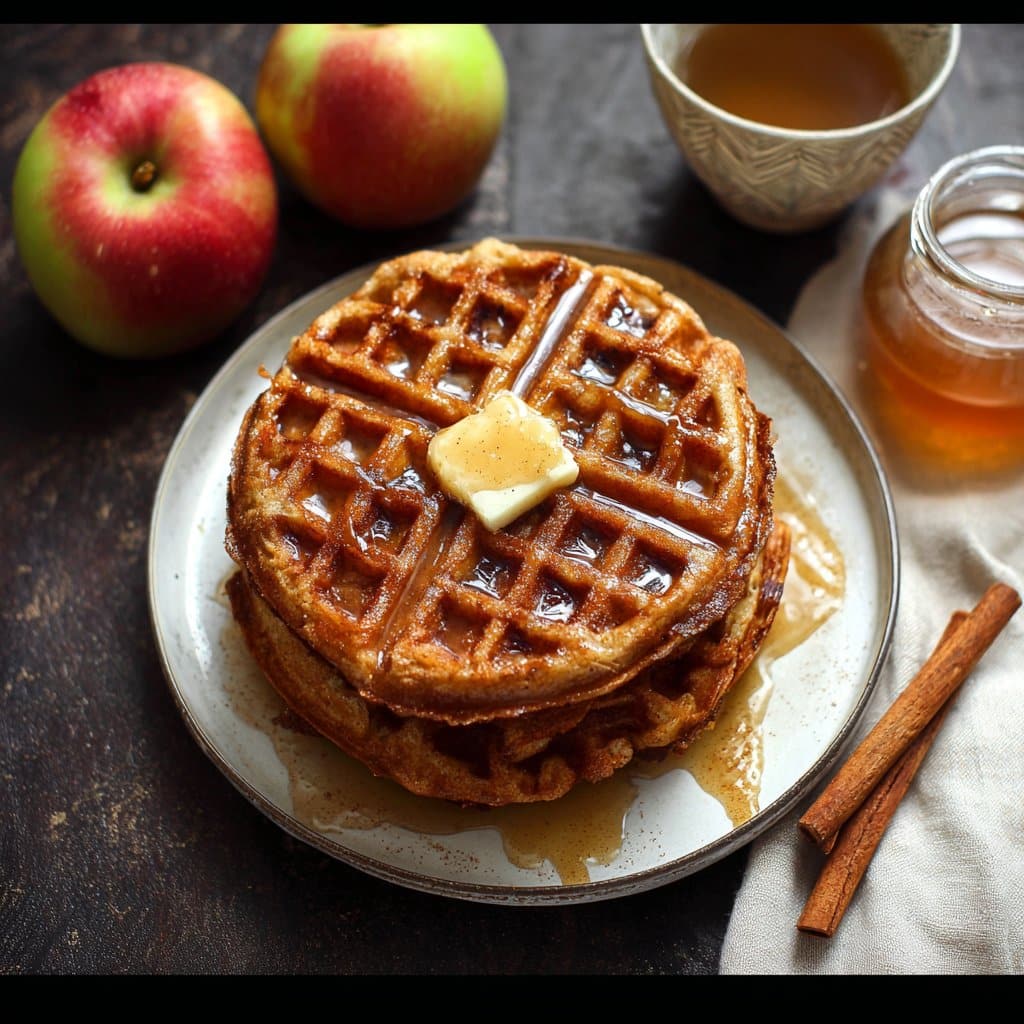
We slather ours with salted butter and a big glug of good maple syrup, but I’ve also put apple butter on top and it’s ridiculous (in the best way). Whipped cream is a hit with kids—sometimes I sneak in a dusting of extra cinnamon sugar too. Breakfast for dinner? Yup, we’ve done that. The waffles pair surprisingly well with crispy bacon if you ask me.
Waffle Pro Tips (The Hard Way)
- I tried rushing the resting step once and my waffles were oddly flat. Honestly, just give it 5 minutes. Also, don’t open the waffle iron too soon like impatient me or you’ll rip the waffle in half and then, well, you’re eating waffle pieces, not waffles.
- If your iron has a “done” light, trust but verify—it’s led me wrong before.
- I used to skip greasing the iron because I thought ‘nonstick’ meant no effort. Ha. Don’t make my rookie mistake.
Apple Cider Waffle FAQs – You Ask, I Overshare
- Can I use apple juice instead of cider? You technically can, but it’s not the same—the flavor’s less punchy. I did it once out of desperation. Not a disaster, but you lose a lil’ of that autumnal thing, you know?
- Do I have to use butter? Nope! Oil works fine, especially a mild one like canola or even coconut. I just like the flavor from butter best. (Actually, I find a touch extra butter makes these even crispier, but that’s just me.)
- Can I make these gluten-free? Probably! Swap in your favorite GF blend and maybe a splash extra liquid if it’s looking thick. I haven’t tried it, but a friend says it works a treat.
- What if I don’t have a waffle iron? Pancake them. It’s not quite the same and you won’t get the crispy edges, but it’ll do in a crunch. Or borrow one—they’re not as rare as hen’s teeth.
- Where do you get good apple cider? Farmers’ market in the fall is gold if you can swing it. Otherwise, the local grocery’s refrigerated section. Stay clear of that shelf-stable stuff unless you’re out of options, honestly—it tastes a bit like disappointment.
But you know, enough waffle—get cooking. And, er, if you find a way to keep your counters clean while making these, let me know. I’m all ears. Happy breakfasting!
Ingredients
- 2 cups all-purpose flour
- 2 tbsp granulated sugar
- 2 tsp baking powder
- 1/2 tsp baking soda
- 1/2 tsp salt
- 1 tsp ground cinnamon
- 1/4 tsp ground nutmeg
- 1 1/4 cups apple cider
- 2 large eggs
- 1/4 cup unsalted butter, melted
- 1/2 cup milk
- 1 tsp vanilla extract
Instructions
-
1Preheat your waffle iron according to the manufacturer’s instructions and lightly grease if necessary.
-
2In a large bowl, whisk together the flour, sugar, baking powder, baking soda, salt, cinnamon, and nutmeg.
-
3In a separate bowl, whisk together apple cider, eggs, melted butter, milk, and vanilla extract until well combined.
-
4Add the wet ingredients to the dry ingredients and mix until just combined. Do not overmix; a few lumps are okay.
-
5Pour the batter onto the preheated waffle iron and cook according to manufacturer instructions until golden brown and crisp, about 3–5 minutes.
-
6Serve warm with maple syrup, cinnamon sugar, or your favorite toppings.
Approximate Information for One Serving
Nutrition Disclaimers
Number of total servings shown is approximate. Actual number of servings will depend on your preferred portion sizes.
Nutritional values shown are general guidelines and reflect information for 1 serving using the ingredients listed, not including any optional ingredients. Actual macros may vary slightly depending on specific brands and types of ingredients used.
To determine the weight of one serving, prepare the recipe as instructed. Weigh the finished recipe, then divide the weight of the finished recipe (not including the weight of the container the food is in) by the desired number of servings. Result will be the weight of one serving.
Did you make this recipe?
Please consider Pinning it!!